How to build your first grid with Valorx Wave (Browser Extension)
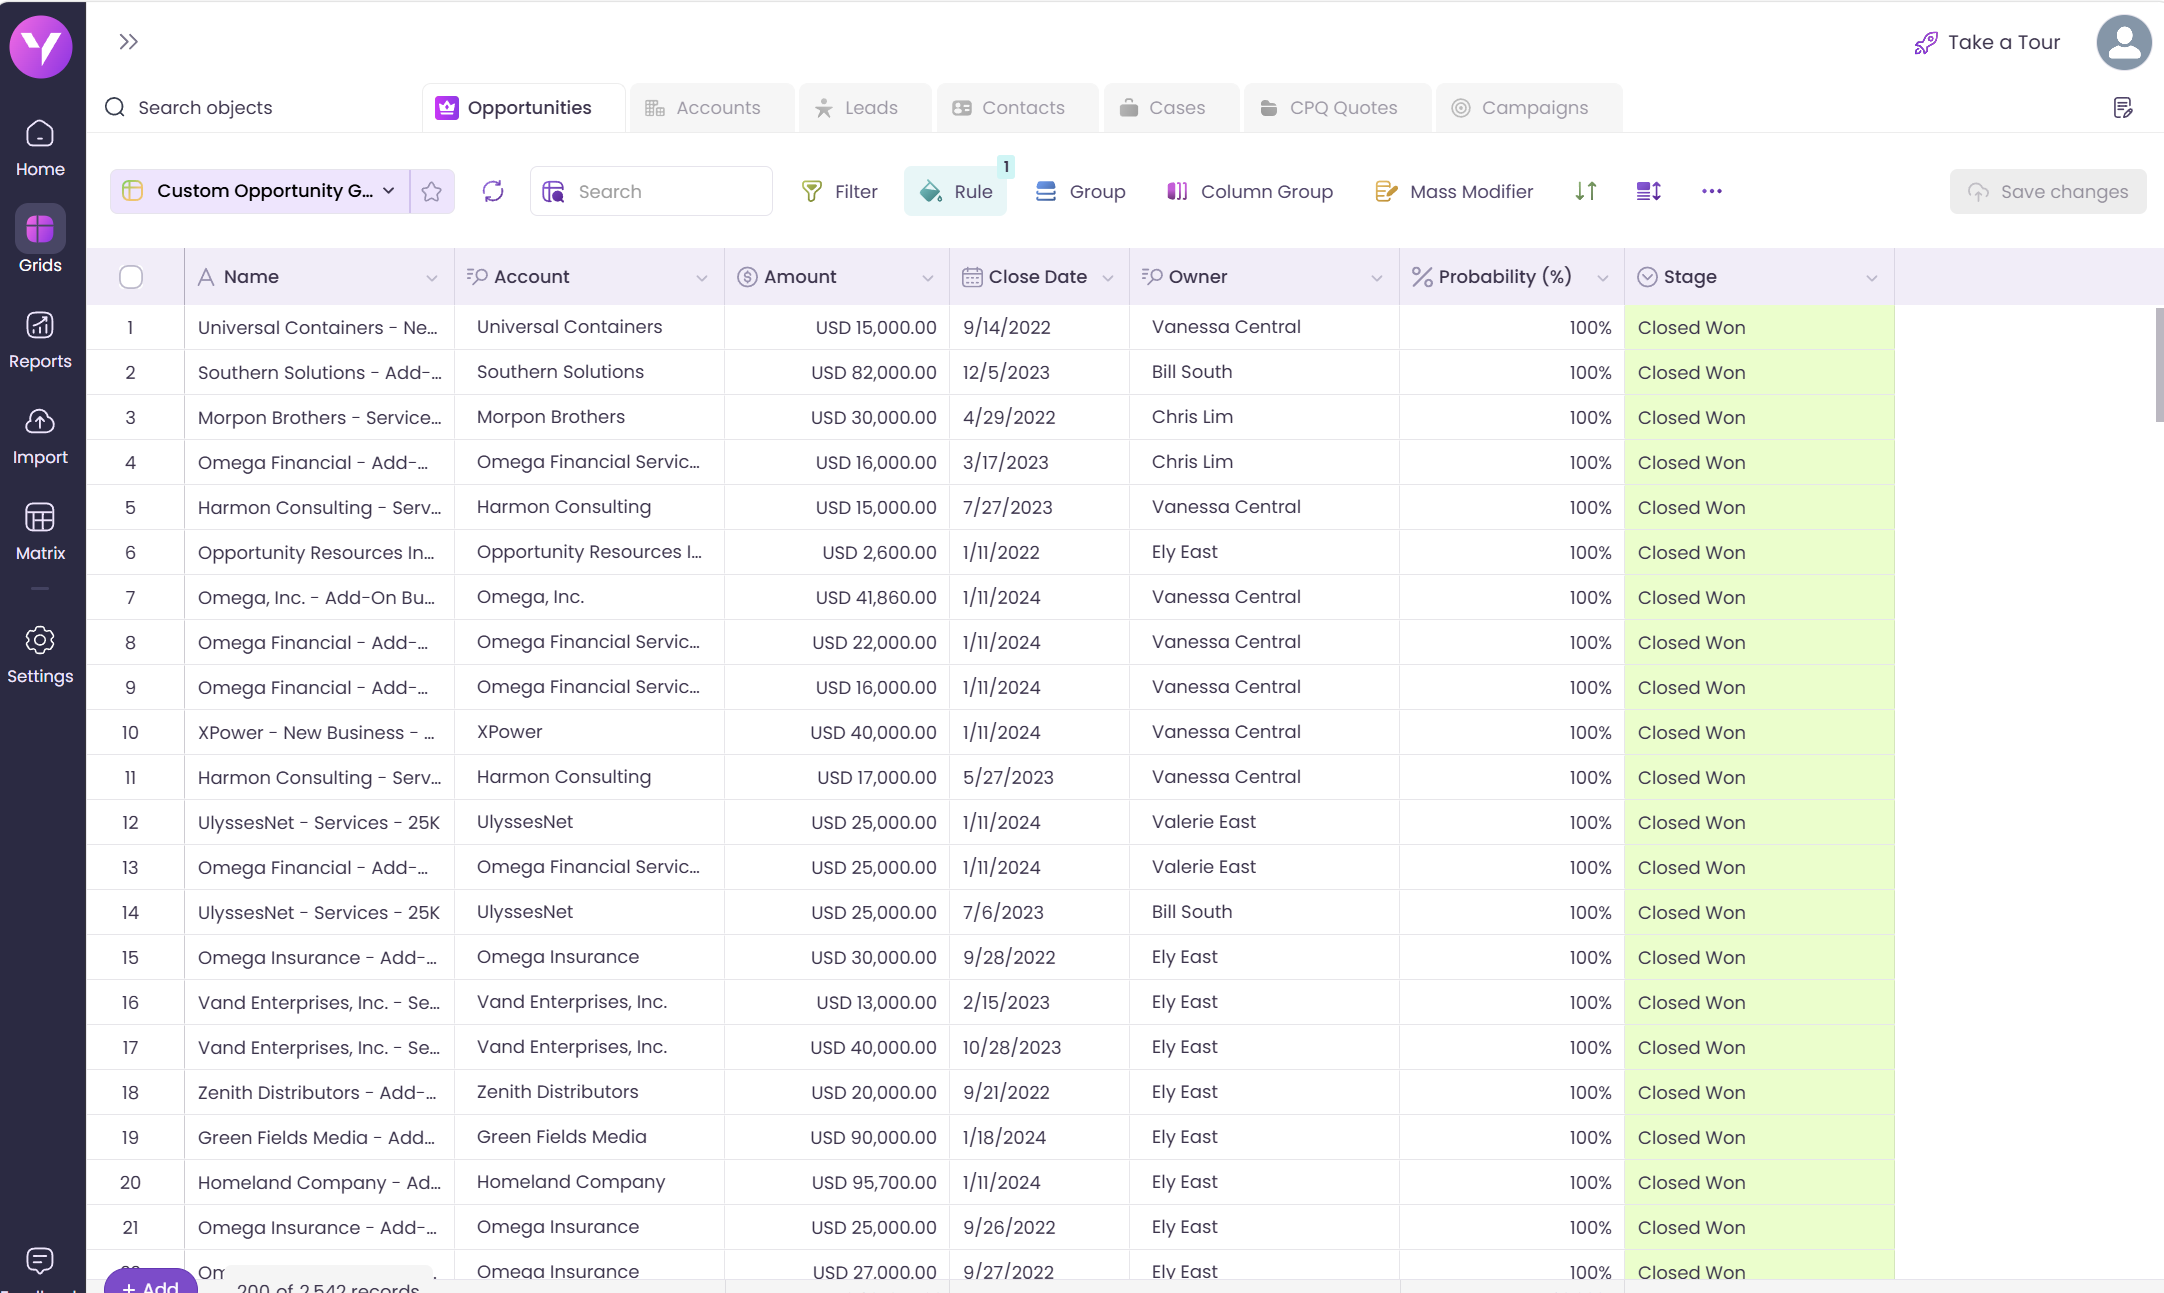
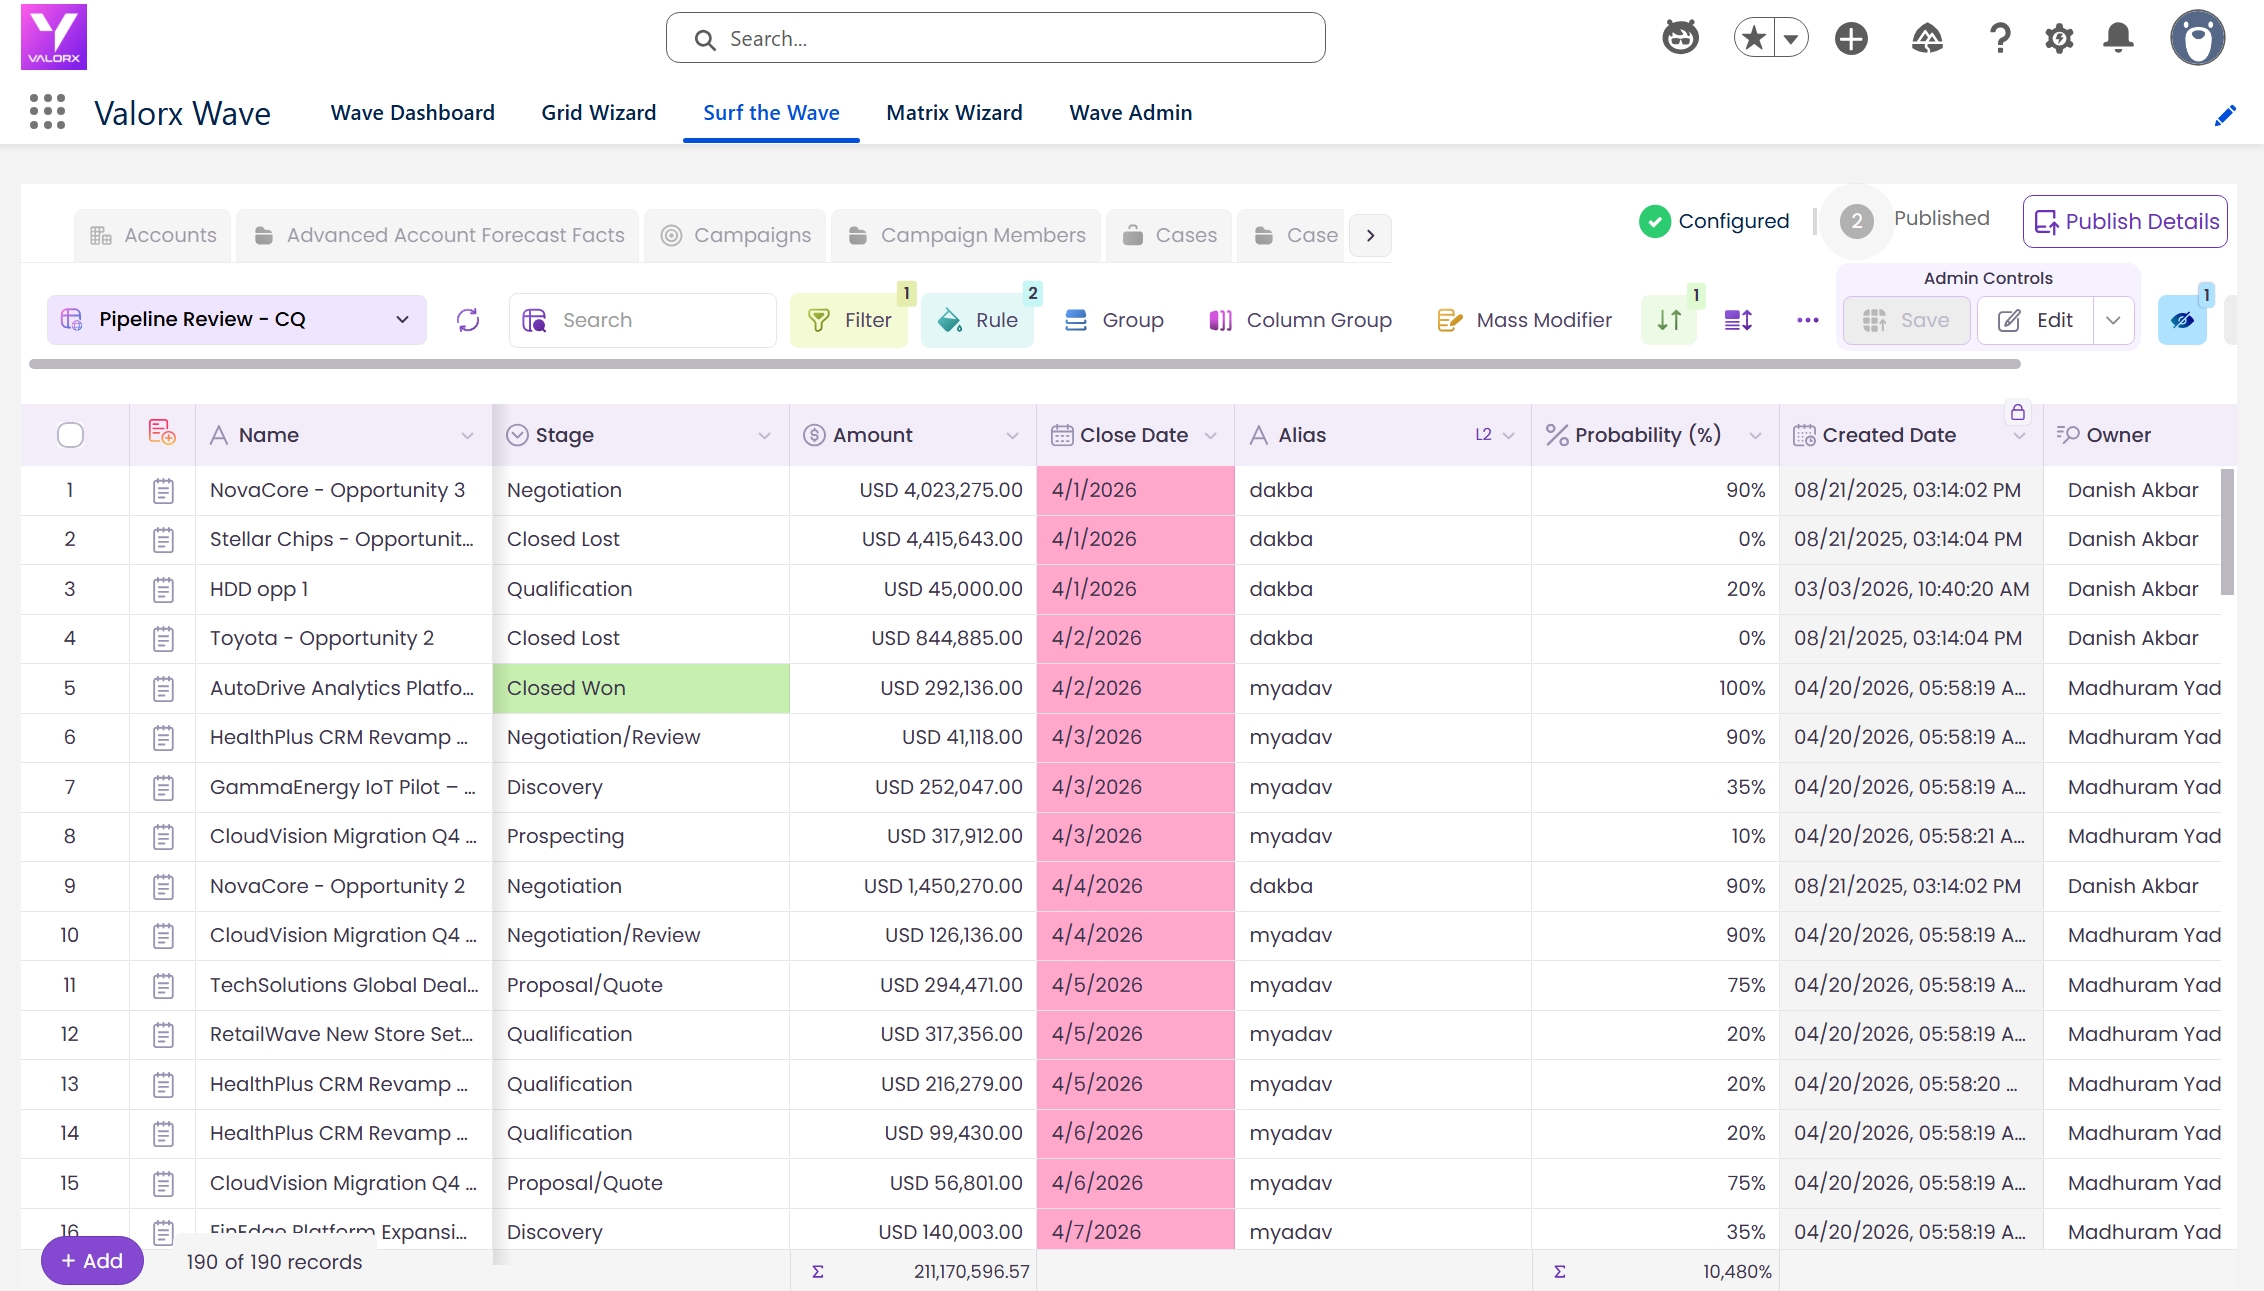
Here’s what you’re building
Your sales team needs to update the Stage, Close Date, and Amount across hundreds of Opportunities before the next pipeline review. Instead of opening every Salesforce record individually or exporting the data to Excel, you’ll create one live Opportunity grid where you can:
- View all the relevant records in one place
- Edit fields directly inside the grid
- Filter and sort the pipeline
- Highlight important records
- Save multiple changes back to Salesforce at once
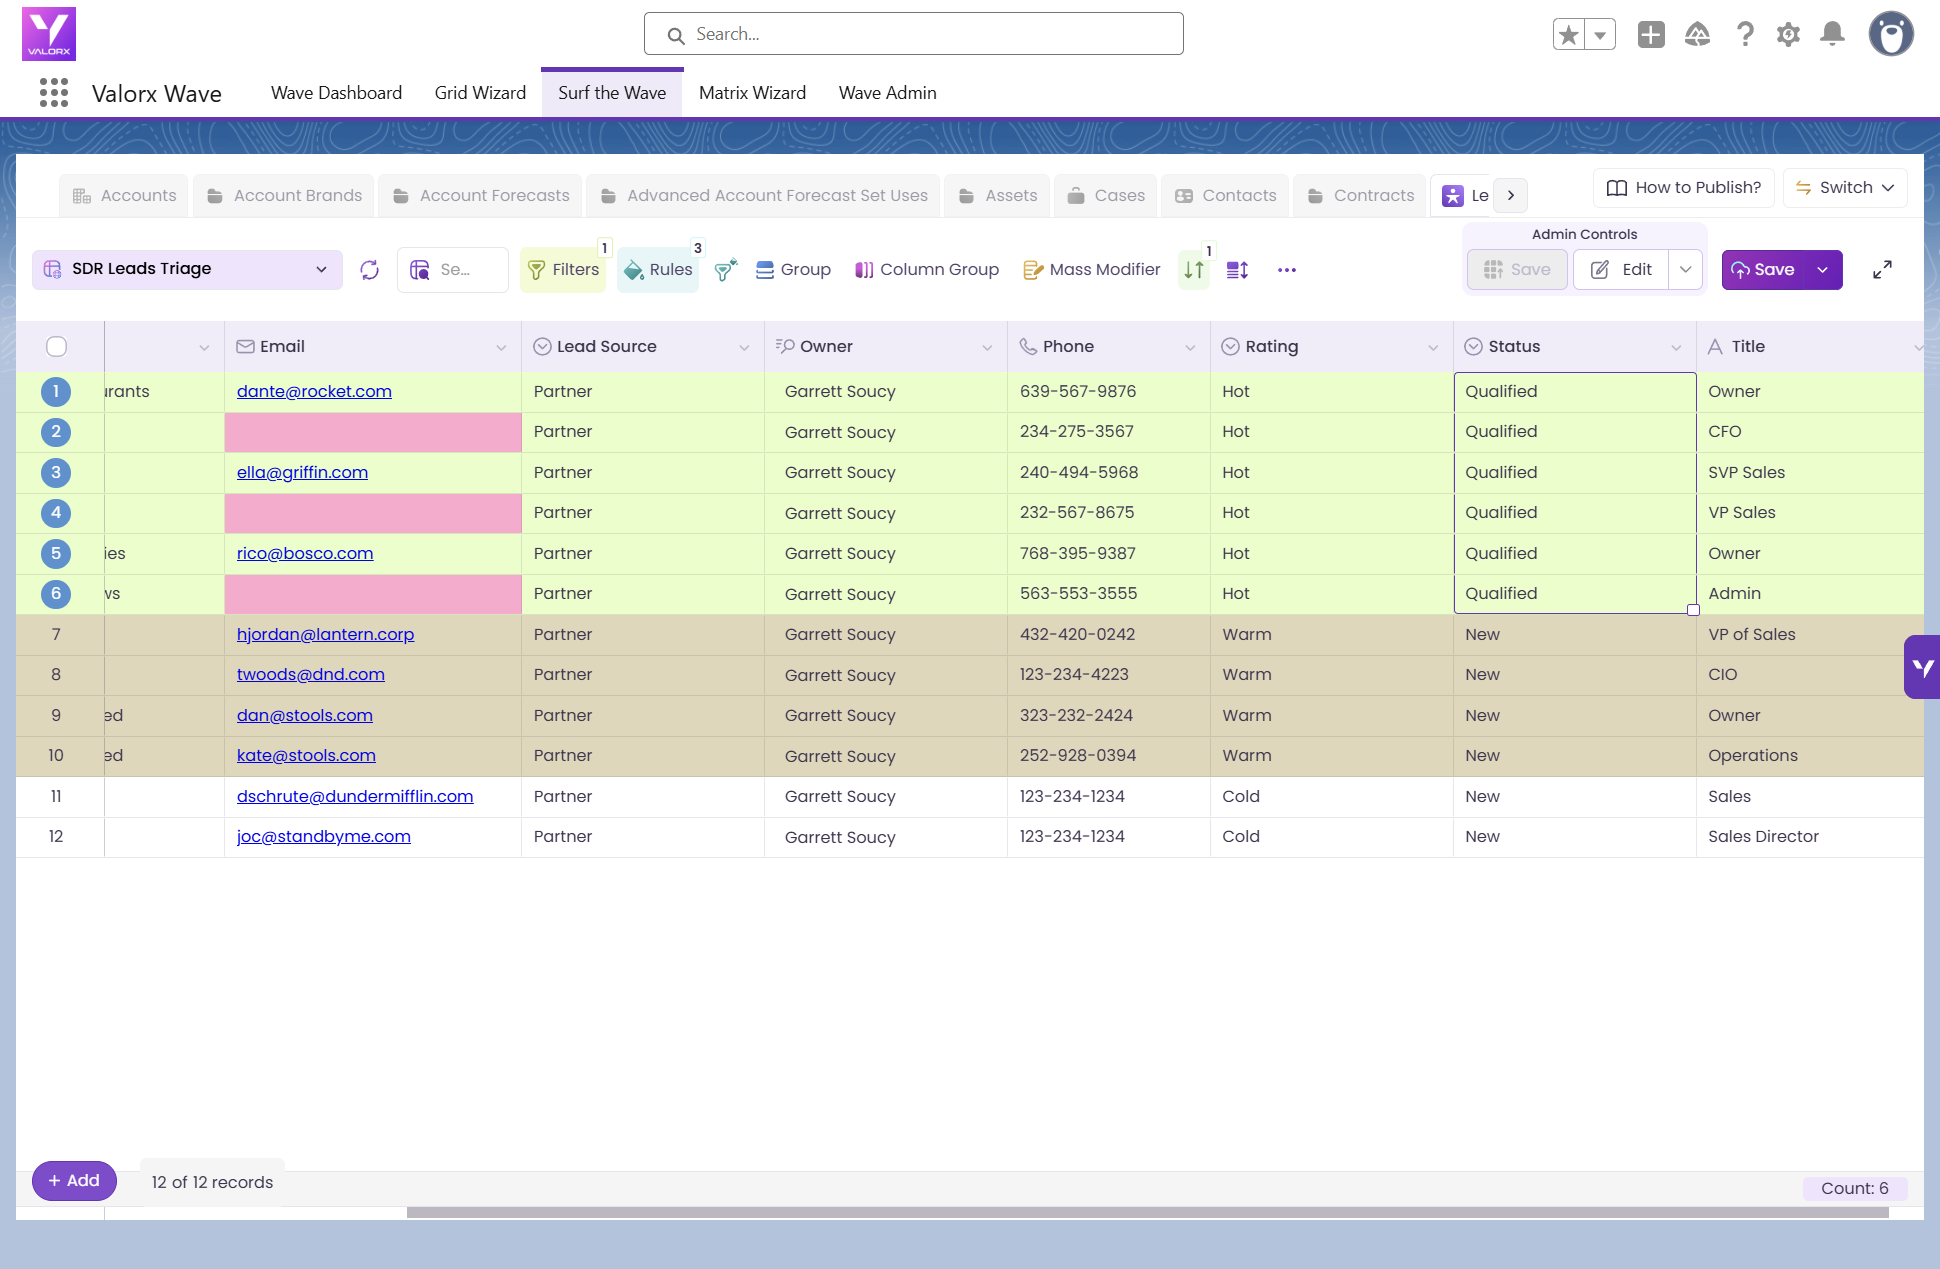
Before we walk through the steps, here’s the end result. This is what your team will see after you publish.
Which Valorx Wave experience does this guide cover?
This guide covers the Valorx Wave Browser Extension, available for Google Chrome and Microsoft Edge.
Wave is also available as an embedded experience inside Salesforce. While both experiences provide a spreadsheet-like interface for Salesforce data, the grid creation process is different.
Using Wave inside Salesforce? Follow the Wave Embedded grid guide instead.
Time: ~5 minutes | Role: Any Wave user | Platform: Wave Browser Extension
Prerequisites
- Valorx Wave browser extension installed (Chrome, Edge, or Firefox).
- A Designer or Admin role to create grids (Standard Users can view and interact with shared grids)
- A Salesforce object you want to work with (e.g. Opportunity, Account, Case, Contact — or any custom object
If the Add New option is not visible, contact your Wave Admin to confirm your role and feature access.
-
Build your first grid (with Valorx Wave Browser Extension)
We’ll use Opportunities as the example — the most common first grid for sales teams.
Step 1: Open the Wave Extension
Click the Valorx Wave icon in your browser toolbar to open the extension panel. You’ll land on the Wave Dashboard — this is your home base for all grids, matrices, and settings.
If this is your first time, you’ll see a “Create Your 1st Grid” prompt in the center of the dashboard. Otherwise, click the Add New button in the top right corner.
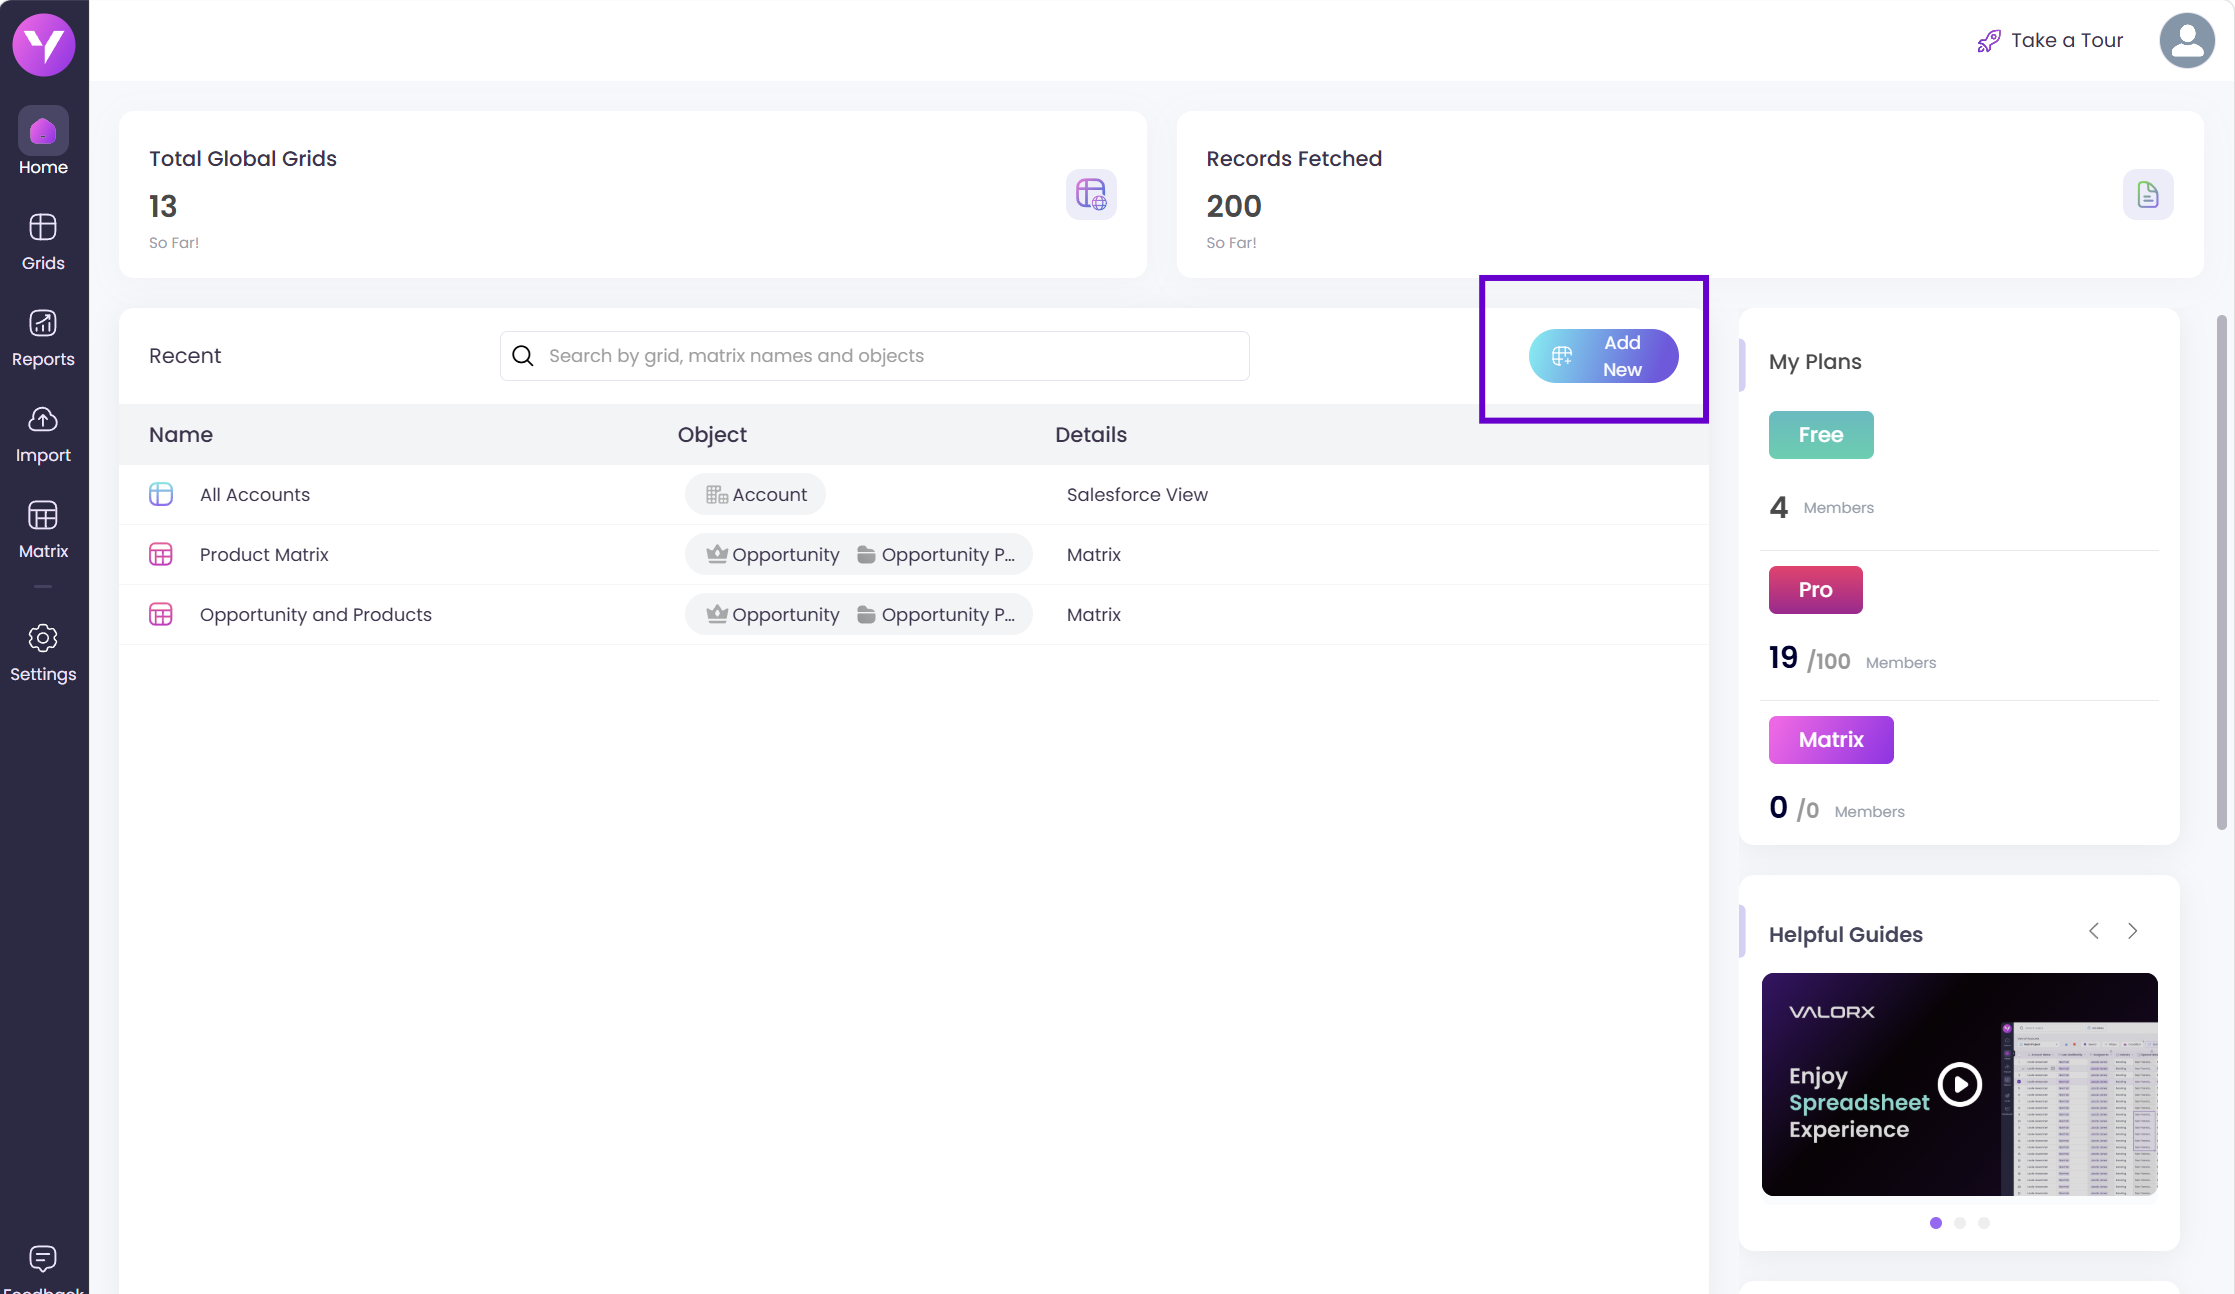
Click Add New from the Wave dashboard.
Select Grid from the available options.
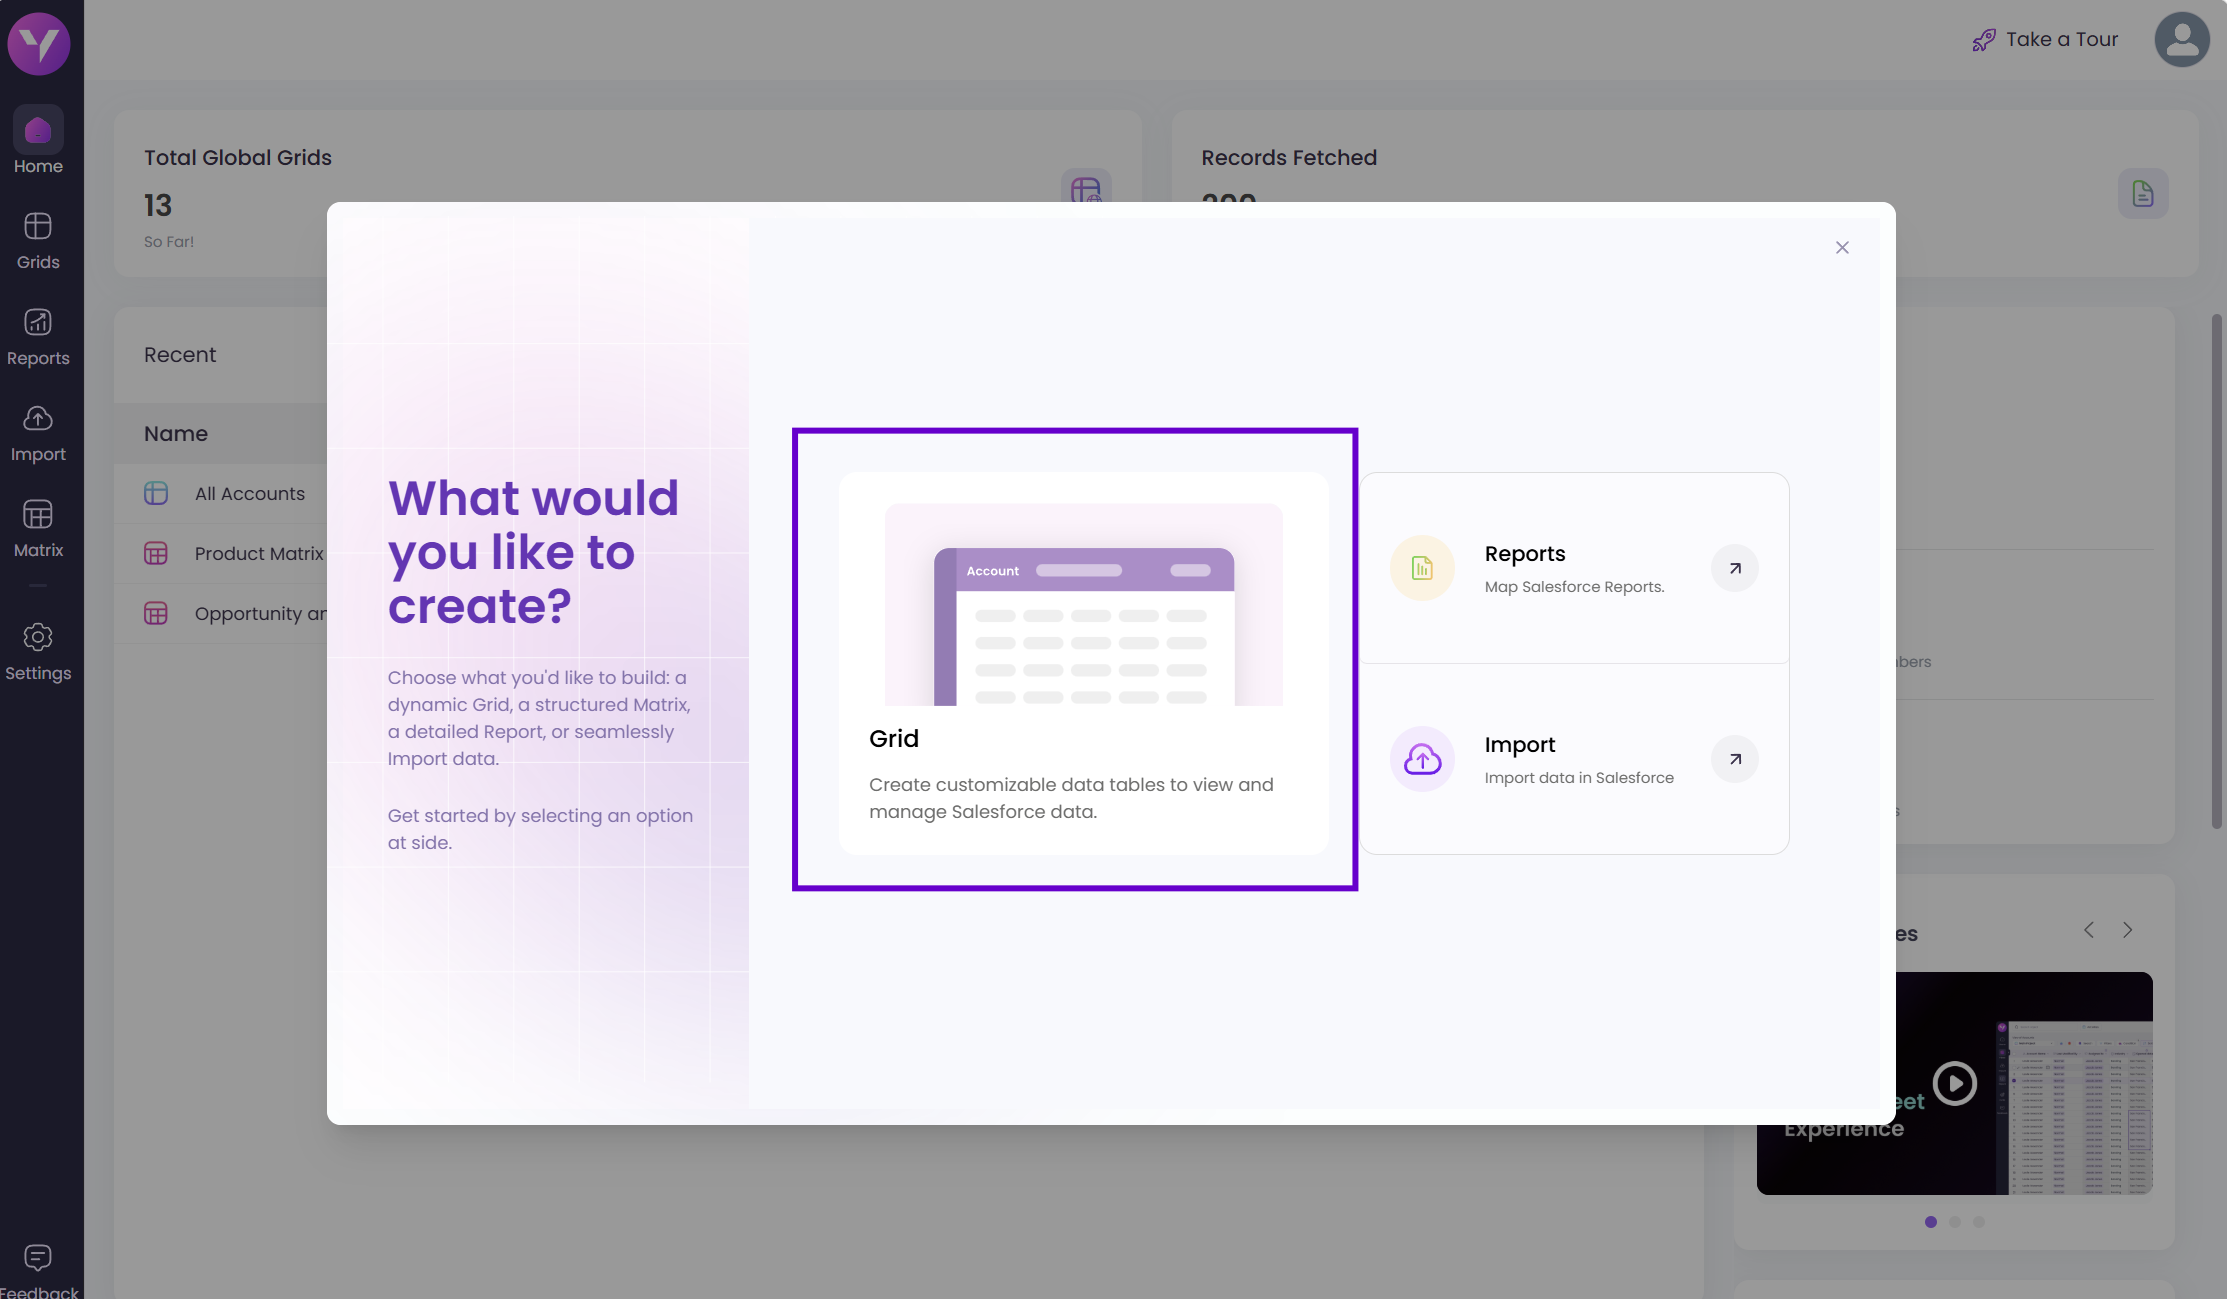
Select Grid to start building a new Salesforce grid.
Step 2: Select your object & name the grid
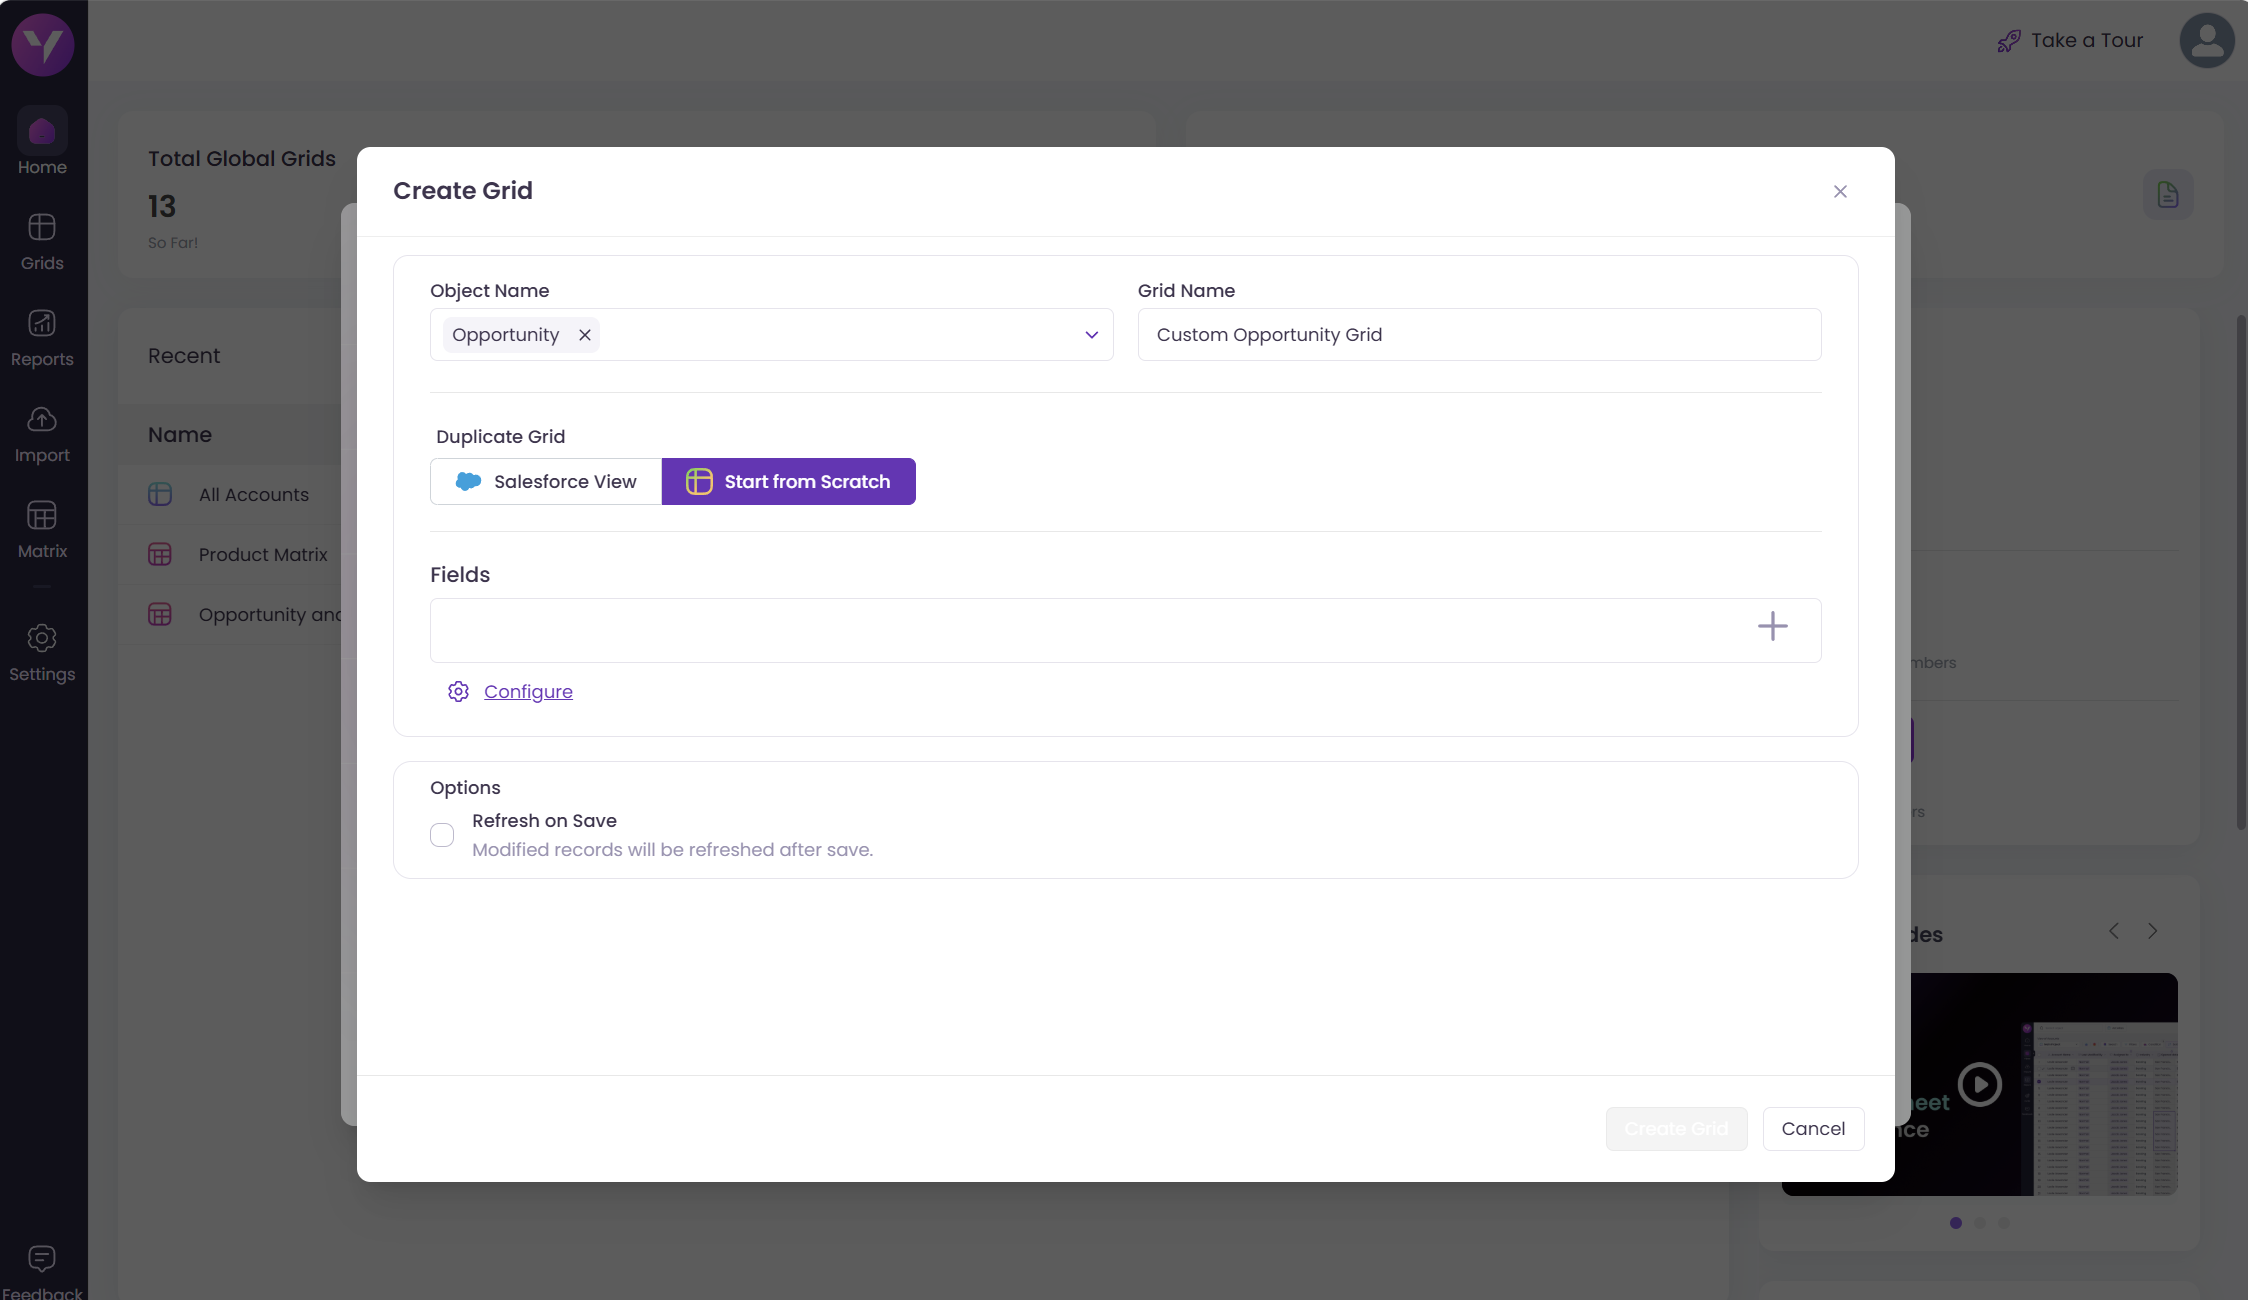
The Grid Wizard opens inside the extension panel. First, under Object Name, search for and select the Salesforce object you want to work with.
For this guide, select:
Opportunity
Wave supports standard Salesforce objects such as Opportunities, Accounts, Contacts, Leads, and Cases, as well as custom objects available in your Salesforce organization.
Then, enter a clear name that tells users what the grid is for.
For this example, use:
Pipeline Review – This Quarter
A purpose-led name makes the grid easier to identify later, especially when your team has several grids for the same Salesforce object.
Examples include:
- Opportunity Close Date Review
- Open Cases by Priority
- California Account Reassignment
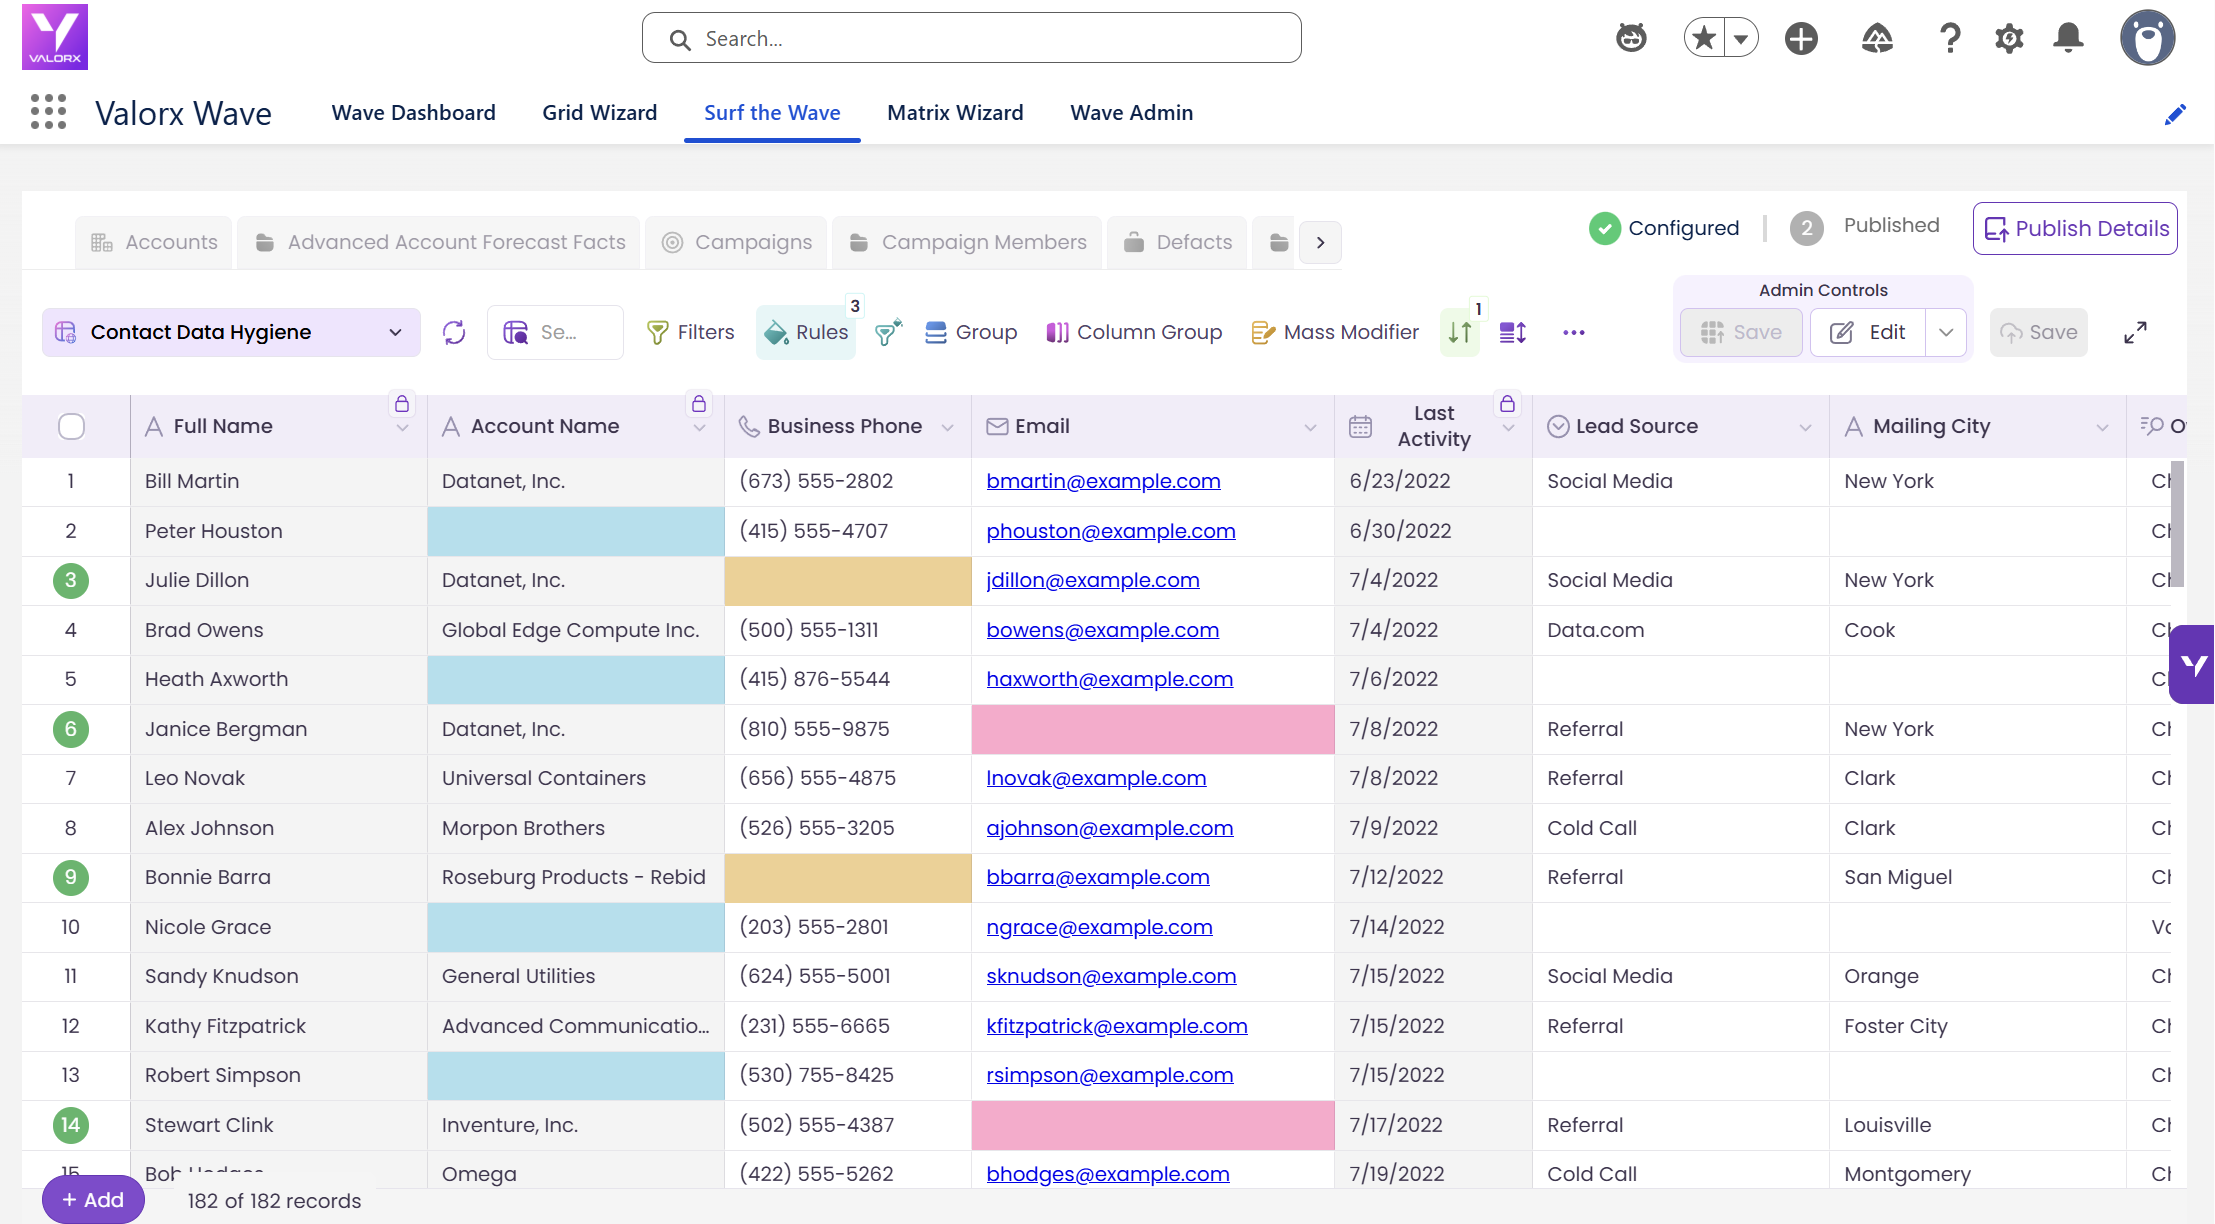
- Leads Missing Contact Information
Valorx Wave gives you two ways to start.
Salesforce View
Choose Salesforce View to start from an existing Salesforce List View.
Wave automatically adds the fields from that view. You can then add or remove fields before creating the grid.
Use this option when your Salesforce team already has a useful List View for the workflow.
Start from Scratch
Choose Start from Scratch to manually select the fields you want in the grid.
Use this option when you want complete control over the grid structure.
For this guide, select:
Start from Scratch
Tip: Starting from a list view is the fastest way to get up and running — your existing field selections and filters come over in one click.
Step 3: Add the fields you need
Select the fields that will appear as columns in your grid. Use the + button to add fields and drag-and-drop to reorder them.
For our pipeline grid, pick:
Opportunity Name, Stage, Amount, Close Date, Owner, Account Name, Probability
You can also configure fields here — rename column headers, mark fields as required, set defaults for new records, or hide fields that should run in the background without appearing in the grid.
Click Next when you’re happy with the field selection.
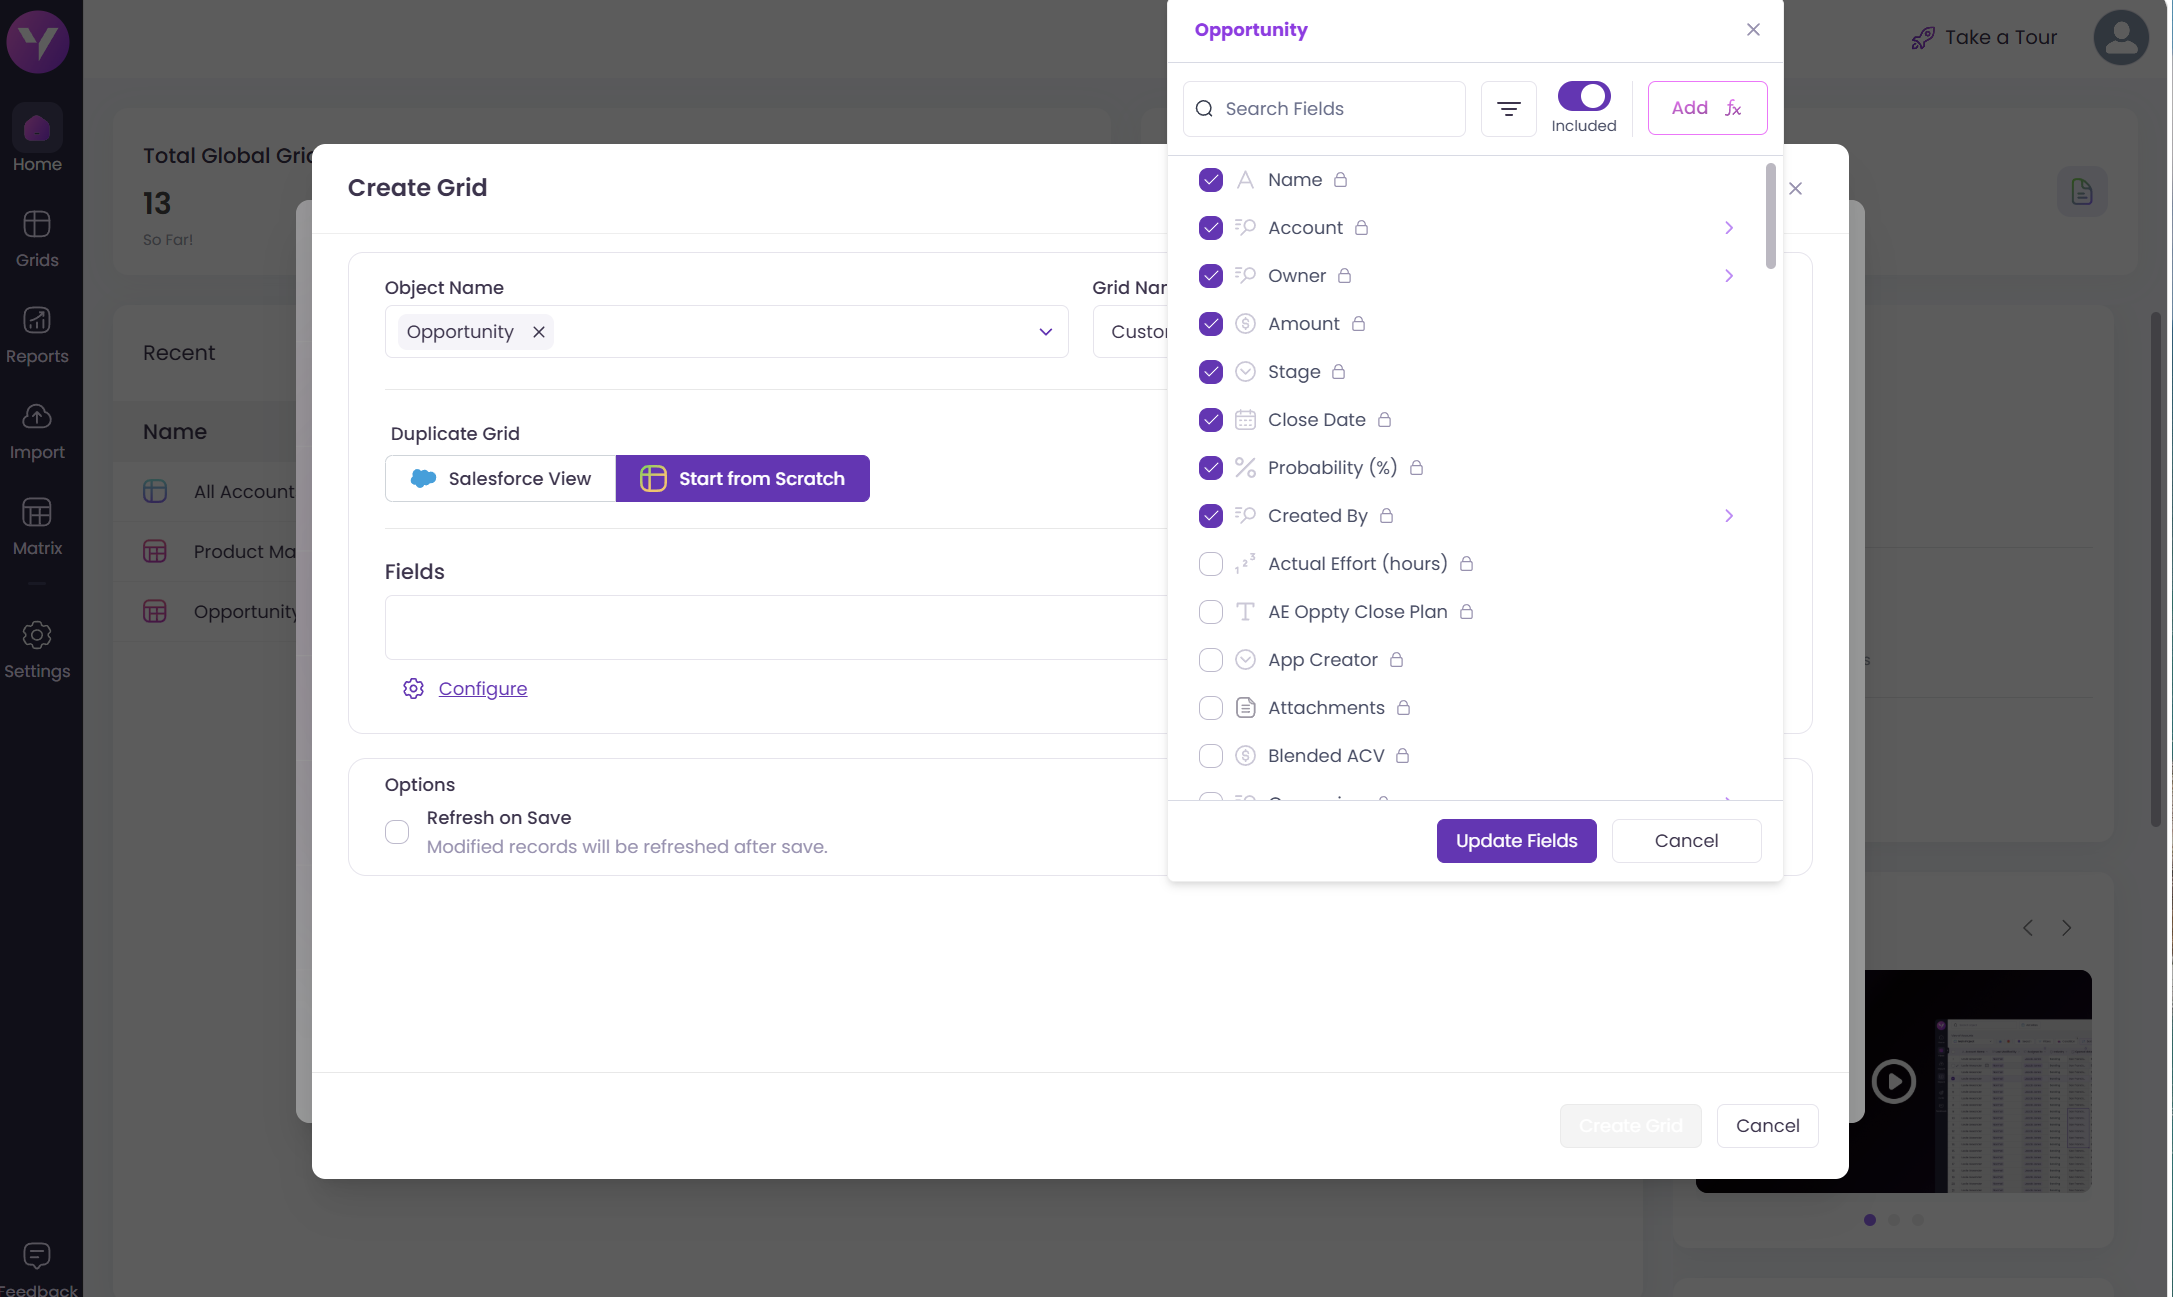
Select the Opportunity fields your team needs and click Update Fields.
You can also enable Refresh on Save if you want Wave to refresh modified rows after changes are successfully saved.
Once the grid details and fields are ready, click Create Grid.
Your new Opportunity grid will open with live Salesforce records.
Step 4: Filter the records (Optional but powerful)
Filters narrow down which records appear in your grid. For a pipeline review, you might filter to:
Close Date = This Quarter and Stage ≠ Closed Won
Click Add a Filter for single conditions, or Add a Filter Group to combine multiple conditions with AND/OR logic. You can even use Cross Filters to filter parent records by related child data.
Tip: You can always skip filters now and add them later in the grid runtime. But pre-setting them means the grid loads exactly the data you need every time.
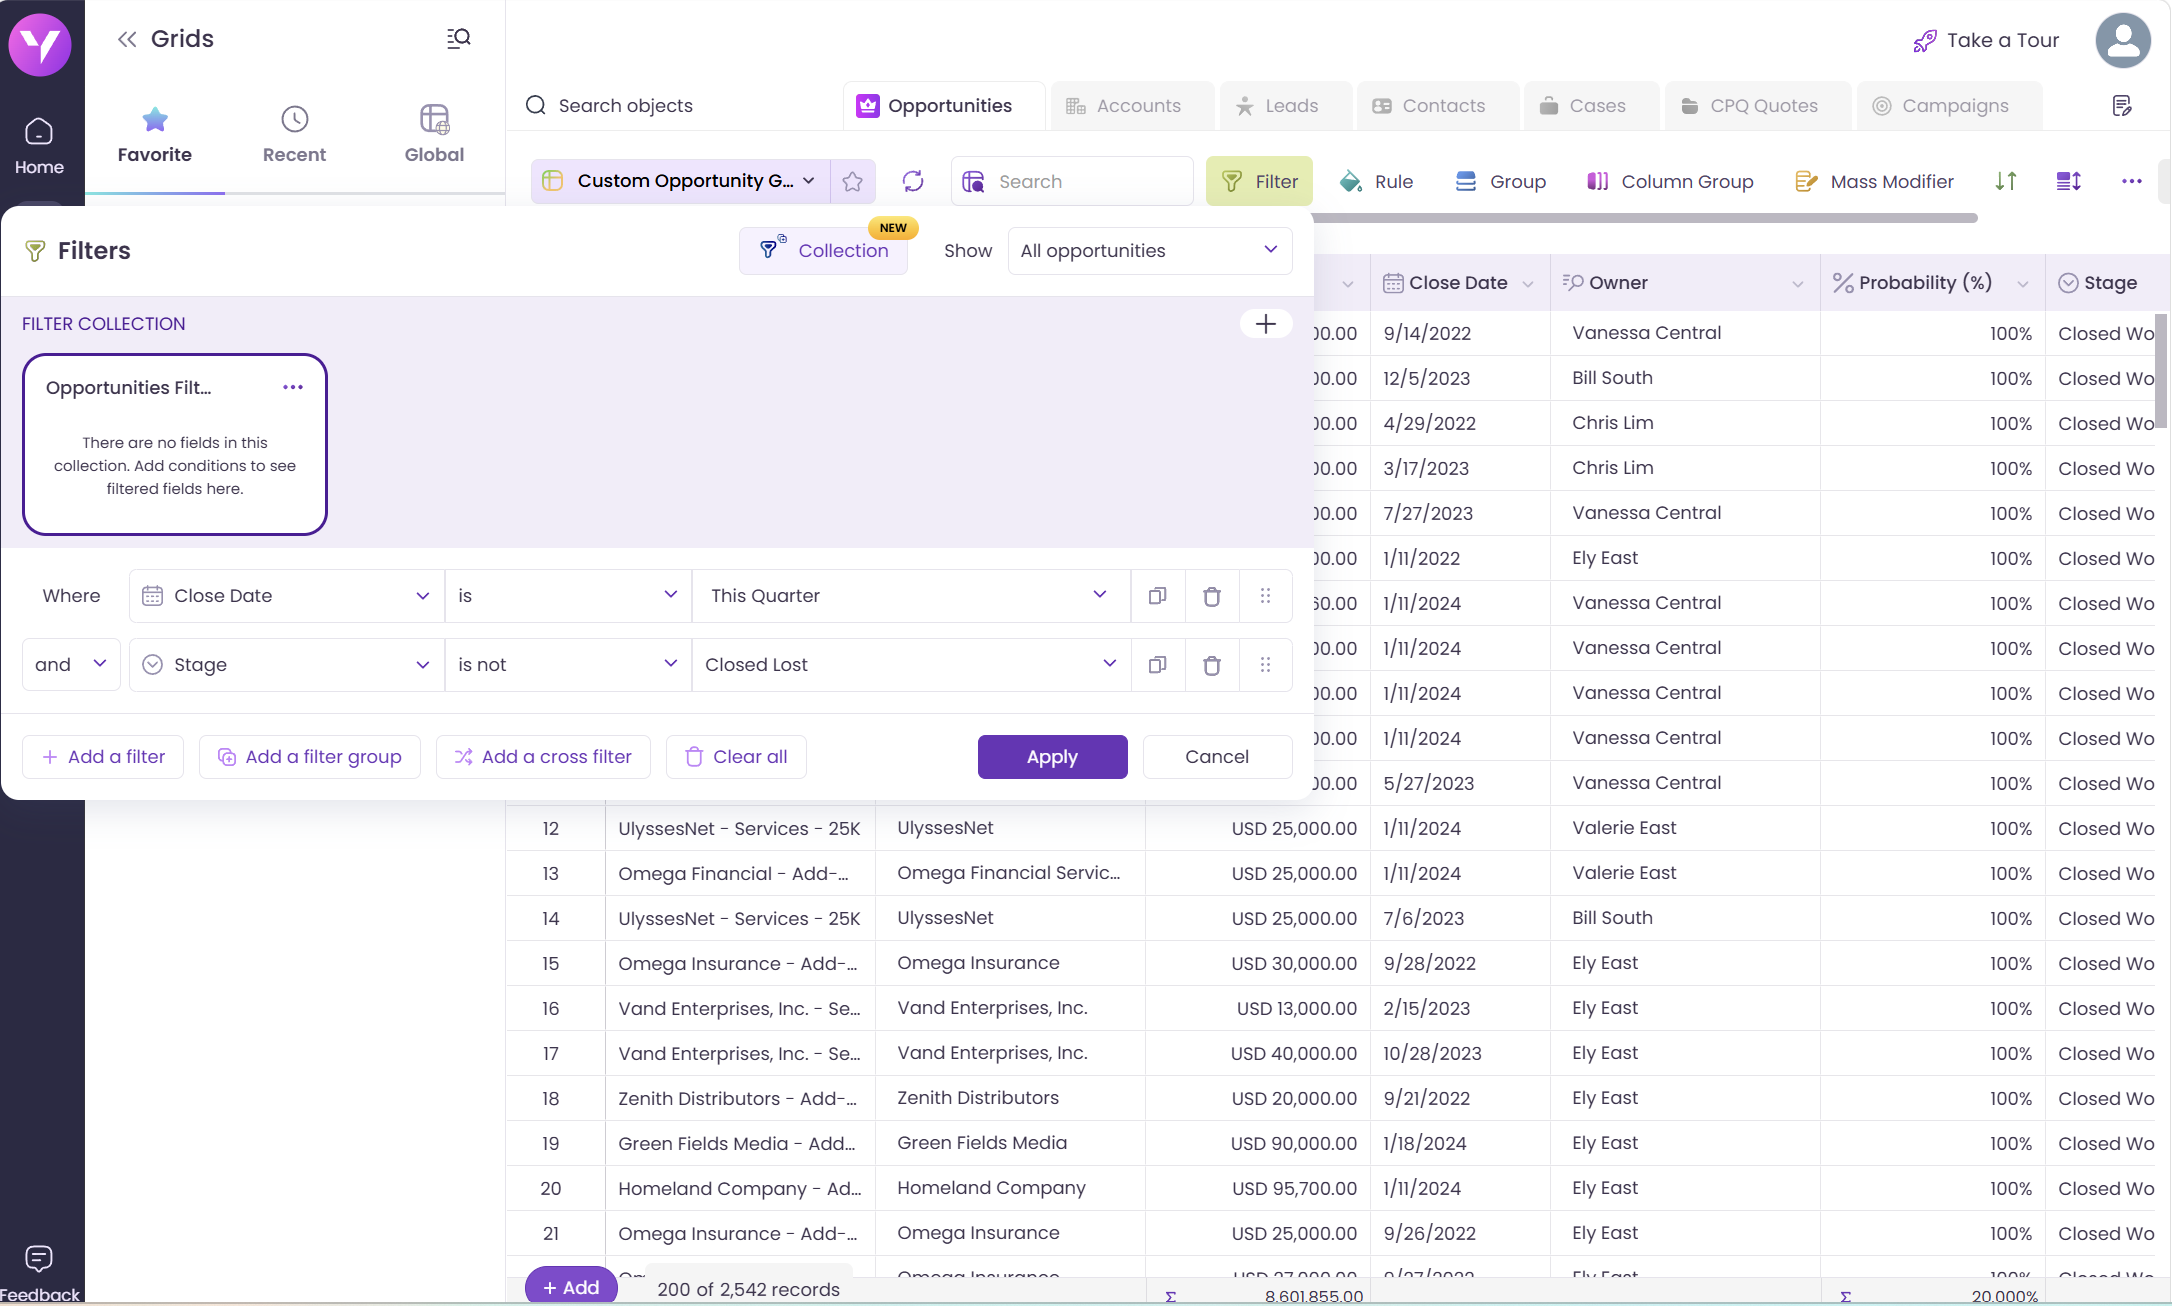
Filter the grid to show the Opportunities relevant to your pipeline review.
You can add:
- Individual filters for simple conditions
- Multiple filters using AND or OR logic
- Filter groups for more complex criteria
- Cross filters based on related Salesforce records
Your filter settings remain part of the custom Wave grid and do not change the original Salesforce object or List View.
Step 5: Set display options (to highlight important records)
Customize how your grid looks and behaves:
- Rules (Conditional Formatting): Highlight records based on field values — e.g. red when Close Date is past due, green when Stage is “Closed Won.”
- Sort: Set a default sort order (e.g. Close Date ascending) so records always appear in a useful order.
- Layout: Freeze key columns (like Opportunity Name) so they stay visible when scrolling.
- Related Lists: Add related records (like Contacts or Activities) as a panel alongside each row for full context.
Click Next when done.
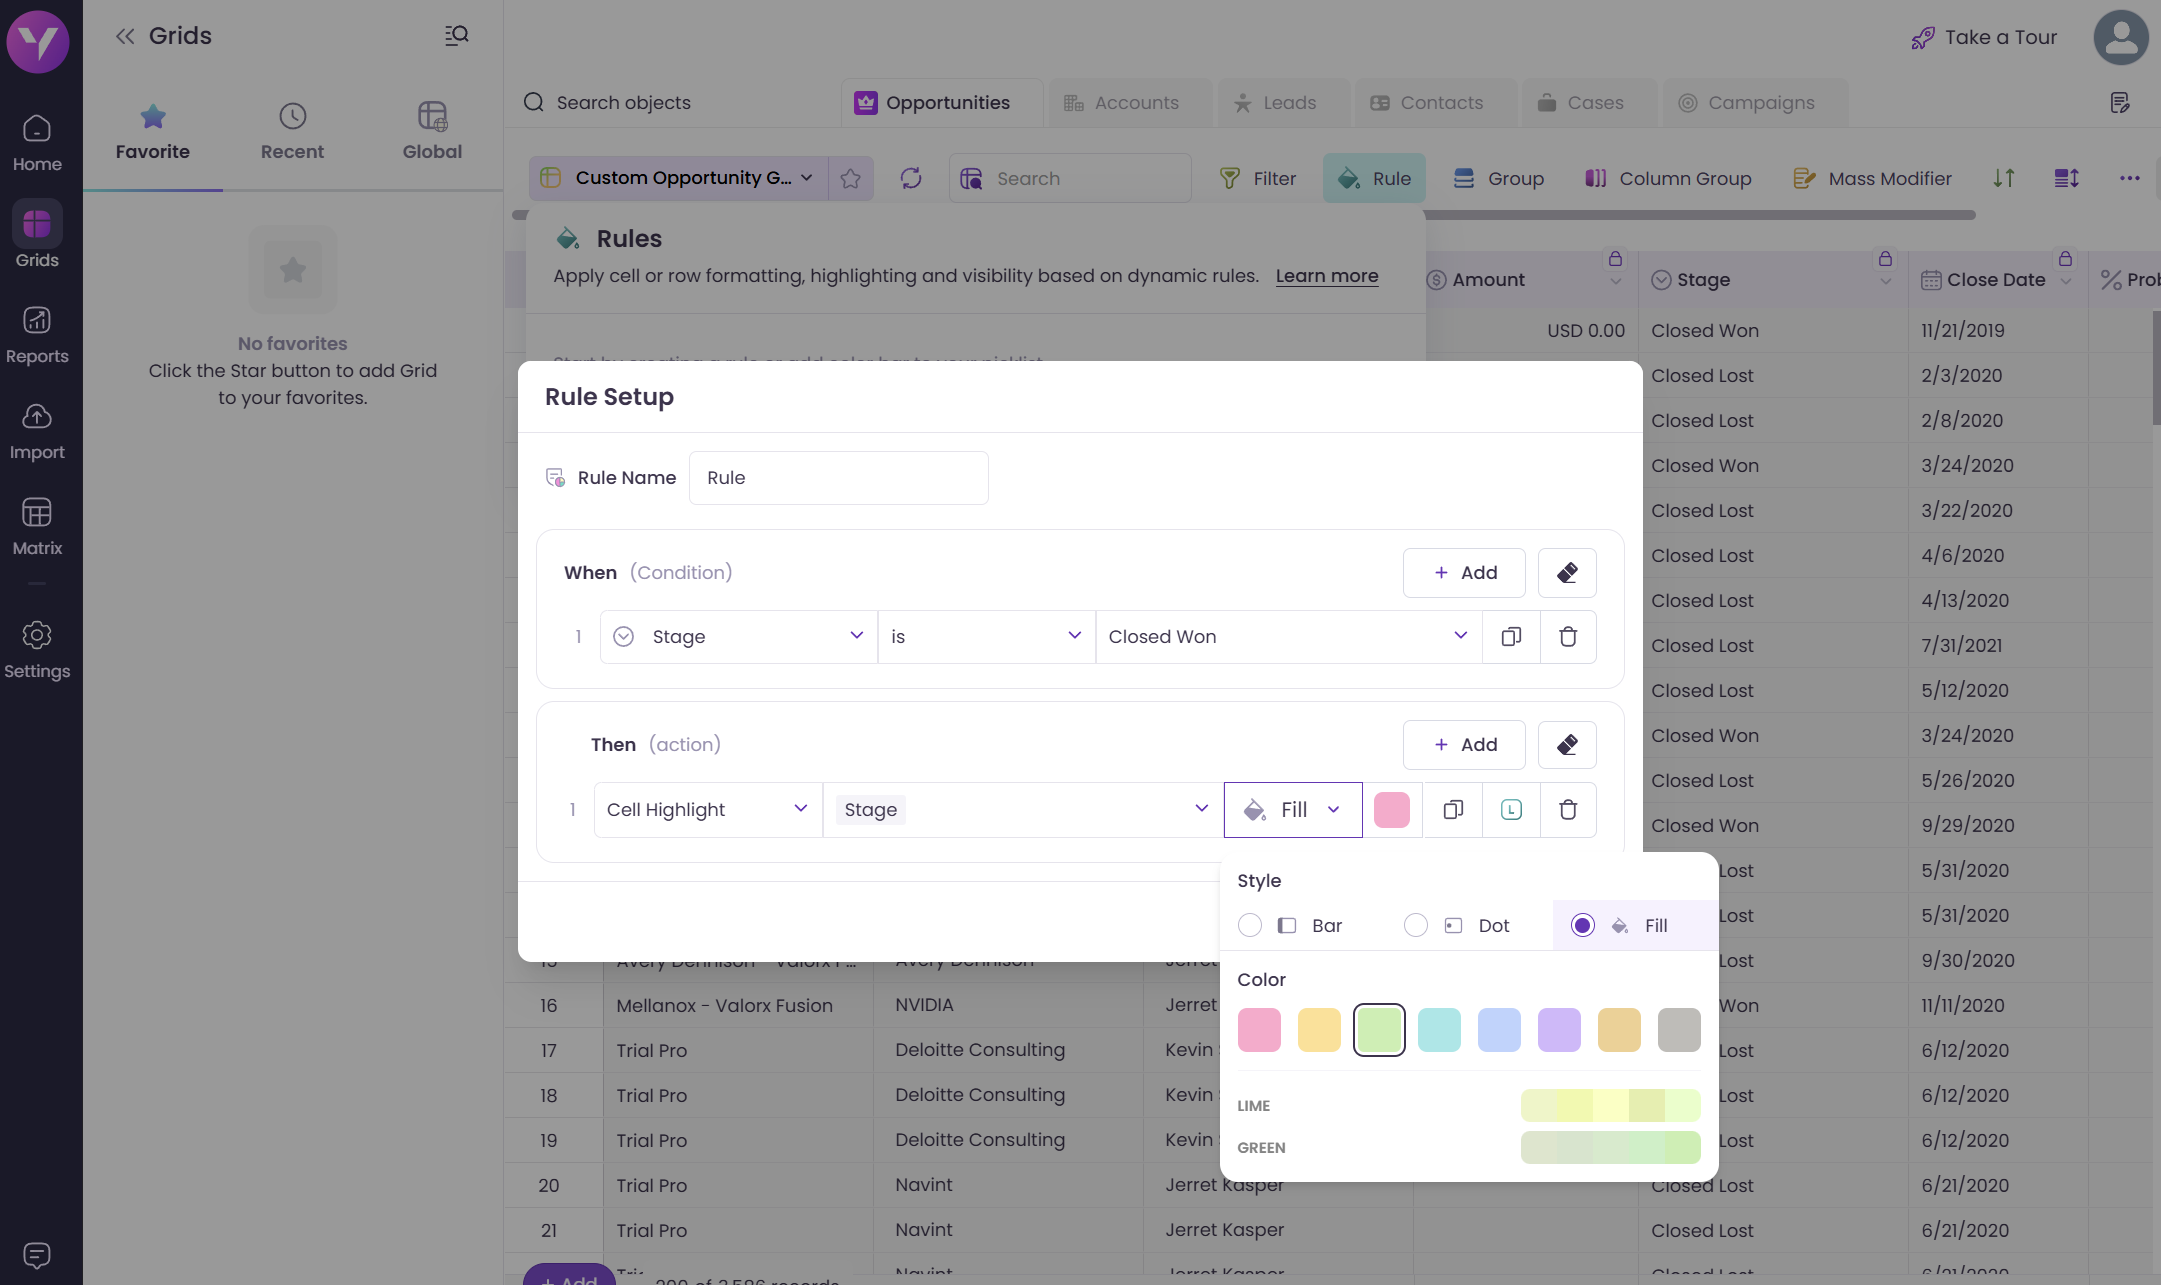
Rules change how information appears inside Wave. They do not modify the underlying Salesforce record.
Step 6: Edit records and save to Salesforce
Your grid is now ready to use. Click any editable cell and update the value just as you would in a spreadsheet.
For example, you can:
- Change an Opportunity Stage
- Update the Close Date
- Revise the Amount
- Assign a different Opportunity Owner
- Copy and paste values across rows
You can edit several records before saving.
When your updates are complete, click Save Changes.
Wave sends the changes directly to Salesforce and displays a save summary showing which records were updated successfully.
There is no file to export, re-import, or reconcile with Salesforce later.
You've created your first Wave grid
You now have a reusable Salesforce grid for reviewing and updating pipeline records.
From the same grid, your team can:
- Filter and sort records
- Add or remove fields
- Apply conditional formatting
- Freeze important columns
- Group related information
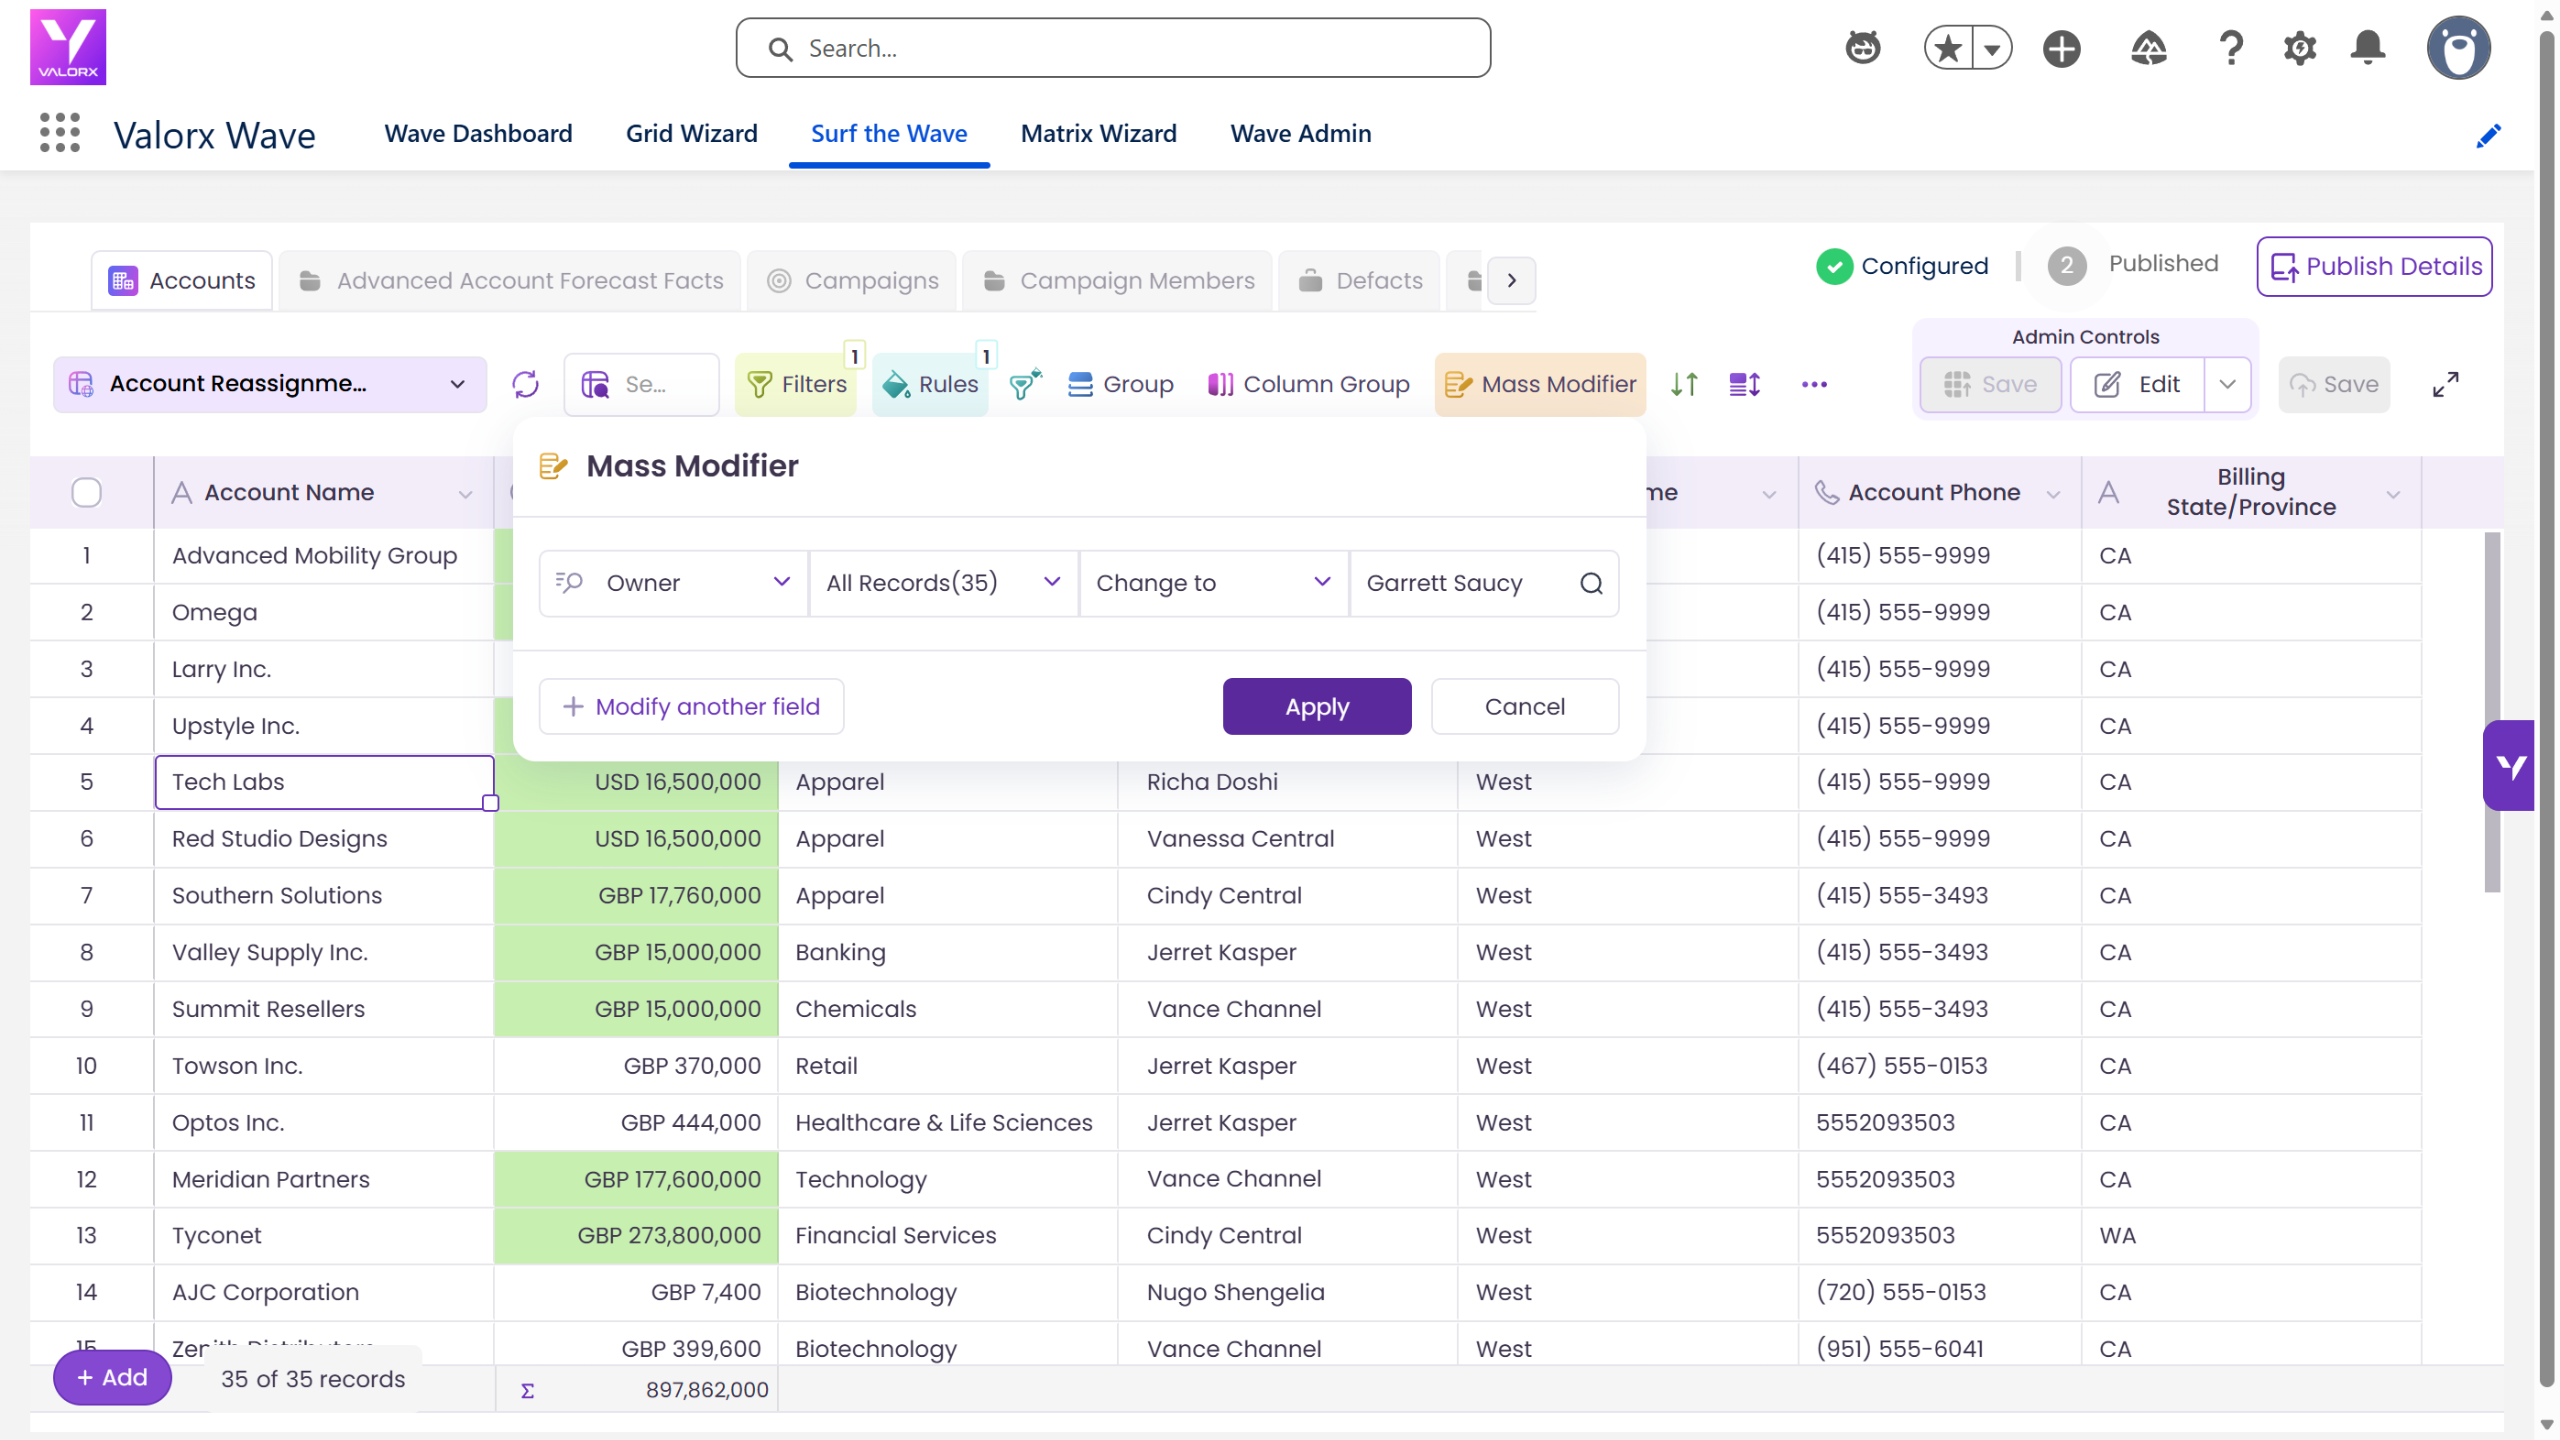
- Update selected records with Mass Modifier
- Save changes directly to Salesforce
The grid structure remains in Valorx Wave, while record updates are saved to Salesforce.
More Salesforce grids your team can build today
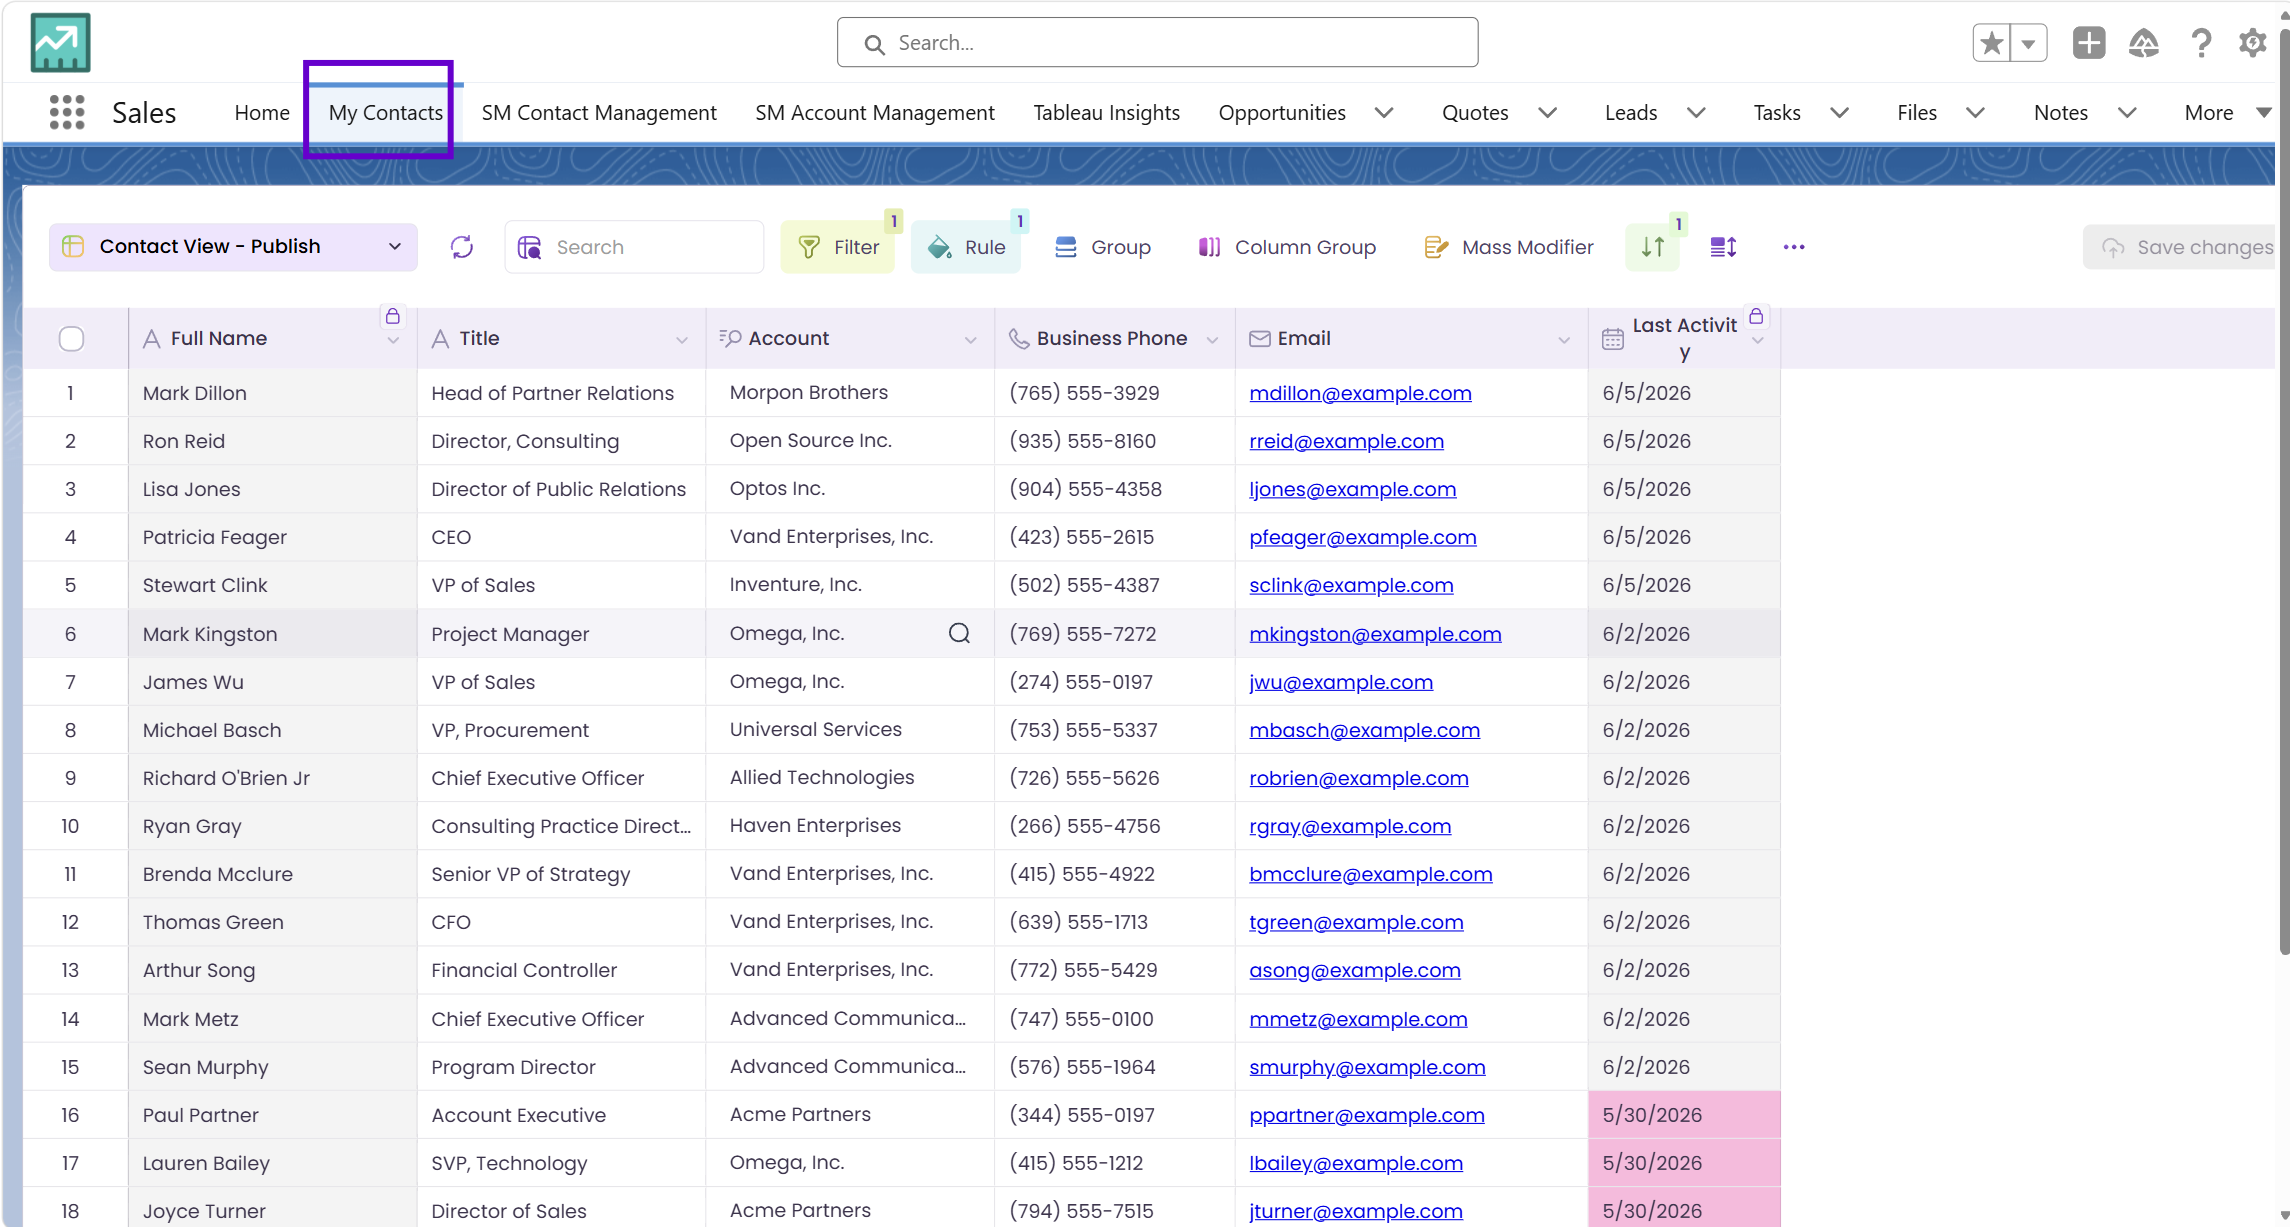
The same 6 steps work for any Salesforce object. Here are four popular grids teams build first.
Updating 200 Salesforce records: two approaches
The difference between native Salesforce editing and a Wave Grid.
Frequently asked questions
What is a Valorx Wave Grid?
A Wave Grid is an editable, spreadsheet-like view of Salesforce data. It lets users view, filter, sort, update, and save Salesforce records from one interface.
Does a Wave Grid update Salesforce directly?
Yes. Changes made to record data can be saved directly to Salesforce. Grid-level settings such as filters, sorting, field selections, and formatting remain within Valorx Wave.
Can I build a grid from a Salesforce List View?
Yes. Select Salesforce View while creating the grid and choose an existing Salesforce List View. Wave will automatically add the fields from that view, which you can then adjust.
Can I create a grid for a custom Salesforce object?
Yes. You can create Wave Grids for standard and custom objects that are available to you in your connected Salesforce organization.
Which browsers support the Wave Browser Extension?
The Valorx Wave Browser Extension supports Google Chrome and Microsoft Edge.
Who can create and share Wave Grids?
Grid creation and sharing options depend on your Wave role and the access configured by your administrator. Admins and Designers can create and manage Global Grids, while Standard User capabilities can be controlled through feature and grid access settings.
Do users need spreadsheet expertise to use Wave?
No. Wave uses a familiar spreadsheet-like interface, but users do not need advanced Excel or spreadsheet skills to view and update Salesforce records.
Does creating a Wave Grid change my Salesforce List Views?
No. Customizing a grid does not modify the original Salesforce List View. The grid configuration is saved in Valorx Wave.

Choose the workflow you need:
Try Wave in browser Extension

Try Wave in Salesforce

Try Fusion In Excel

Enhancing Salesforce for industry leaders