How to build a lead qualification grid
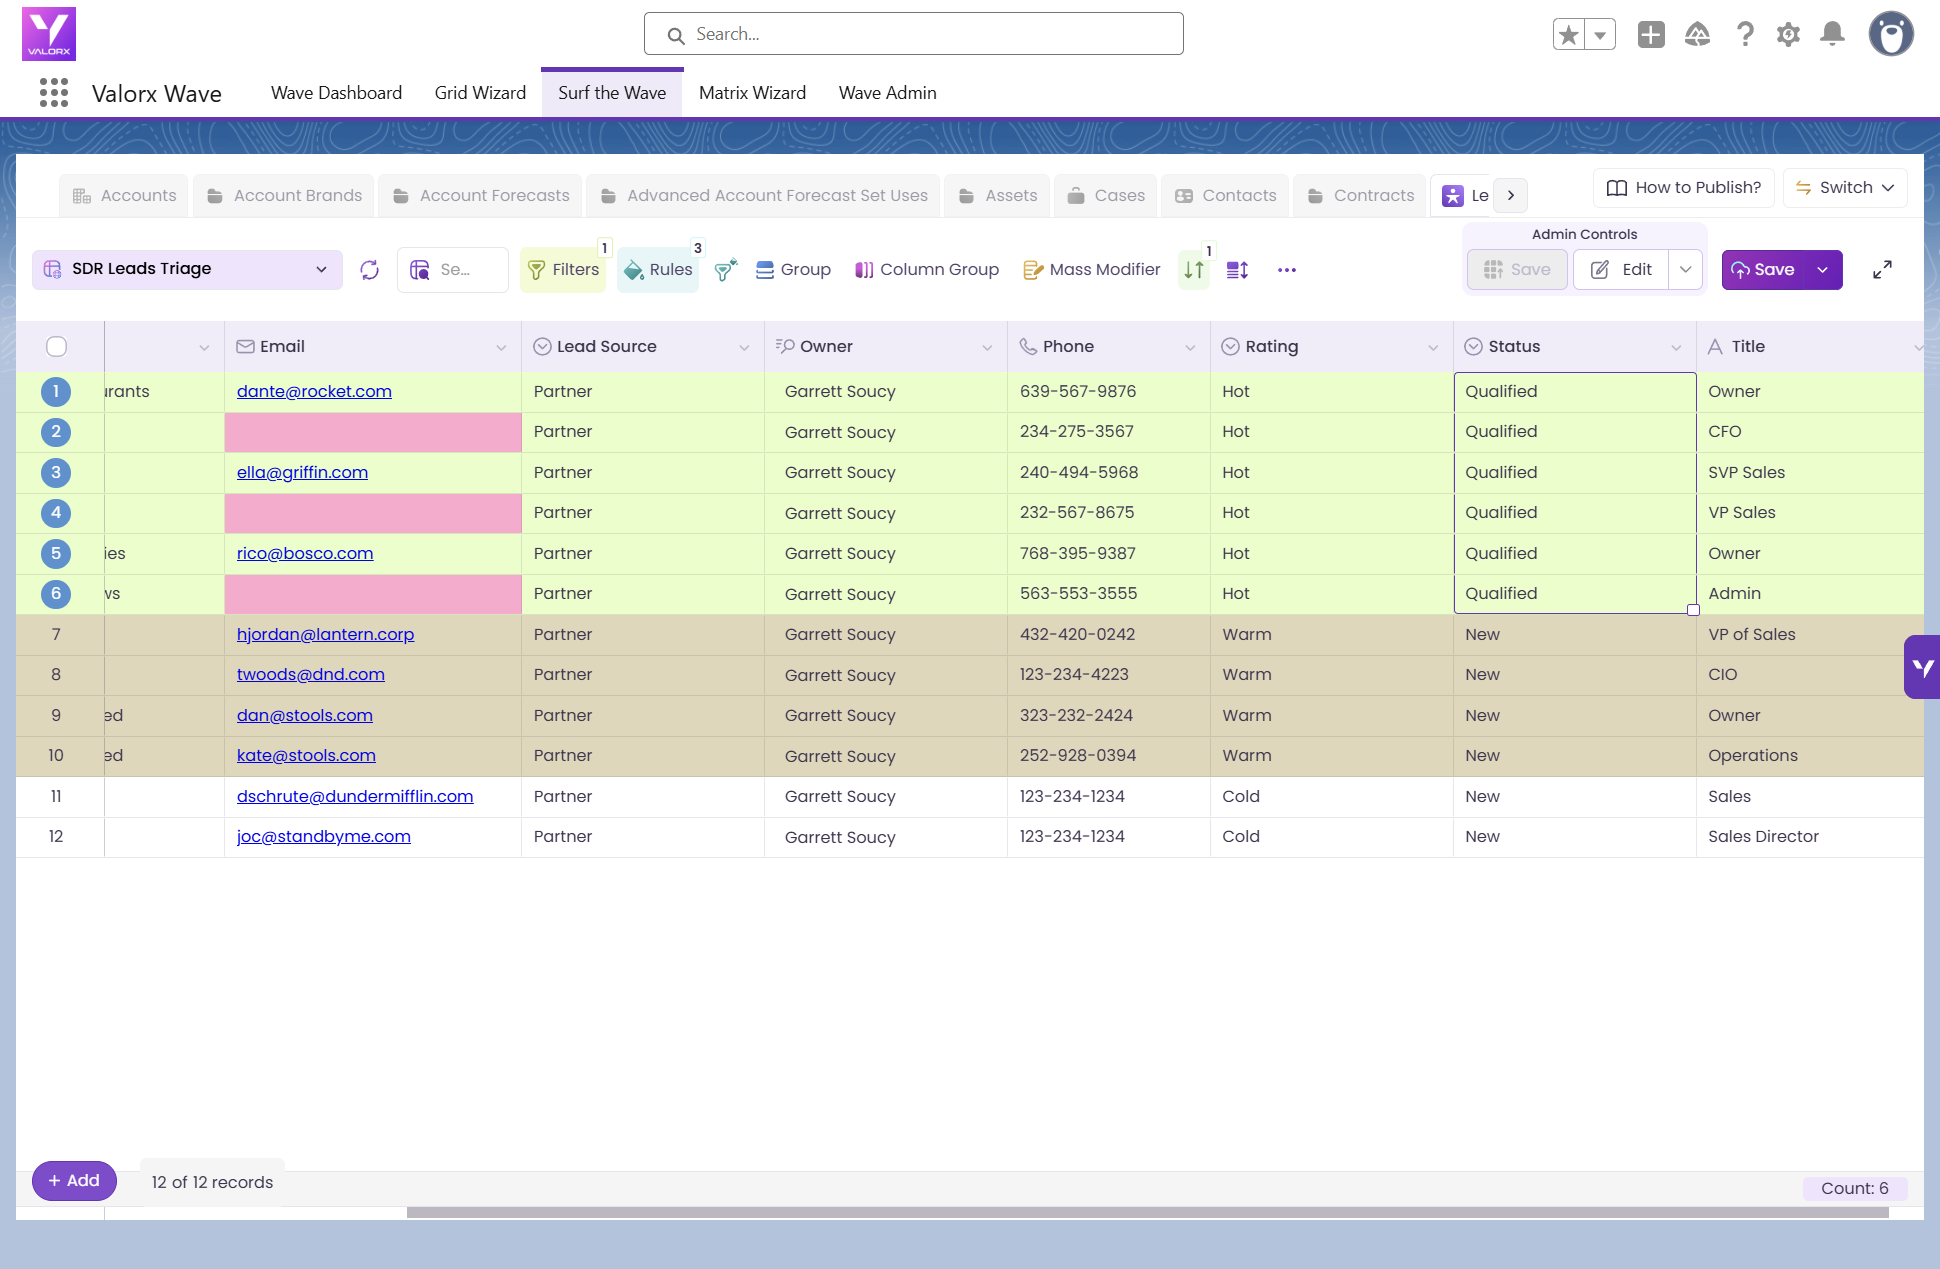
Here’s what you’re building
A lead triage grid that lets SDR managers review, score, and qualify leads in bulk.
What is a Salesforce lead qualification grid?
It is a saved Wave grid built on the Lead object, filtered to leads nobody has worked yet. Every lead's company, title, source and contact details sit in one scrollable view. Conditional formatting colors each row by Rating, so the strong leads rise to the top visually. You select rows and push a single Status and Owner change to all of them at once.
What it replaces: opening each lead record to check the source, company and title. Deciding one at a time whether to qualify or disqualify. Manually updating Status and assigning an owner. Then repeating for every lead in the queue.
When you would use this
Your SDR team wakes up to 200 new leads from an overnight webinar campaign. Before standup, the manager has to review each lead's company, title and source, qualify the strong ones, disqualify the junk, and get the winners to AEs. Record by record, that is roughly two hours. In a Wave grid it is about fifteen minutes: sort by Rating, select the Hot rows, bulk-qualify and assign, then bulk-disqualify the rest.
Prerequisites
- Valorx Wave installed — embedded or as the browser extension
- A Designer or Admin role in Wave
- Leads in Salesforce with Status, Rating and Lead Source populated
Time: ~5 minutes to build | Role: Designer or Admin | Object: Lead
How to build a lead triage grid in Wave (7 steps)
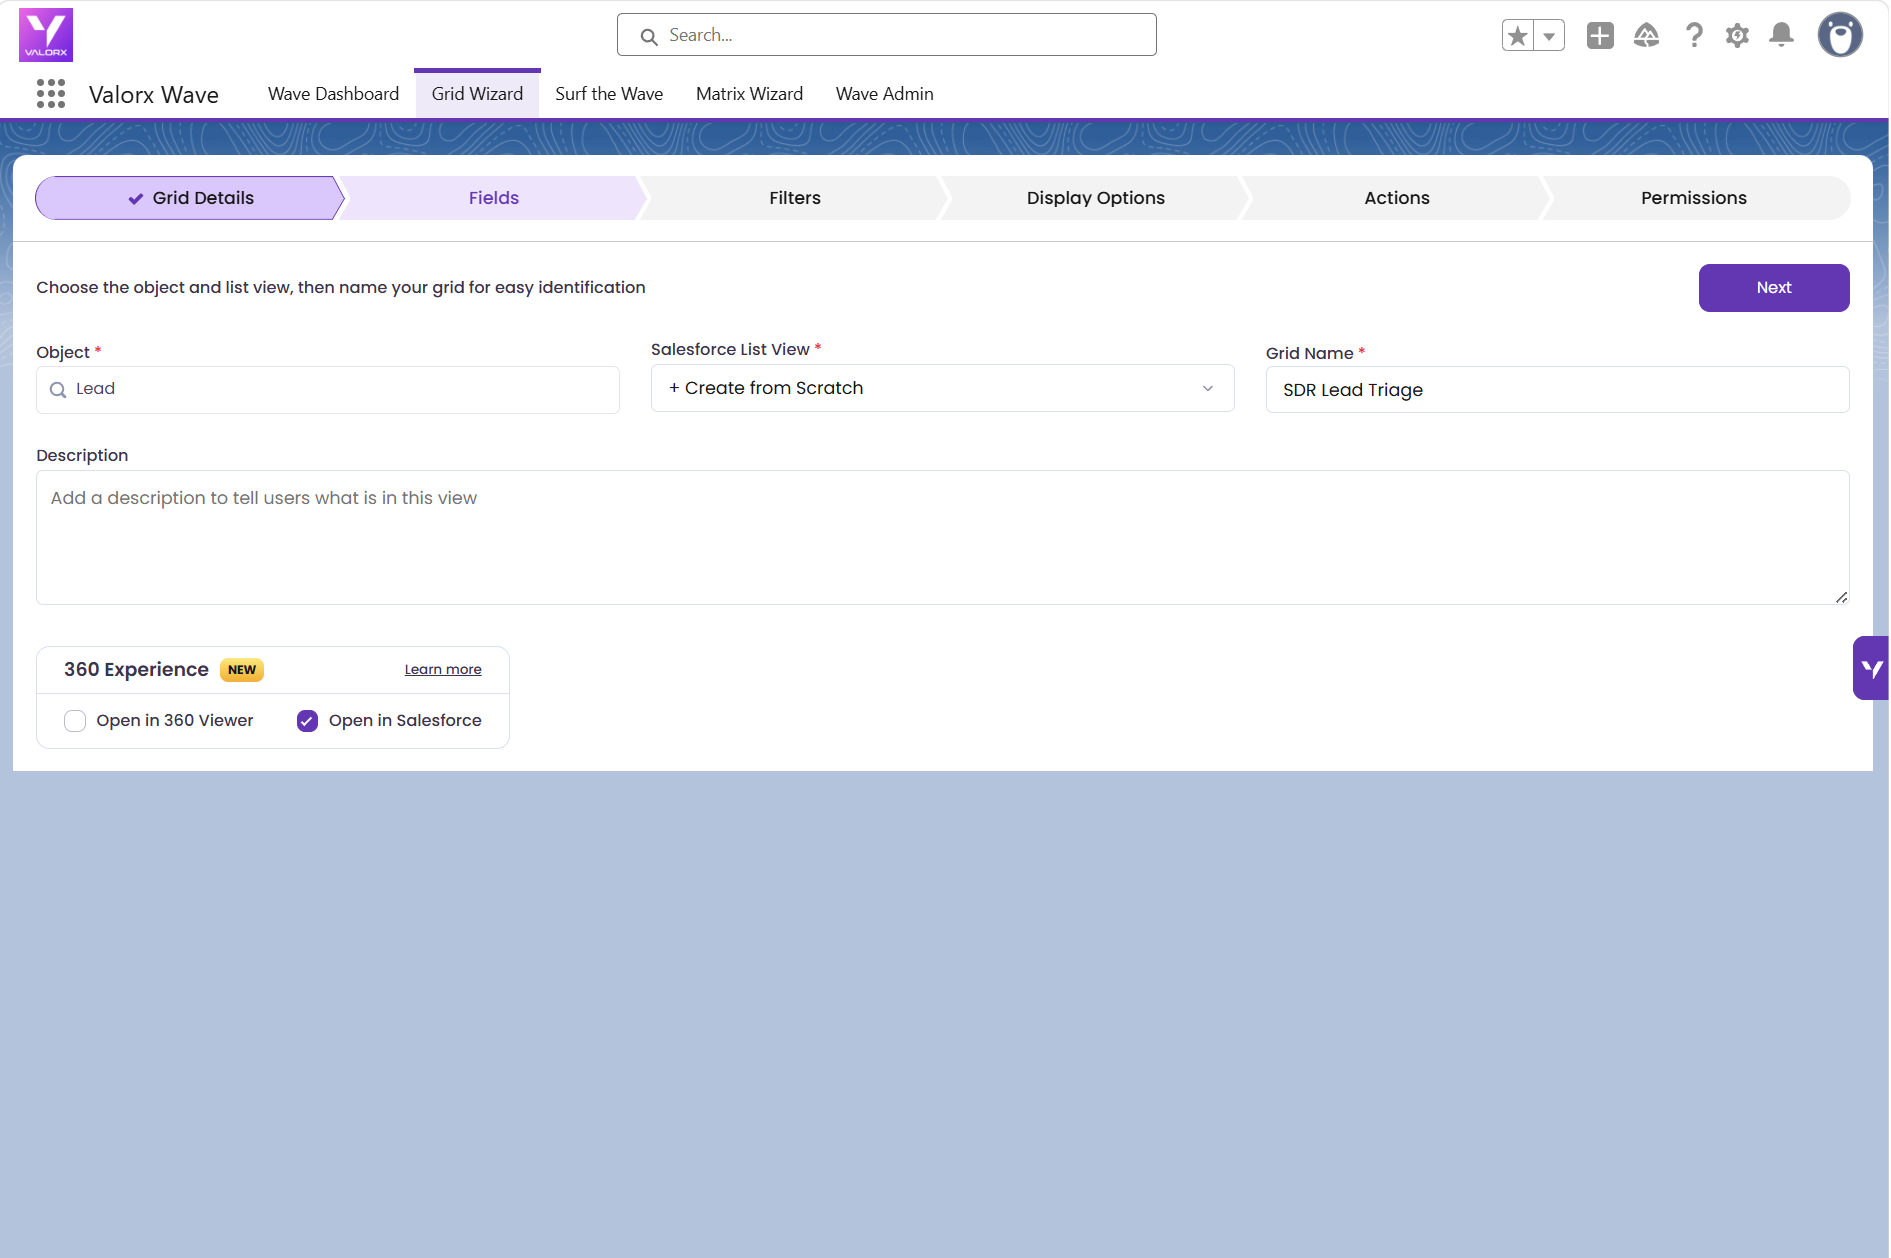
Step 1: Create a new grid on the Lead object
- Open Wave and click Create New Grid.
- Select Lead.
- Choose Create from Scratch.
- Name it SDR Lead Triage and click Next.
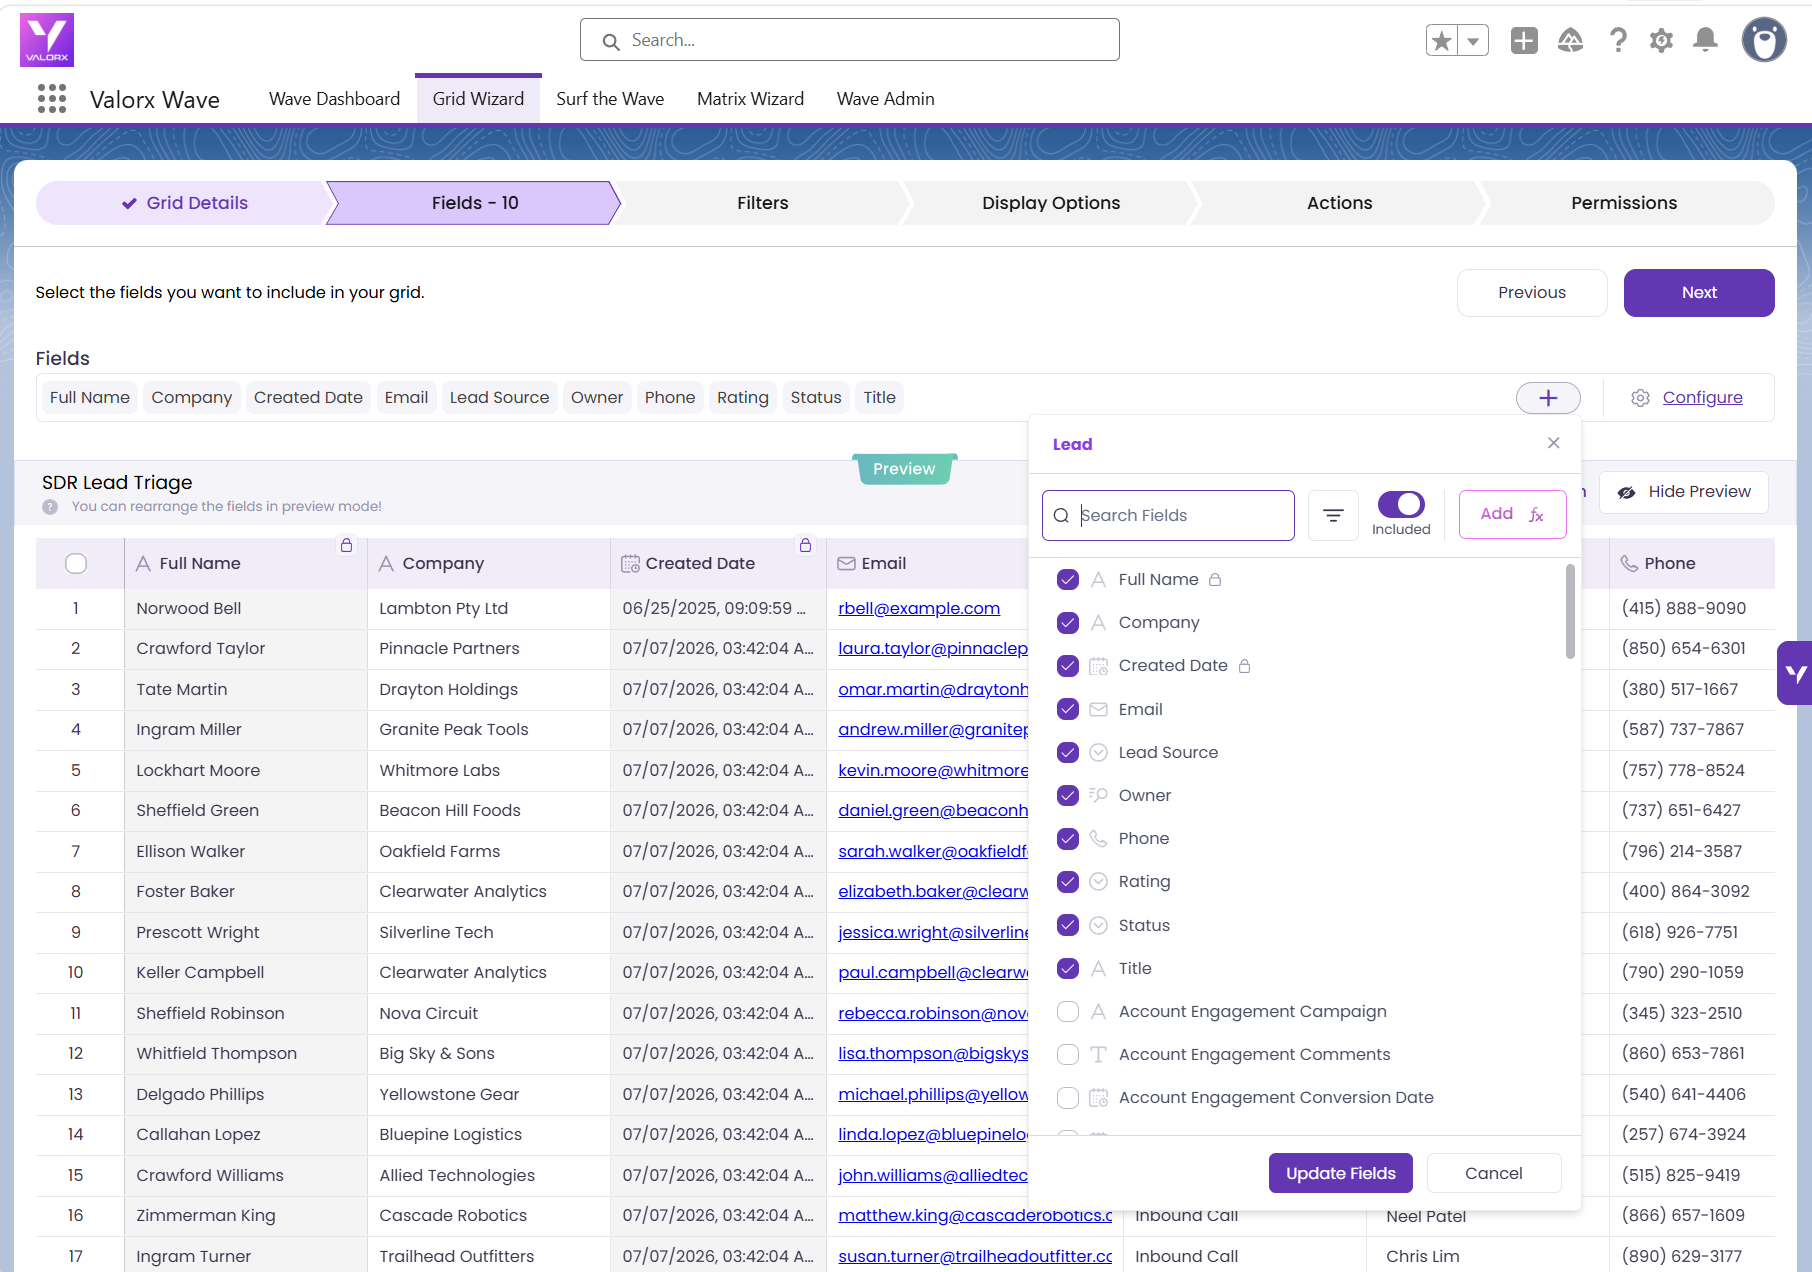
Step 2: Add qualification fields that answer an SDR's three questions
Add: Full Name, Company, Title, Lead Source, Status, Rating, Email, Phone, and Owner.
These nine fields cover everything a rep needs to make the call:
- who is this person (Name, Company, Title),
- are they reachable (Email, Phone), and
- how did they find us (Lead Source, Created Date). Click Next.
Tip: Rating is the field your conditional formatting keys off in Step 4. If your org scores leads with a custom field instead, add that one here and use it in Step 4.
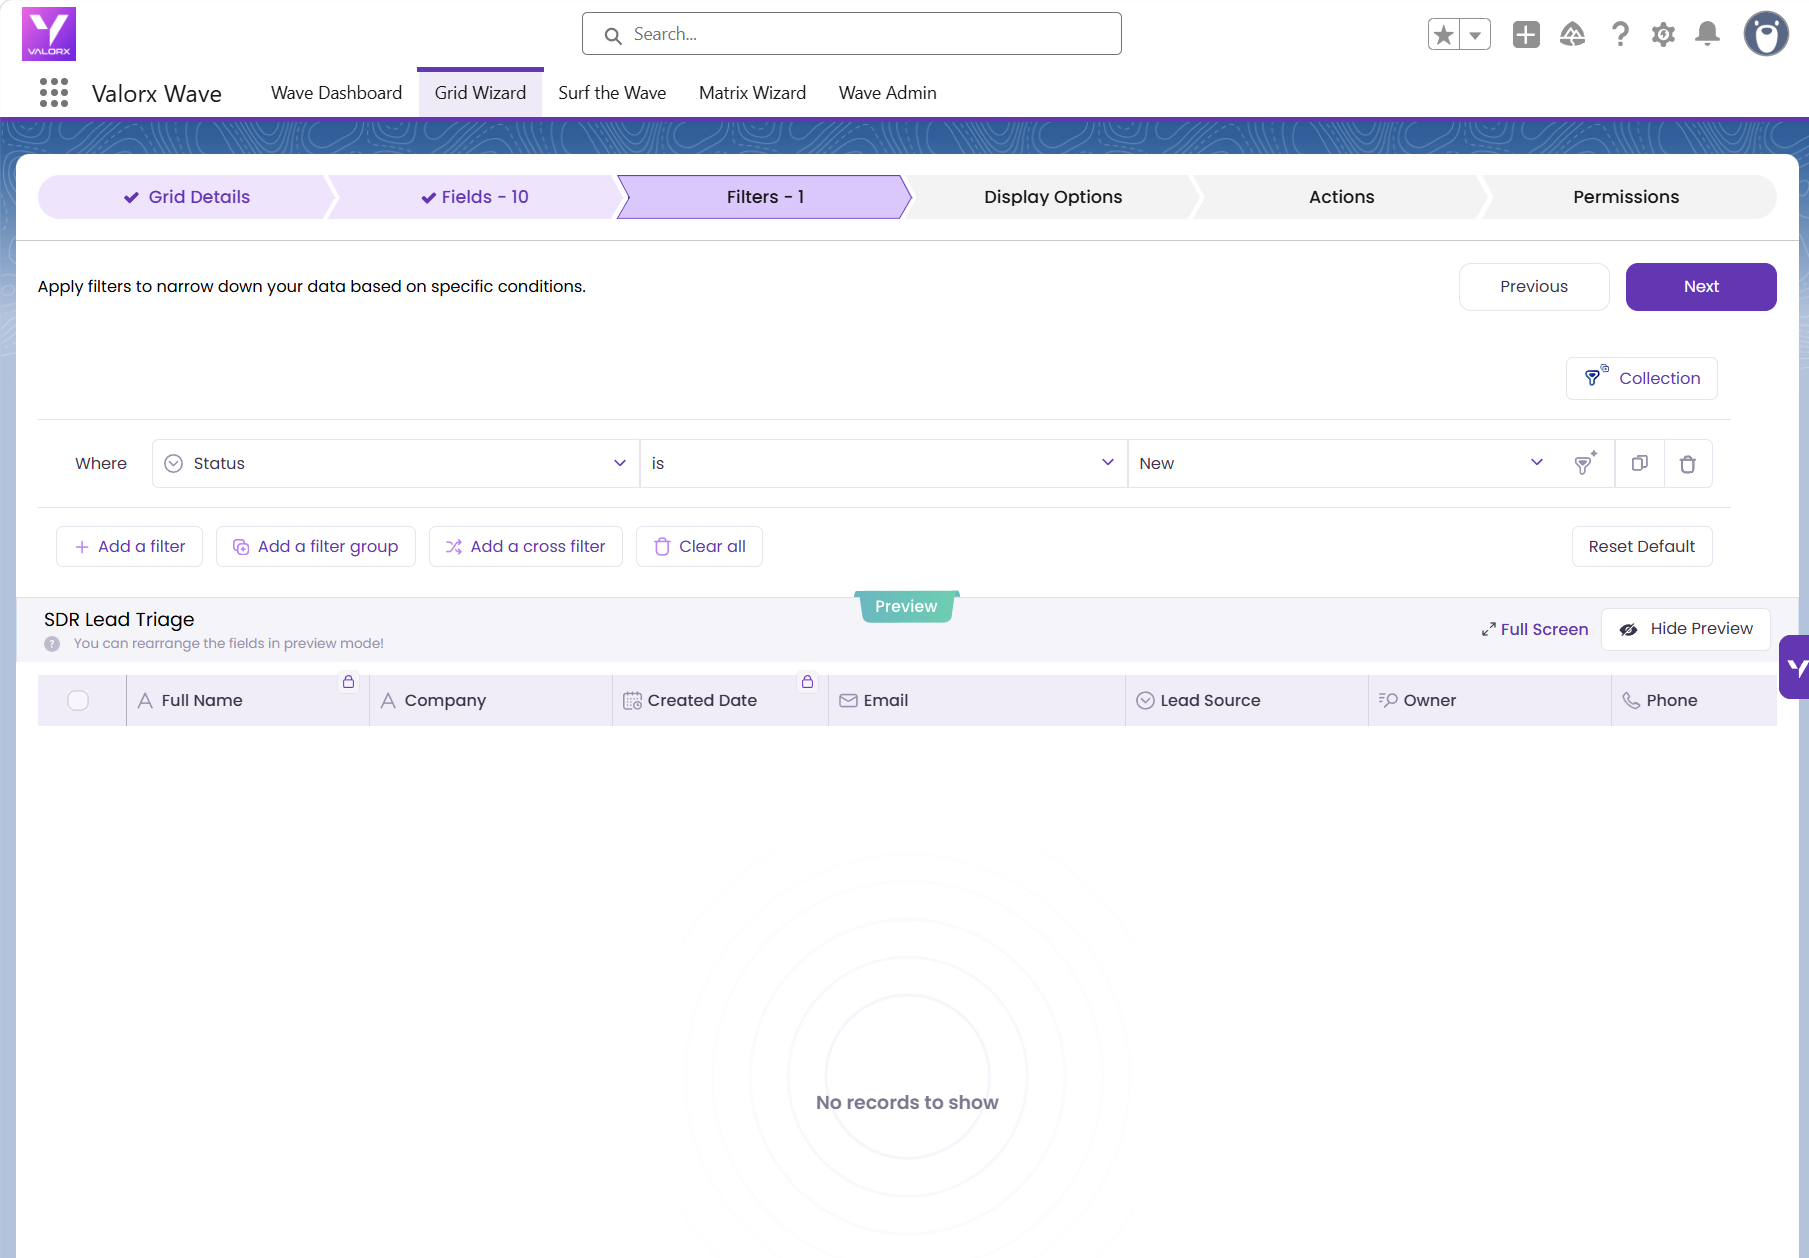
Step 3: Filter to the unworked queue (unqualified leads)
Add the filter: Status = Open – Not Contacted OR Status = New. That leaves only leads nobody has qualified or disqualified yet — the live triage queue.
Tip: Add Created Date = This Week to focus on the freshest leads, or Lead Source = [campaign name] to triage a single event or campaign. If your org uses custom Lead Status values, substitute yours.
Step 4: Add conditional formatting for lead scoring
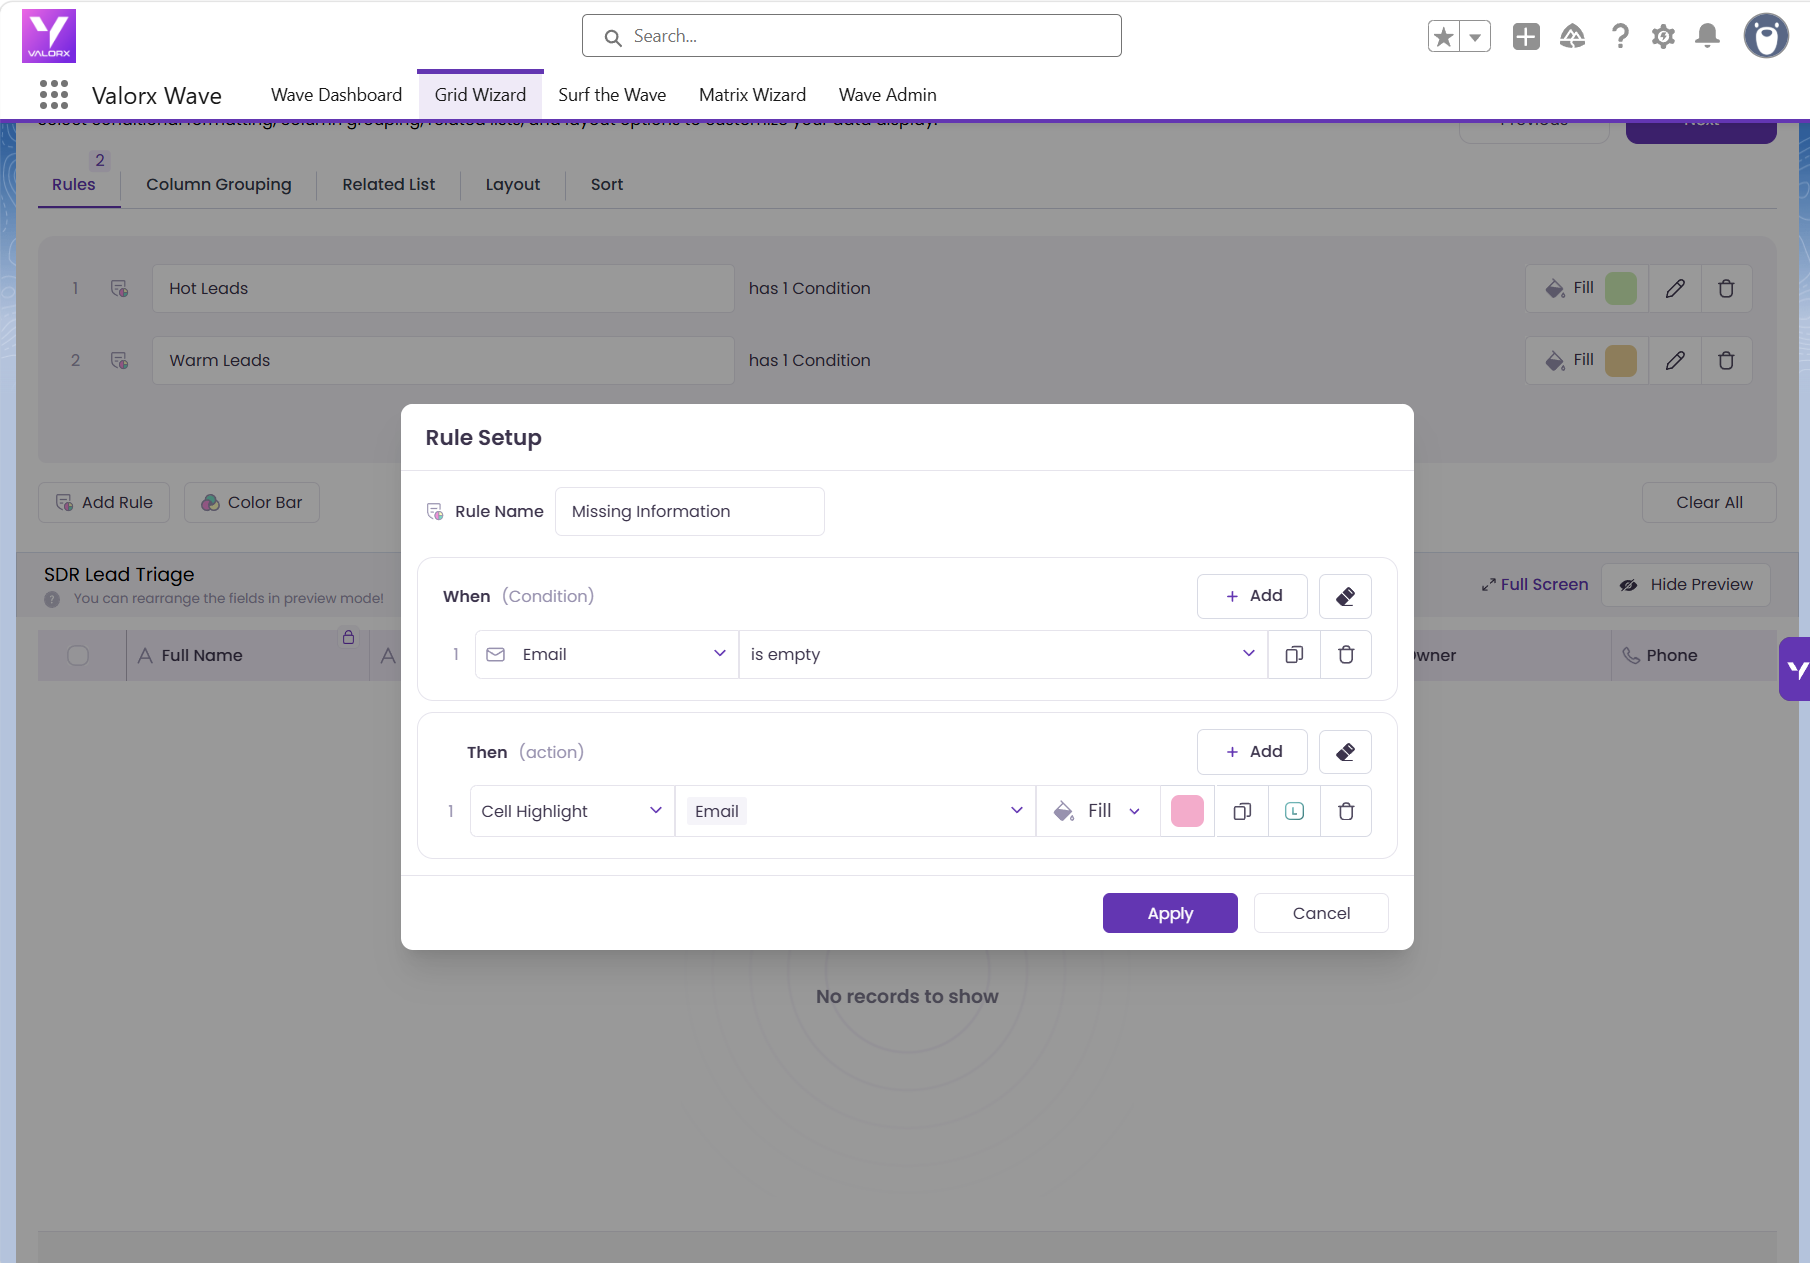
Open the Rules tab under Display Options and add three rules:
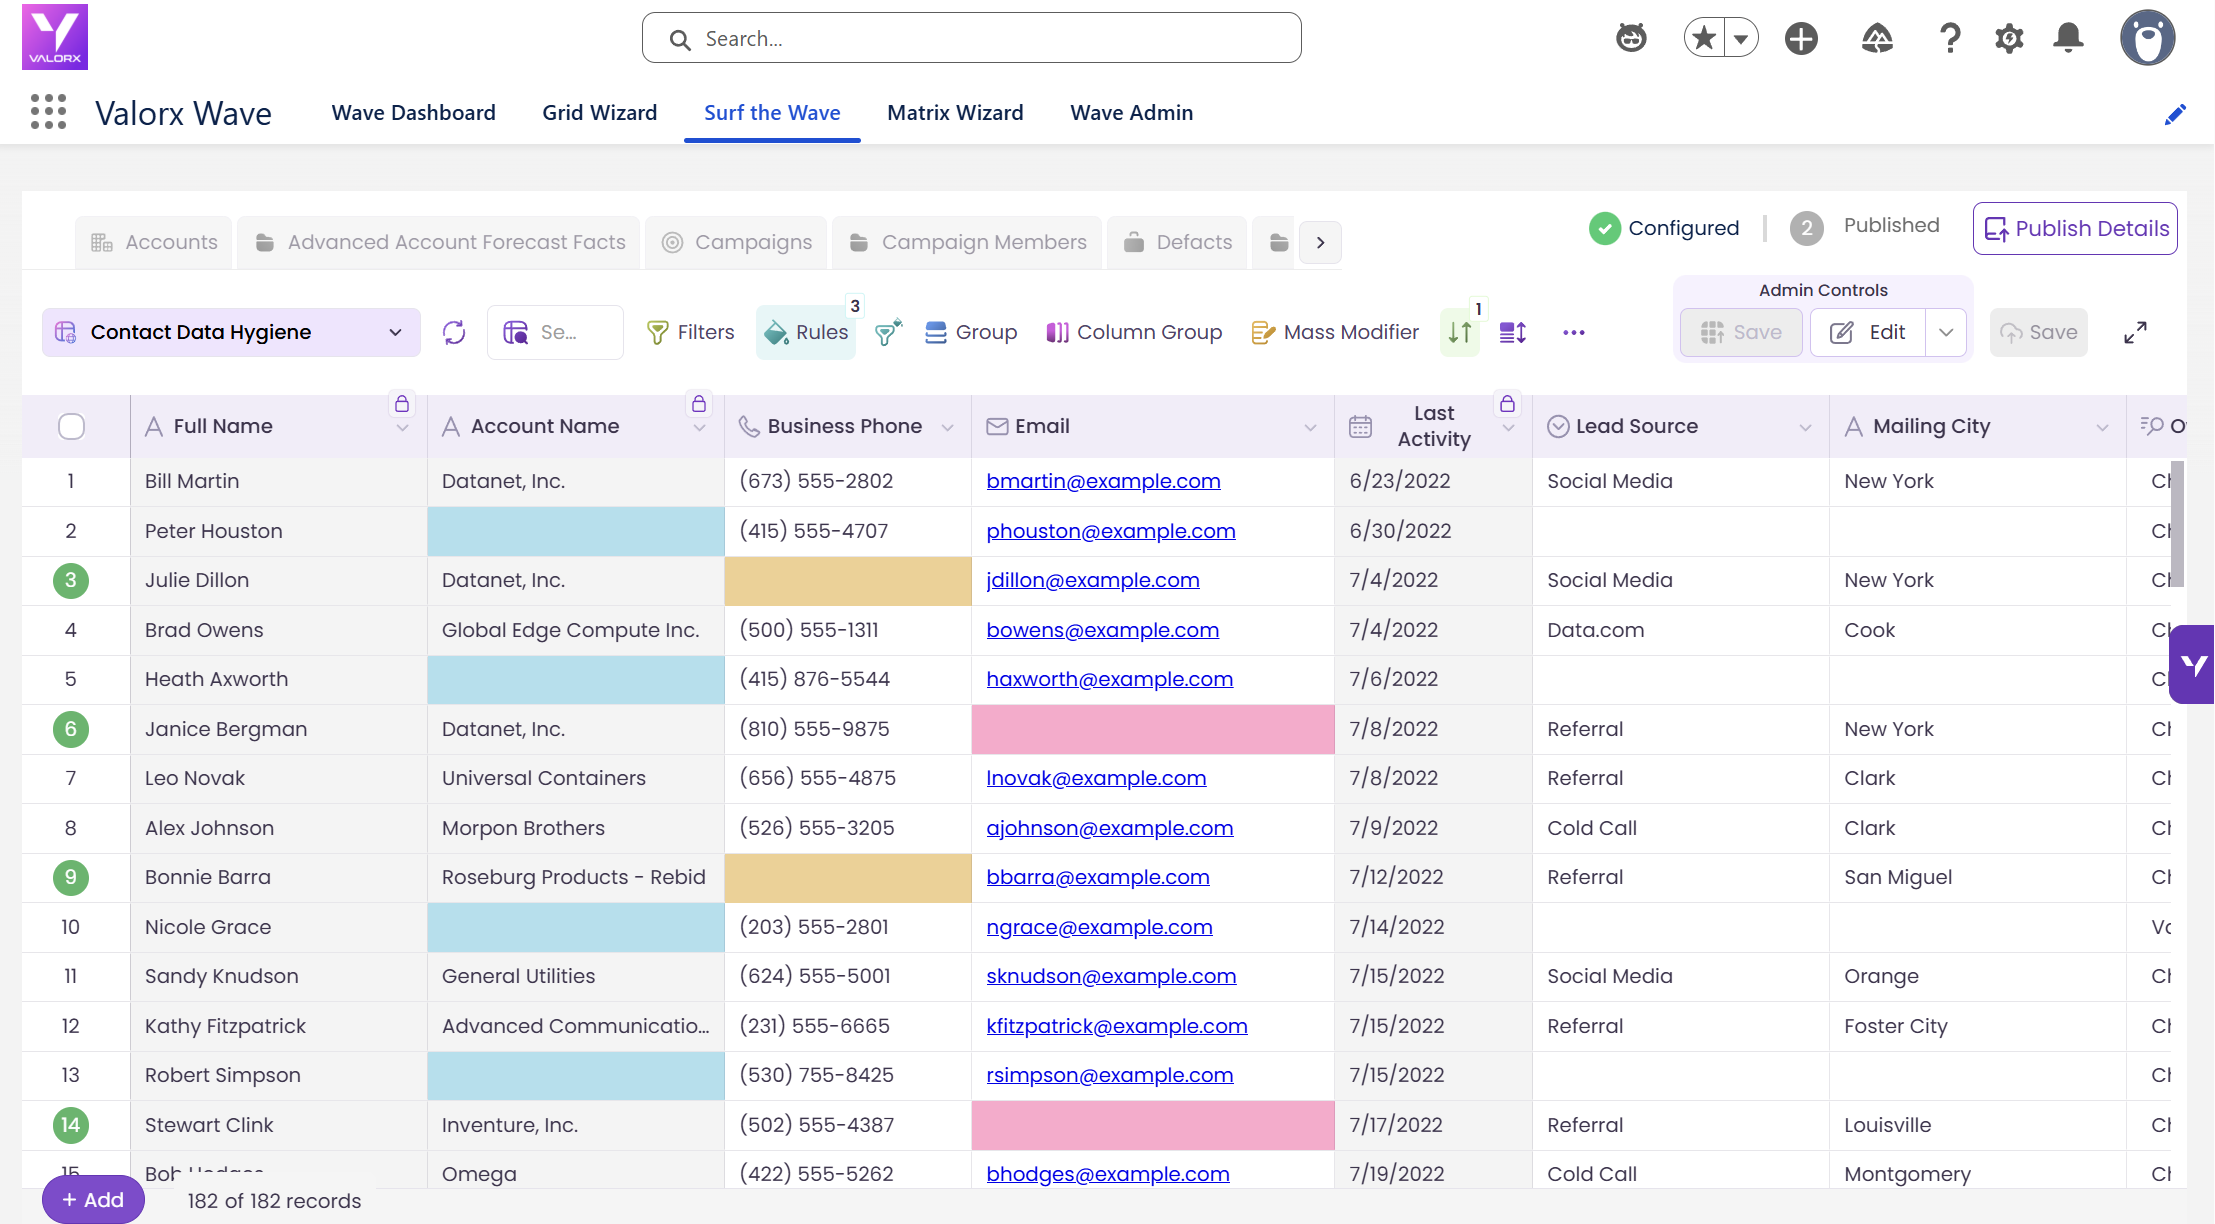
- Hot Leads — when Rating is Hot, fill the row green. Your best prospects. Qualify and assign immediately.
- Warm Leads — when Rating is Warm, fill the row gold/amber. Worth a look. Review these individually.
- Missing Info — when Email is empty, highlight the Email cell in coral/red. Can't contact means can't qualify.
Then open the Sort tab and sort by Rating so the best leads sit at the top. Click Next.
Tip: Rules stack in order. Keep Hot above Warm so a lead only ever picks up one row color.
Step 5: Save and open the queue to review leads
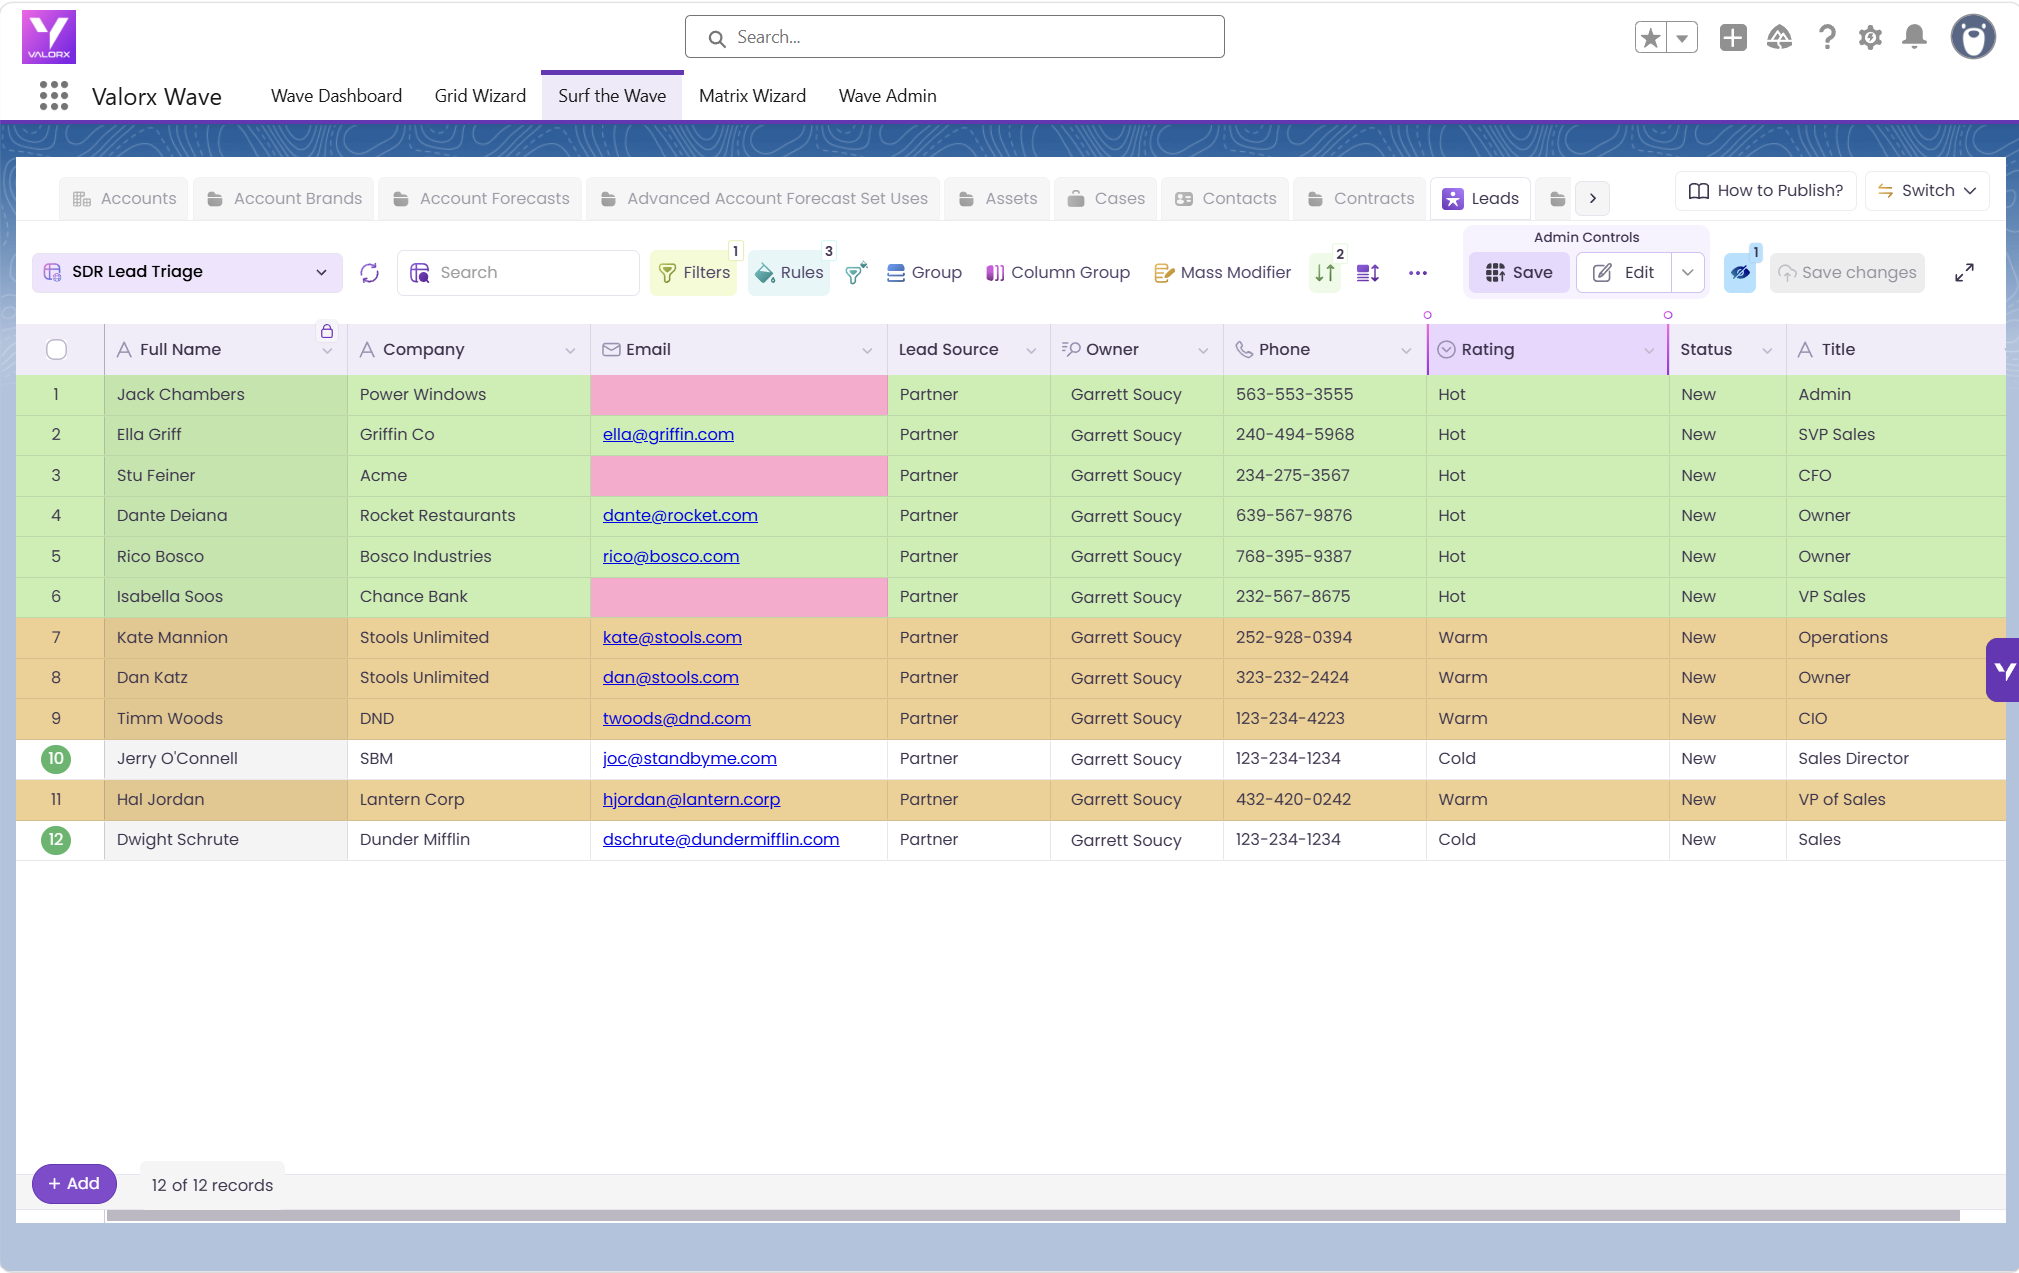
Click Save, then Surf the Wave. Your queue loads color-coded:
- 🟢 Green — Hot. Qualify and assign to an AE.
- 🟠 Amber — Warm. Review individually, then nurture or qualify.
- 🔴 Red — no email. Find one or disqualify.
- ⚪ White — Cold or unrated. Disqualify or route to nurture.
Step 6: Qualify and disqualify leads in bulk
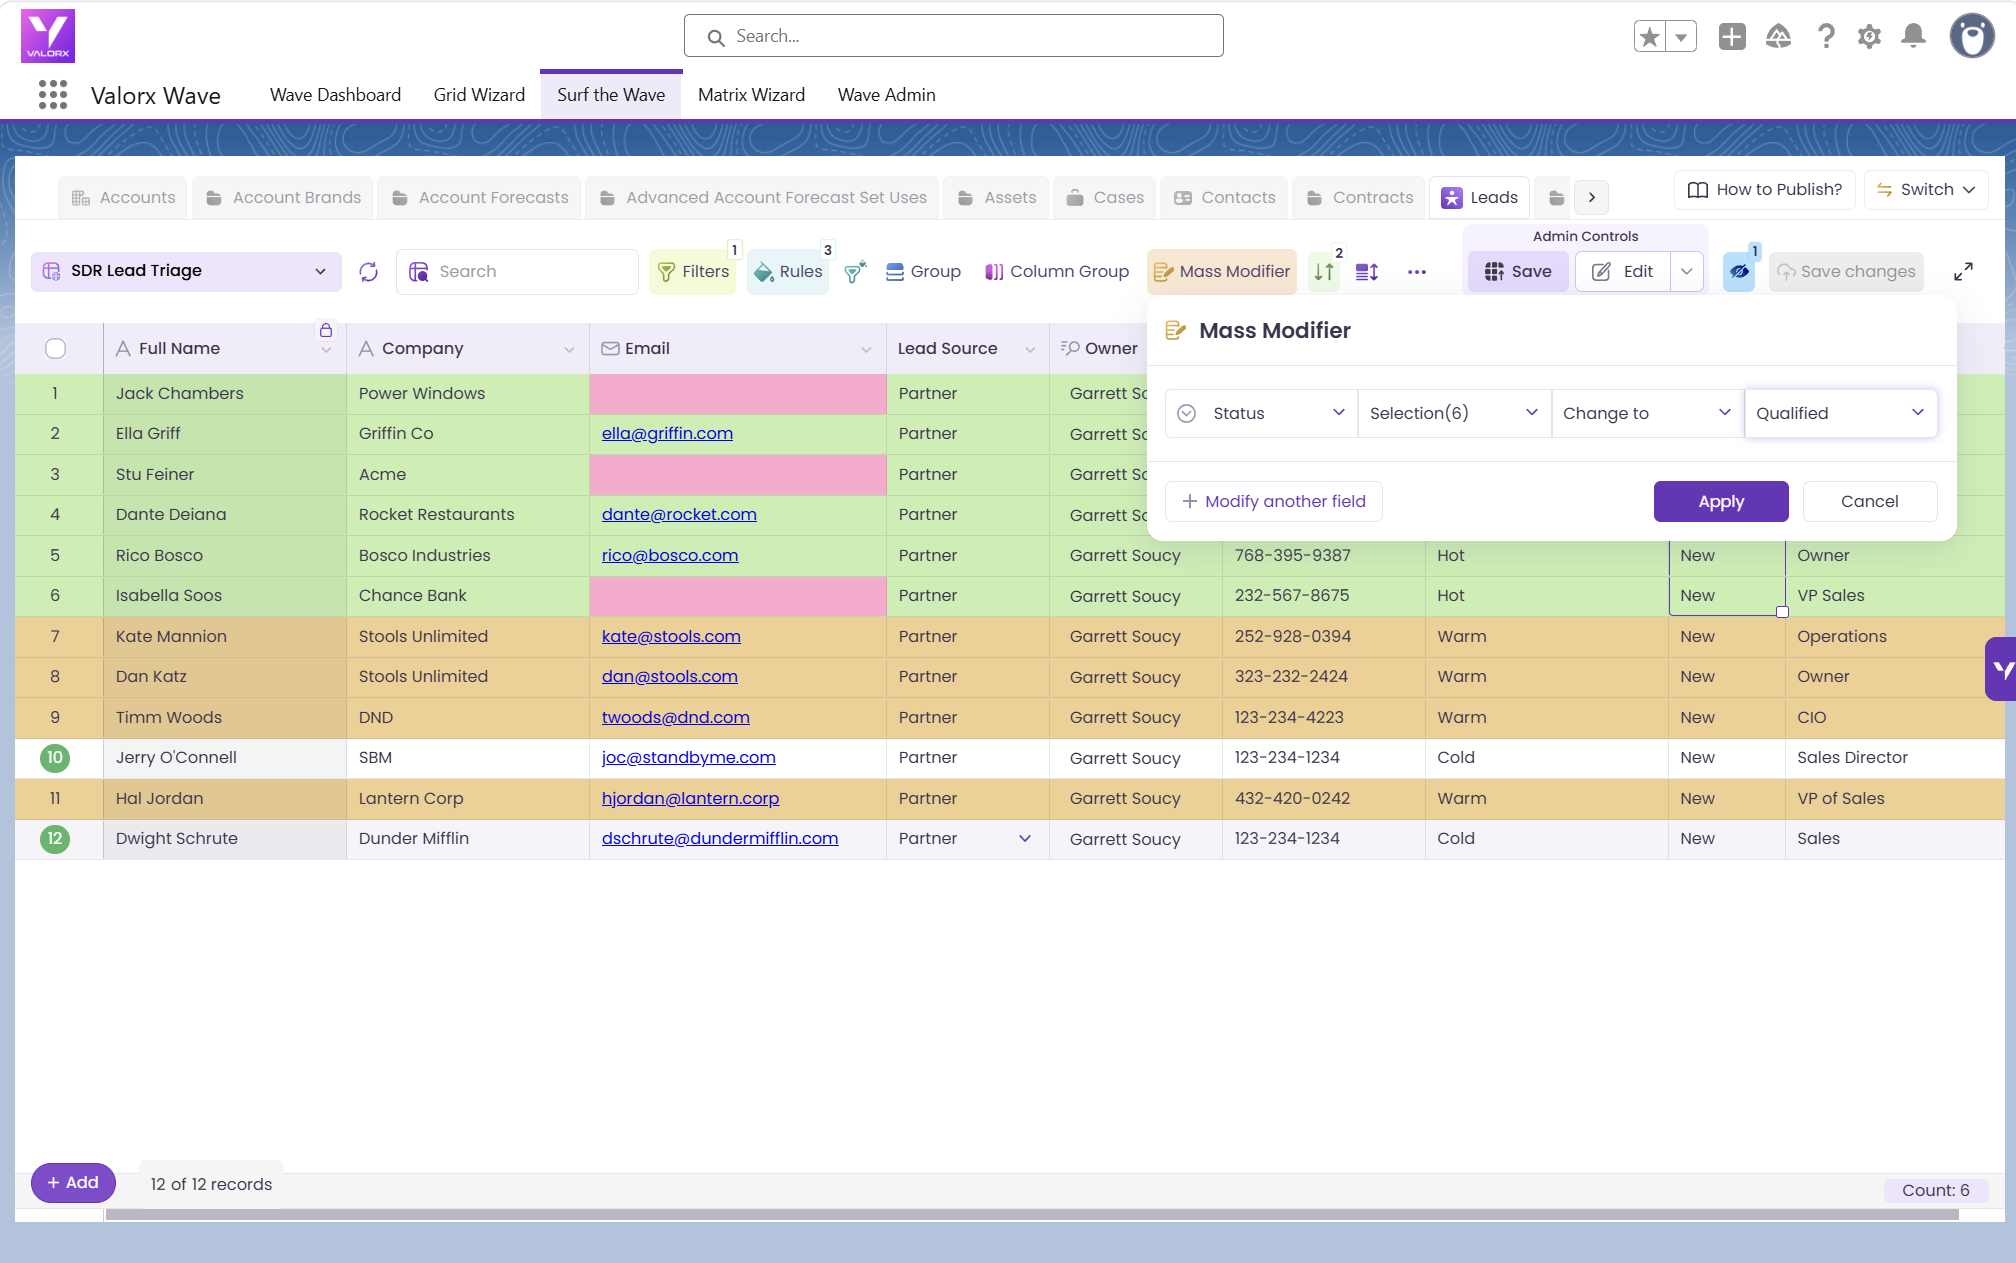
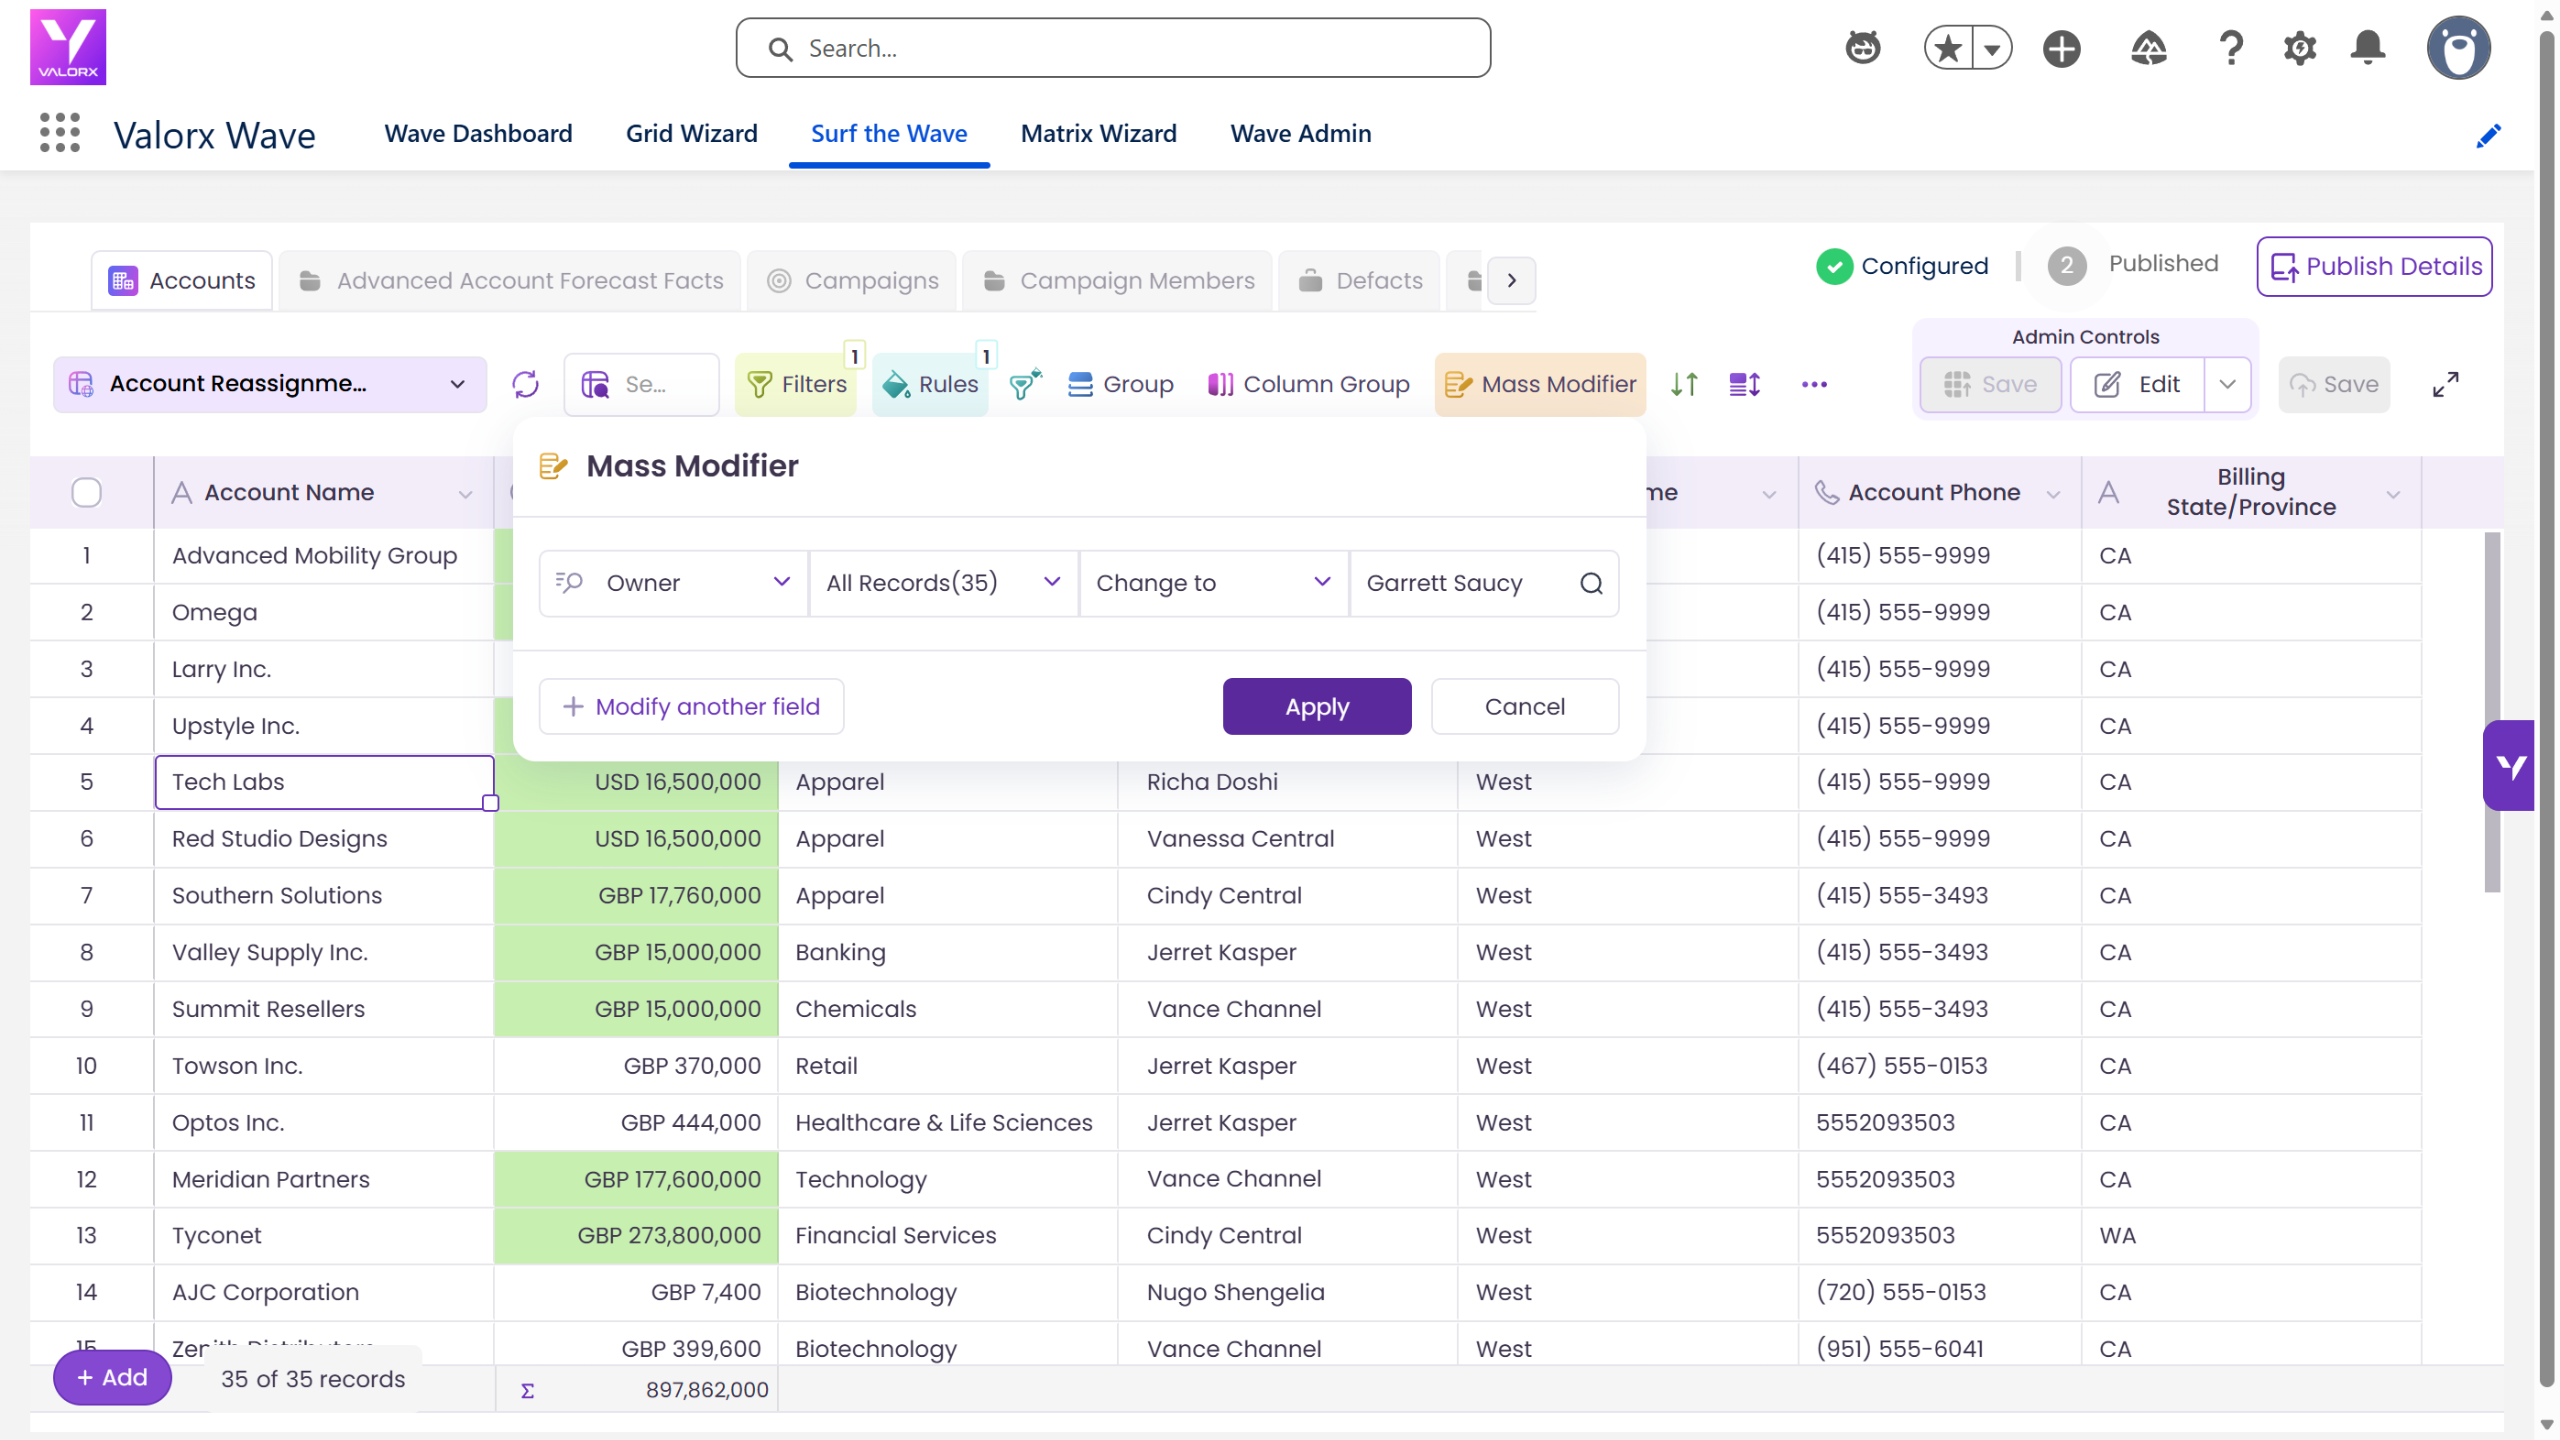
- Qualify the Hot leads. Select all green rows, click Mass Modifier, and set Status to your Qualified value and Owner to the receiving AE in the same action.
- Judge the Warm leads. Scan the amber rows. Does this title have buying authority? Qualify the good ones by clicking straight into the Status cell.
- Clear the rest. Select the remaining white and red rows and Mass Modify Status to your disqualified value.
- Rescue what's worth rescuing. For red rows you recognize, click into the Email and Phone cells and fill them in.
Tip: Work top to bottom — green first for the fast wins, then amber where judgment is needed, then bulk-clear the tail. It matches how SDRs already triage.
Note: Mass Modifier can set more than one field at a time — add Owner alongside Status to qualify and assign to an AE in a single action.
Step 7: Save and hand off
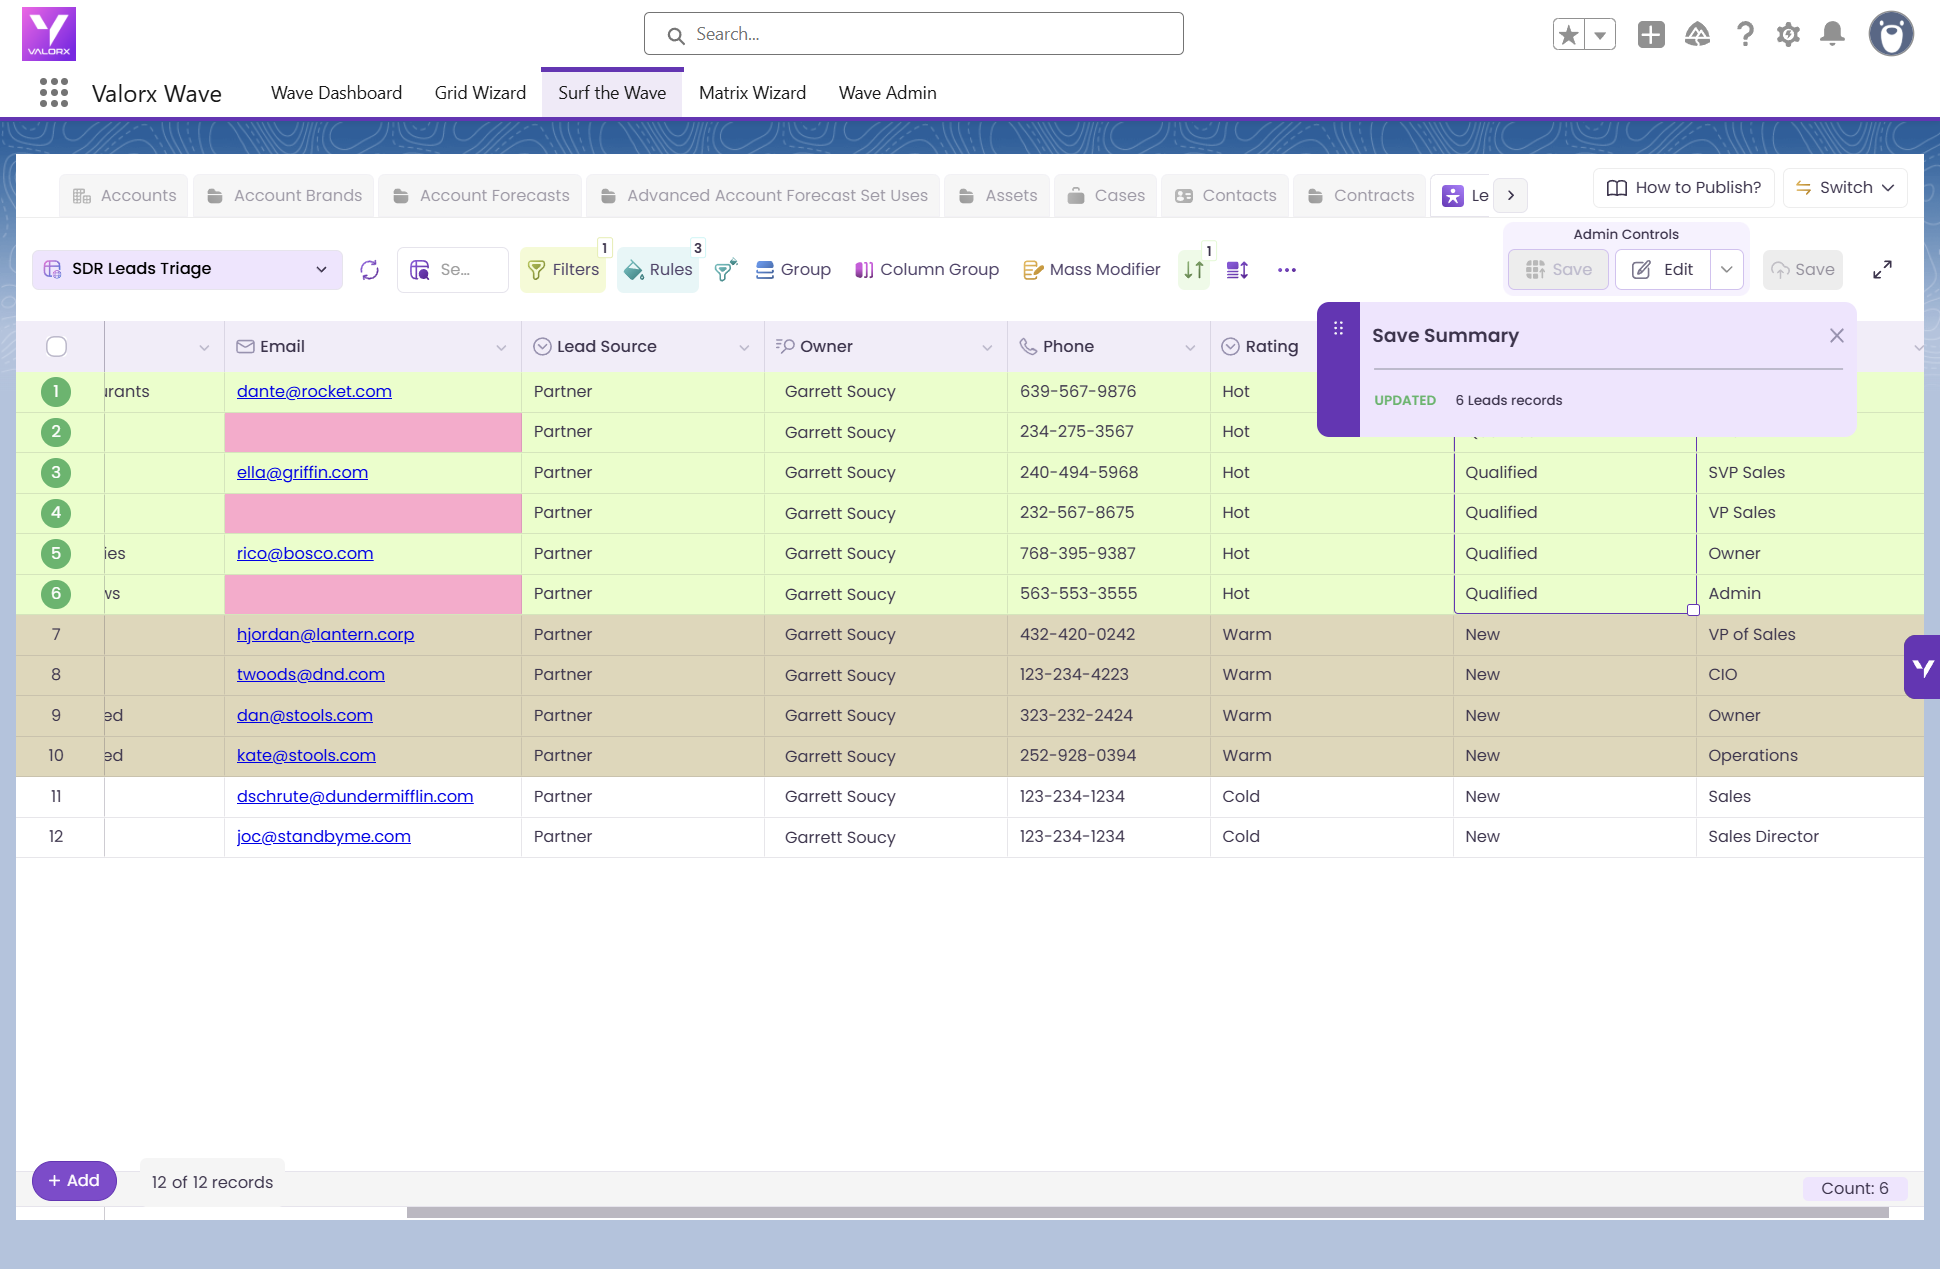
Click Save to push every change to Salesforce. The Save Summary confirms how many records were updated.
Refresh and the qualified leads drop out of the grid, because your filter only holds leads with Status = New. AEs pick up their new leads through your normal Salesforce assignment or notification setup, and the disqualified records are out of the pipeline, so your funnel reporting stays clean.
Tip: Share the grid with your other SDR managers so everyone qualifies against the same view, and run it as a standing morning routine.
Common mistakes to avoid
- Filtering on Rating instead of Status. Rating drives the colors; Status drives what stays in the queue. Filter on Status or your triaged leads never leave the view.
- Skipping the Owner field in Mass Modifier. Qualifying without assigning creates a pile of qualified leads nobody owns.
- Formatting on a scoring field you don't actually maintain. If Rating is blank across your org, every row renders white. Fix the scoring first.
- Forgetting to hit Save. Grid edits are staged until you save them back to Salesforce.
Lead qualification in Salesforce: before and after
Frequently asked questions
Can you bulk update Lead Status in Salesforce?
Not natively beyond the limits of an inline-editable list view. Valorx Wave adds a Mass Modifier that sets a field value across every row you select — hundreds of leads in one action — and writes the change back to Salesforce when you save.
Does Wave respect our Salesforce security settings?
Yes. Wave runs inside Salesforce and enforces your profiles, sharing rules and field-level security. Users only see and edit the leads and fields they already have access to.
Can I convert leads in bulk from the grid?
This grid covers qualification and assignment — getting the right leads to the right AE with the right Status. Conversion itself still runs through your standard Salesforce lead conversion process once an AE picks the lead up.
Do I need a Salesforce admin to build this?
You need a Designer or Admin role in Wave, which is separate from your Salesforce admin profile. If you have it, you can build this grid yourself in about five minutes without filing a ticket.
What if our org uses custom Lead Status values?
Substitute them. The grid filters and Mass Modifier read whatever picklist values your org has configured, including custom qualified and unqualified stages.
How is this different from a Salesforce list view?
A list view shows leads but limits how much you can edit at once and offers no conditional formatting. A Wave grid gives you spreadsheet-style editing, row-level color coding by Rating, and multi-field bulk updates in a single action.

Choose the workflow you need:
Try Wave in browser Extension

Try Wave in Salesforce

Try Fusion In Excel

Enhancing Salesforce for industry leaders