How to Publish an App in Valorx Wave
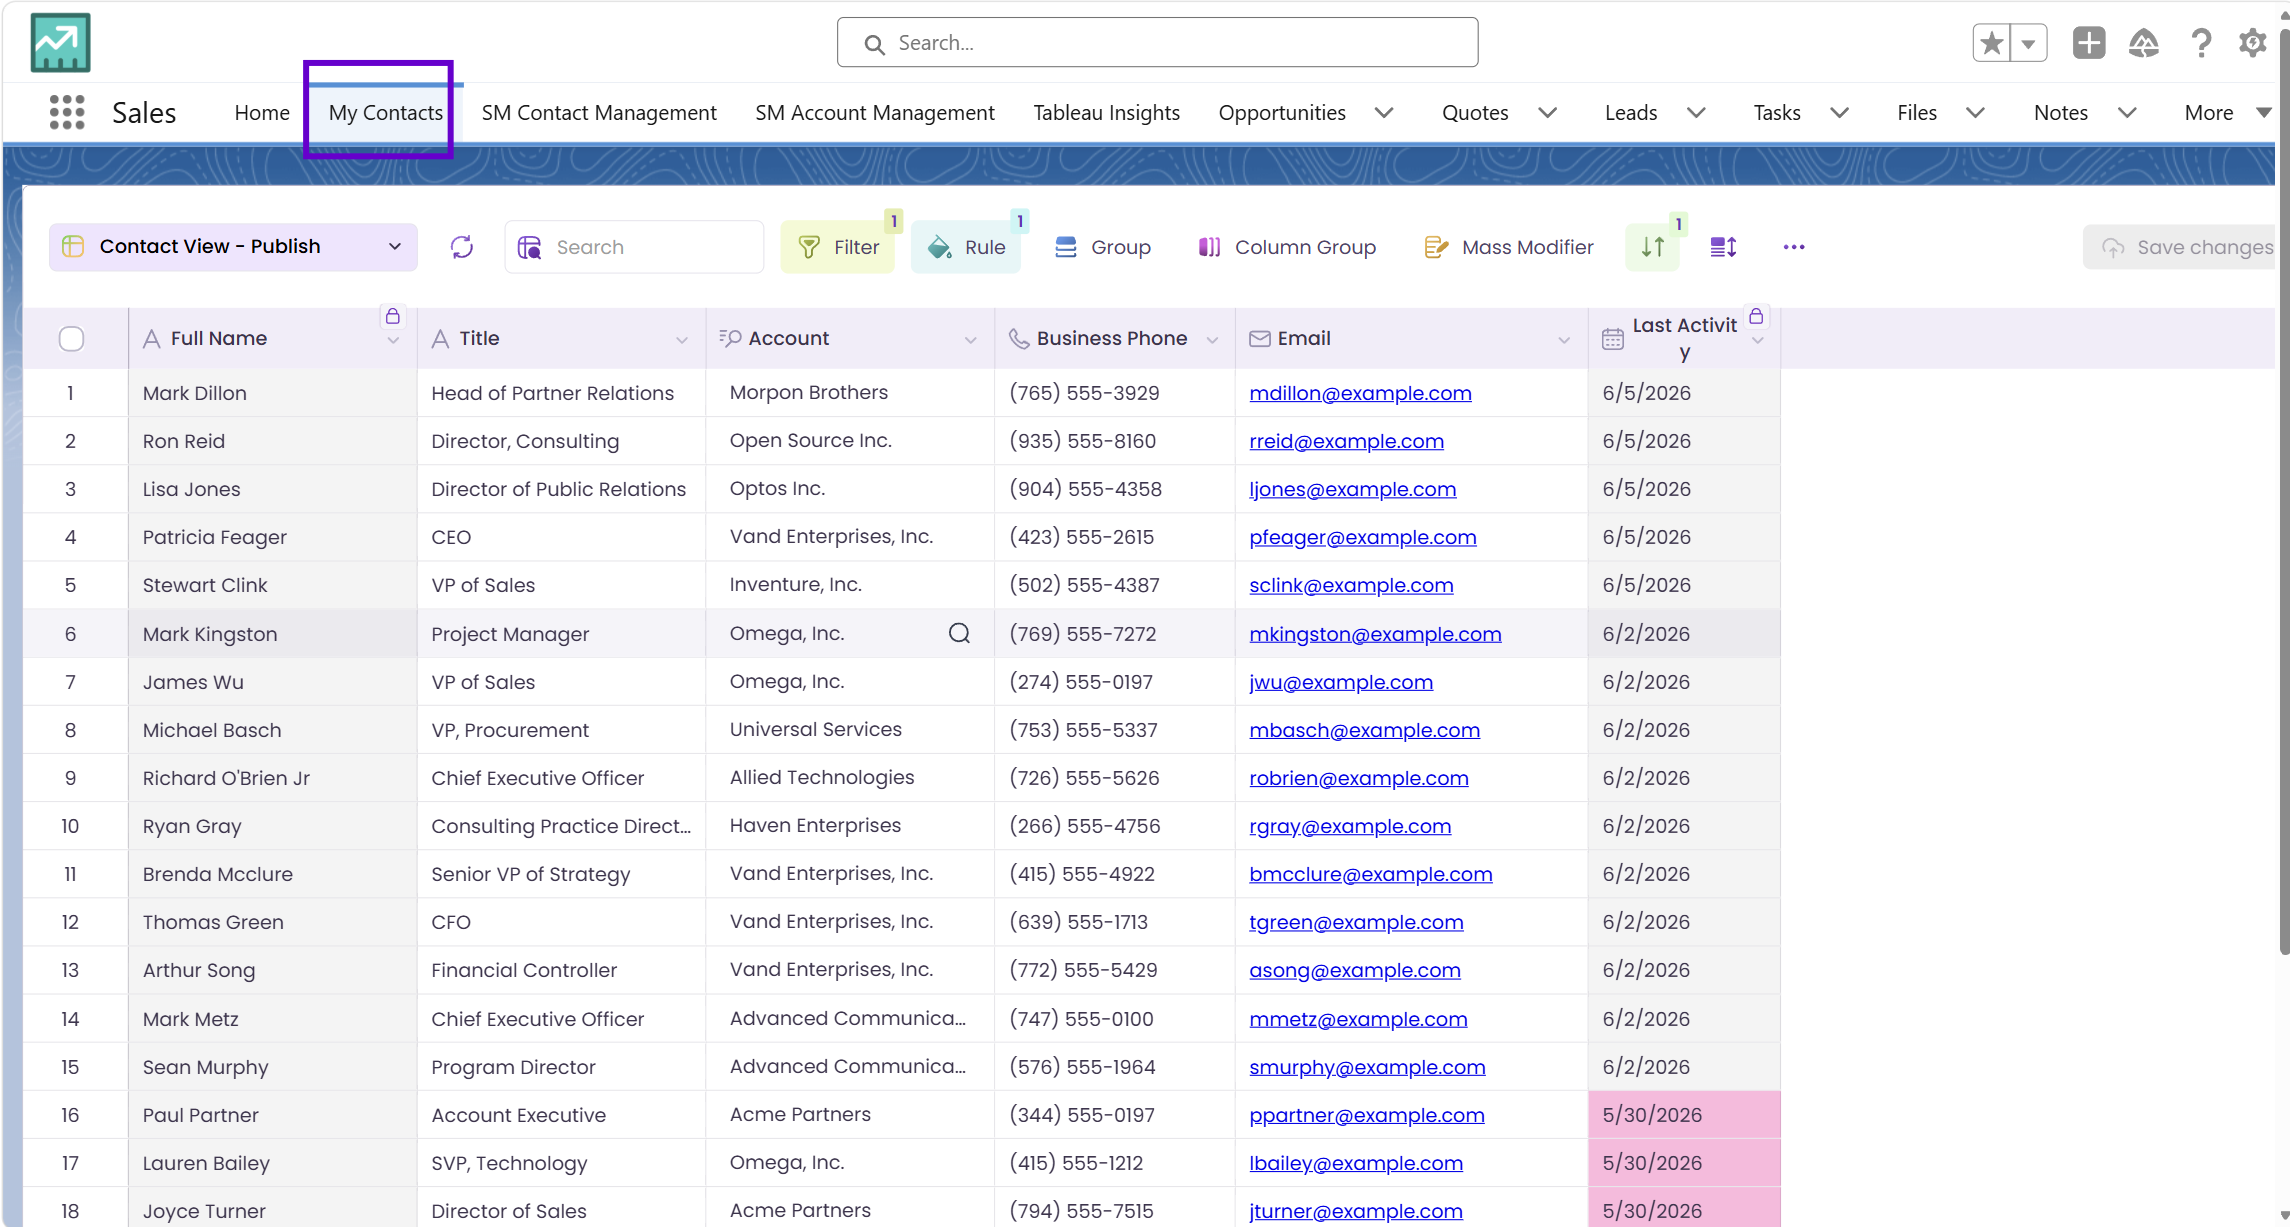
Here’s what you’re building
Before we walk through the steps, here’s the end result. This is what your team will see after you publish.
Time: ~15 minutes | Role: Designer or Admin | Requires: Wave Embedded + an existing Grid
Prerequisites
- Valorx Wave embedded package installed in your Salesforce org
- A Grid already created and tested in Wave (if you don’t have one yet, follow the “Making Your First Grid” guide first)
- A Designer or Admin role in Wave
- Permission to edit Lightning Pages in Salesforce (System Administrator or delegated page layout access)
Publish your Grid to a Lightning page
We’ll walk through the Sales Manager scenario above: creating an App Page with an Contacts grid and adding it as a tab in the Sales app. The same steps apply to any grid and any app.
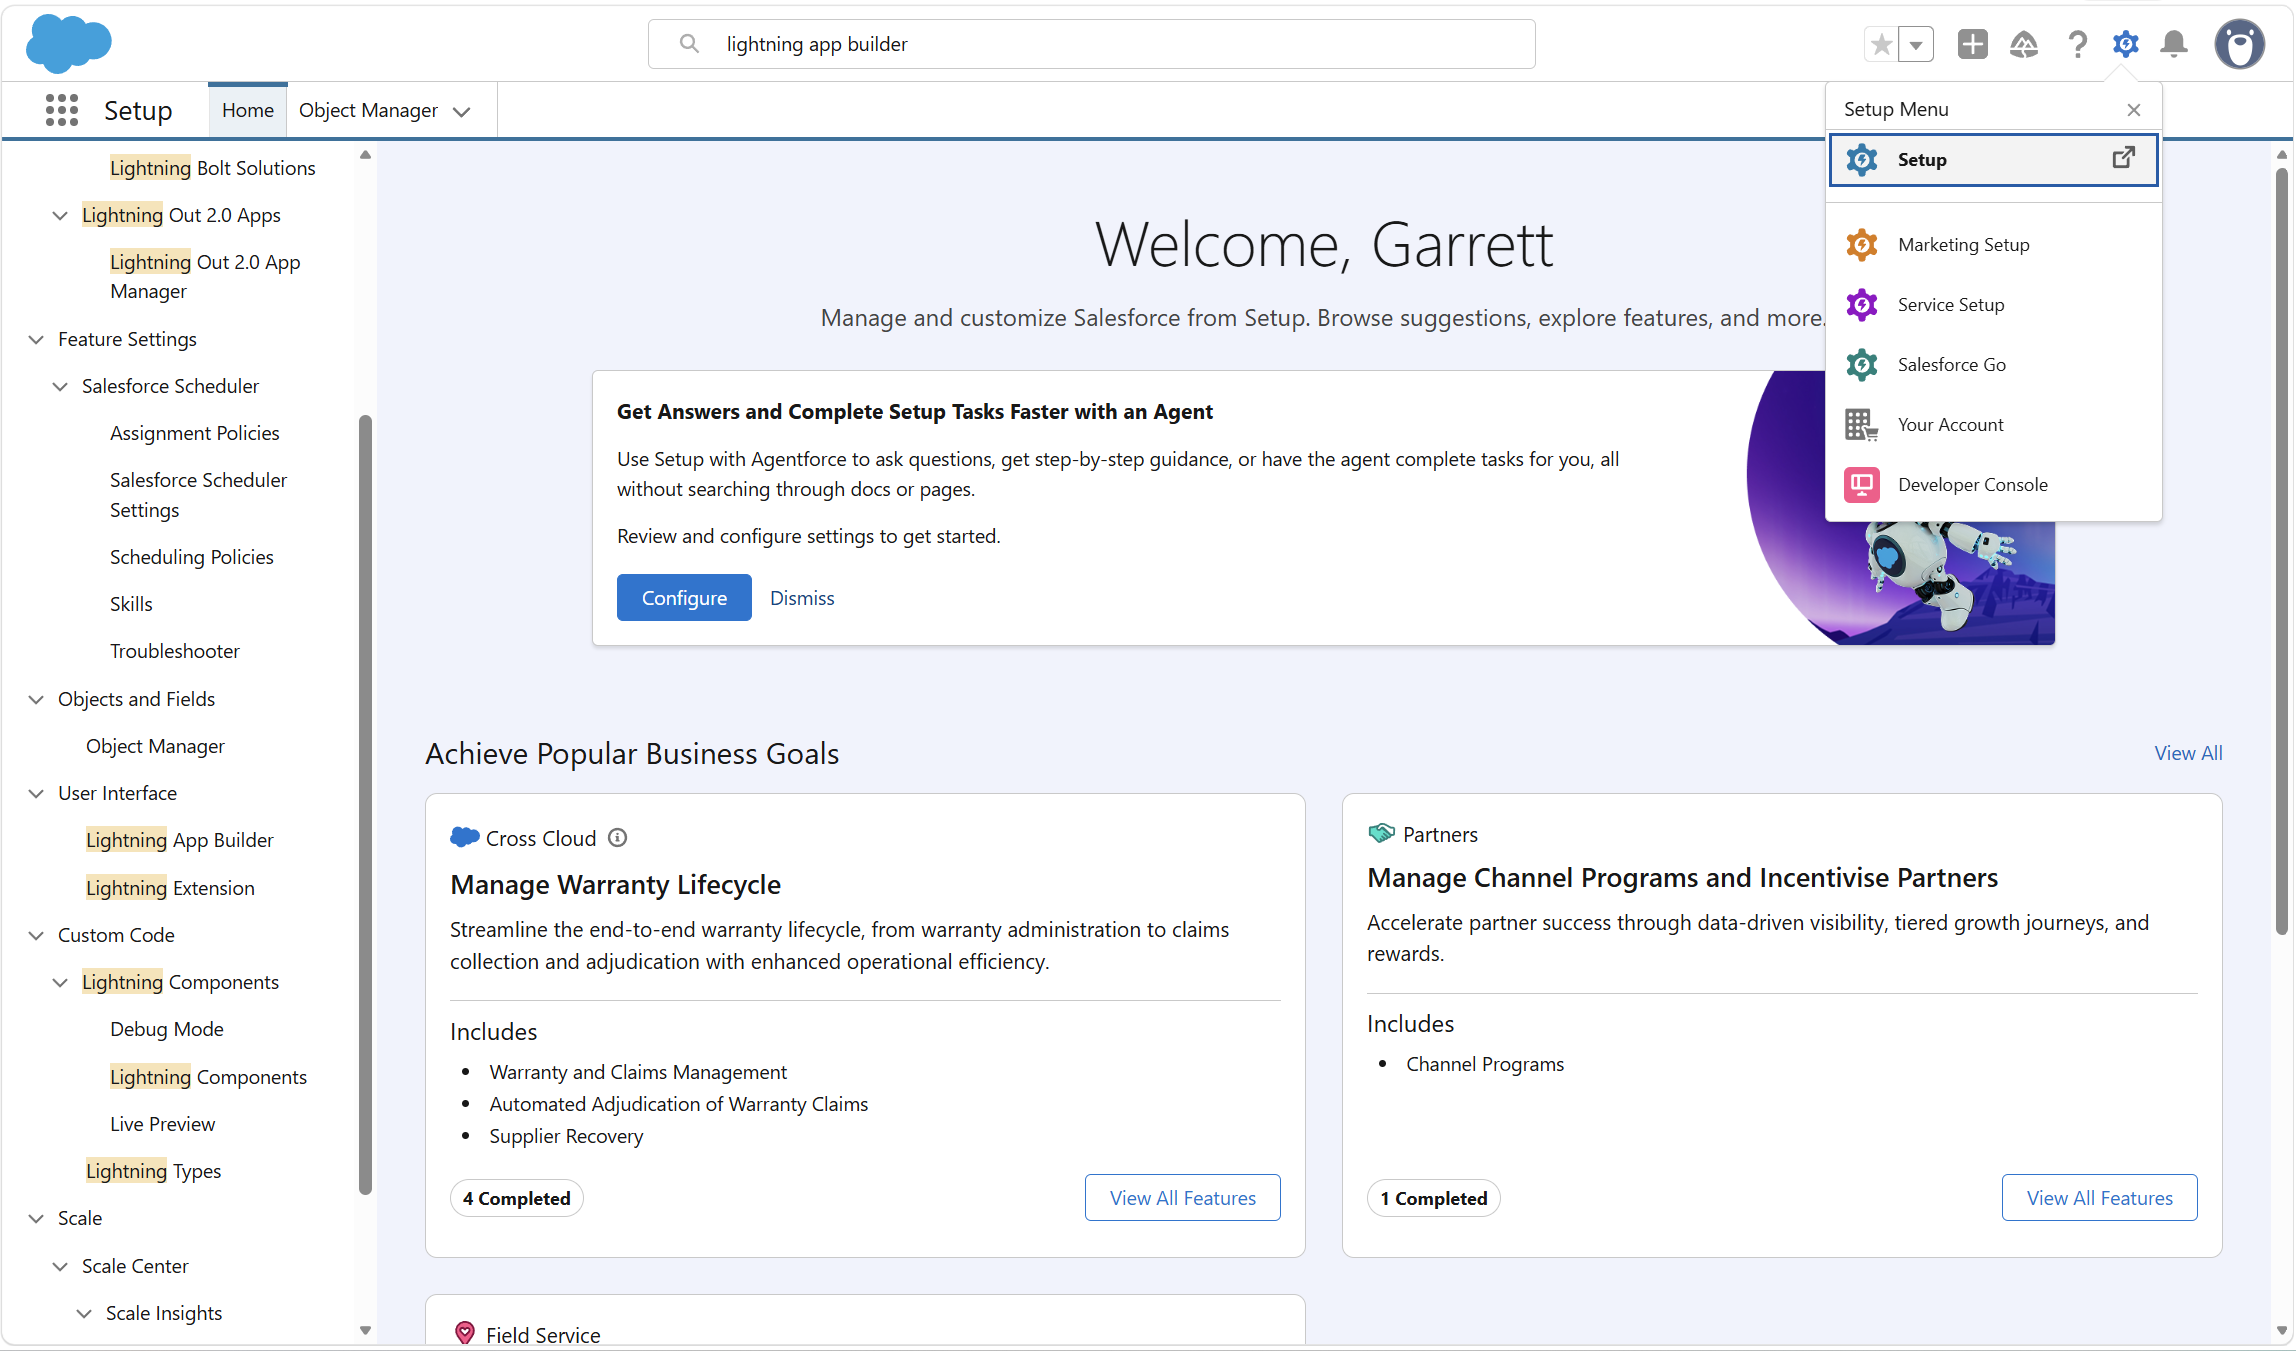
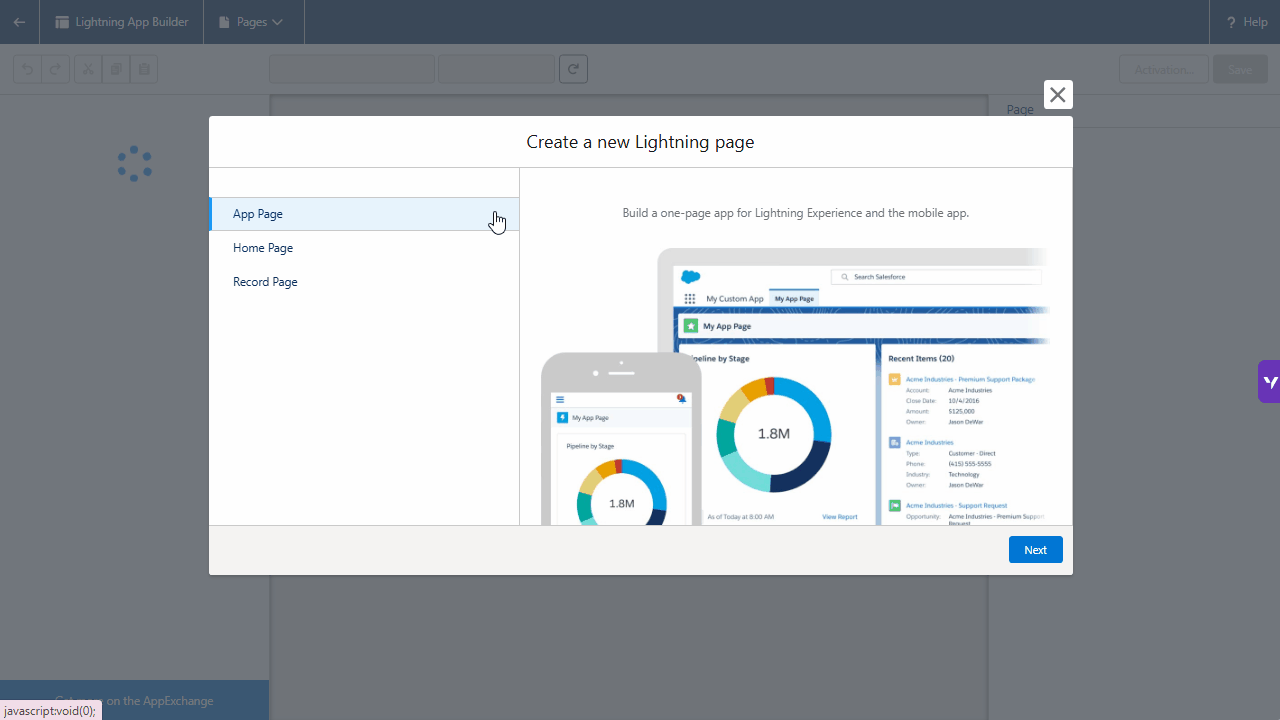
In Salesforce Setup, type 'Lightning App Builder' in the Quick Find bar and click it.
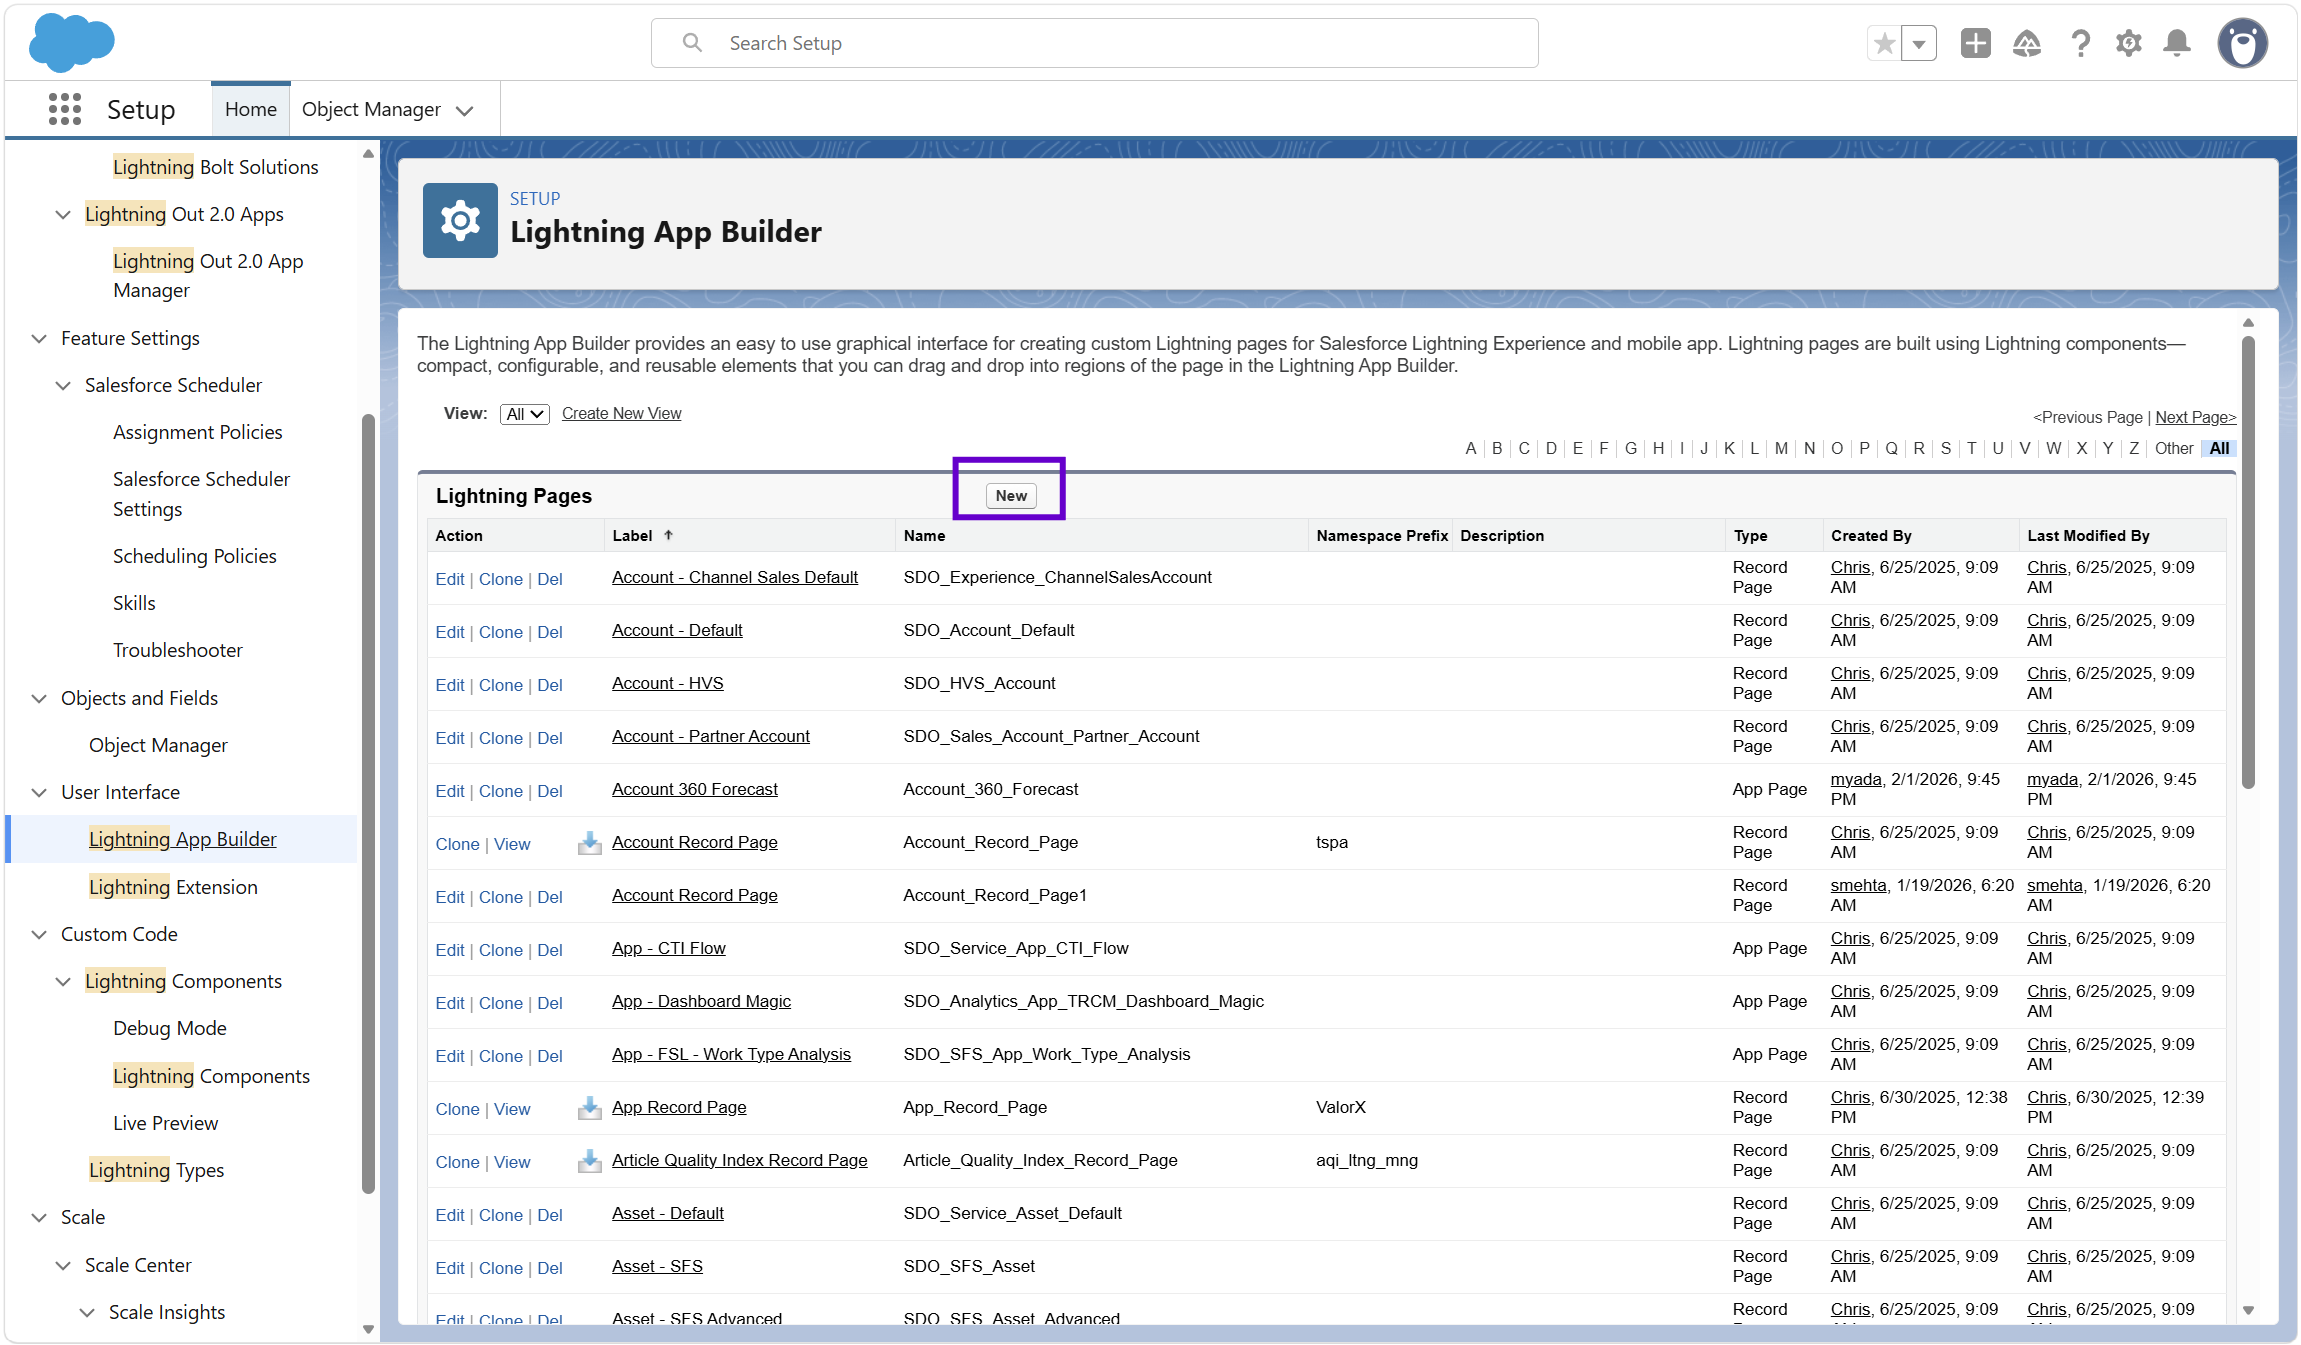
On the Lightning App Builder home screen, click New to create a new page.
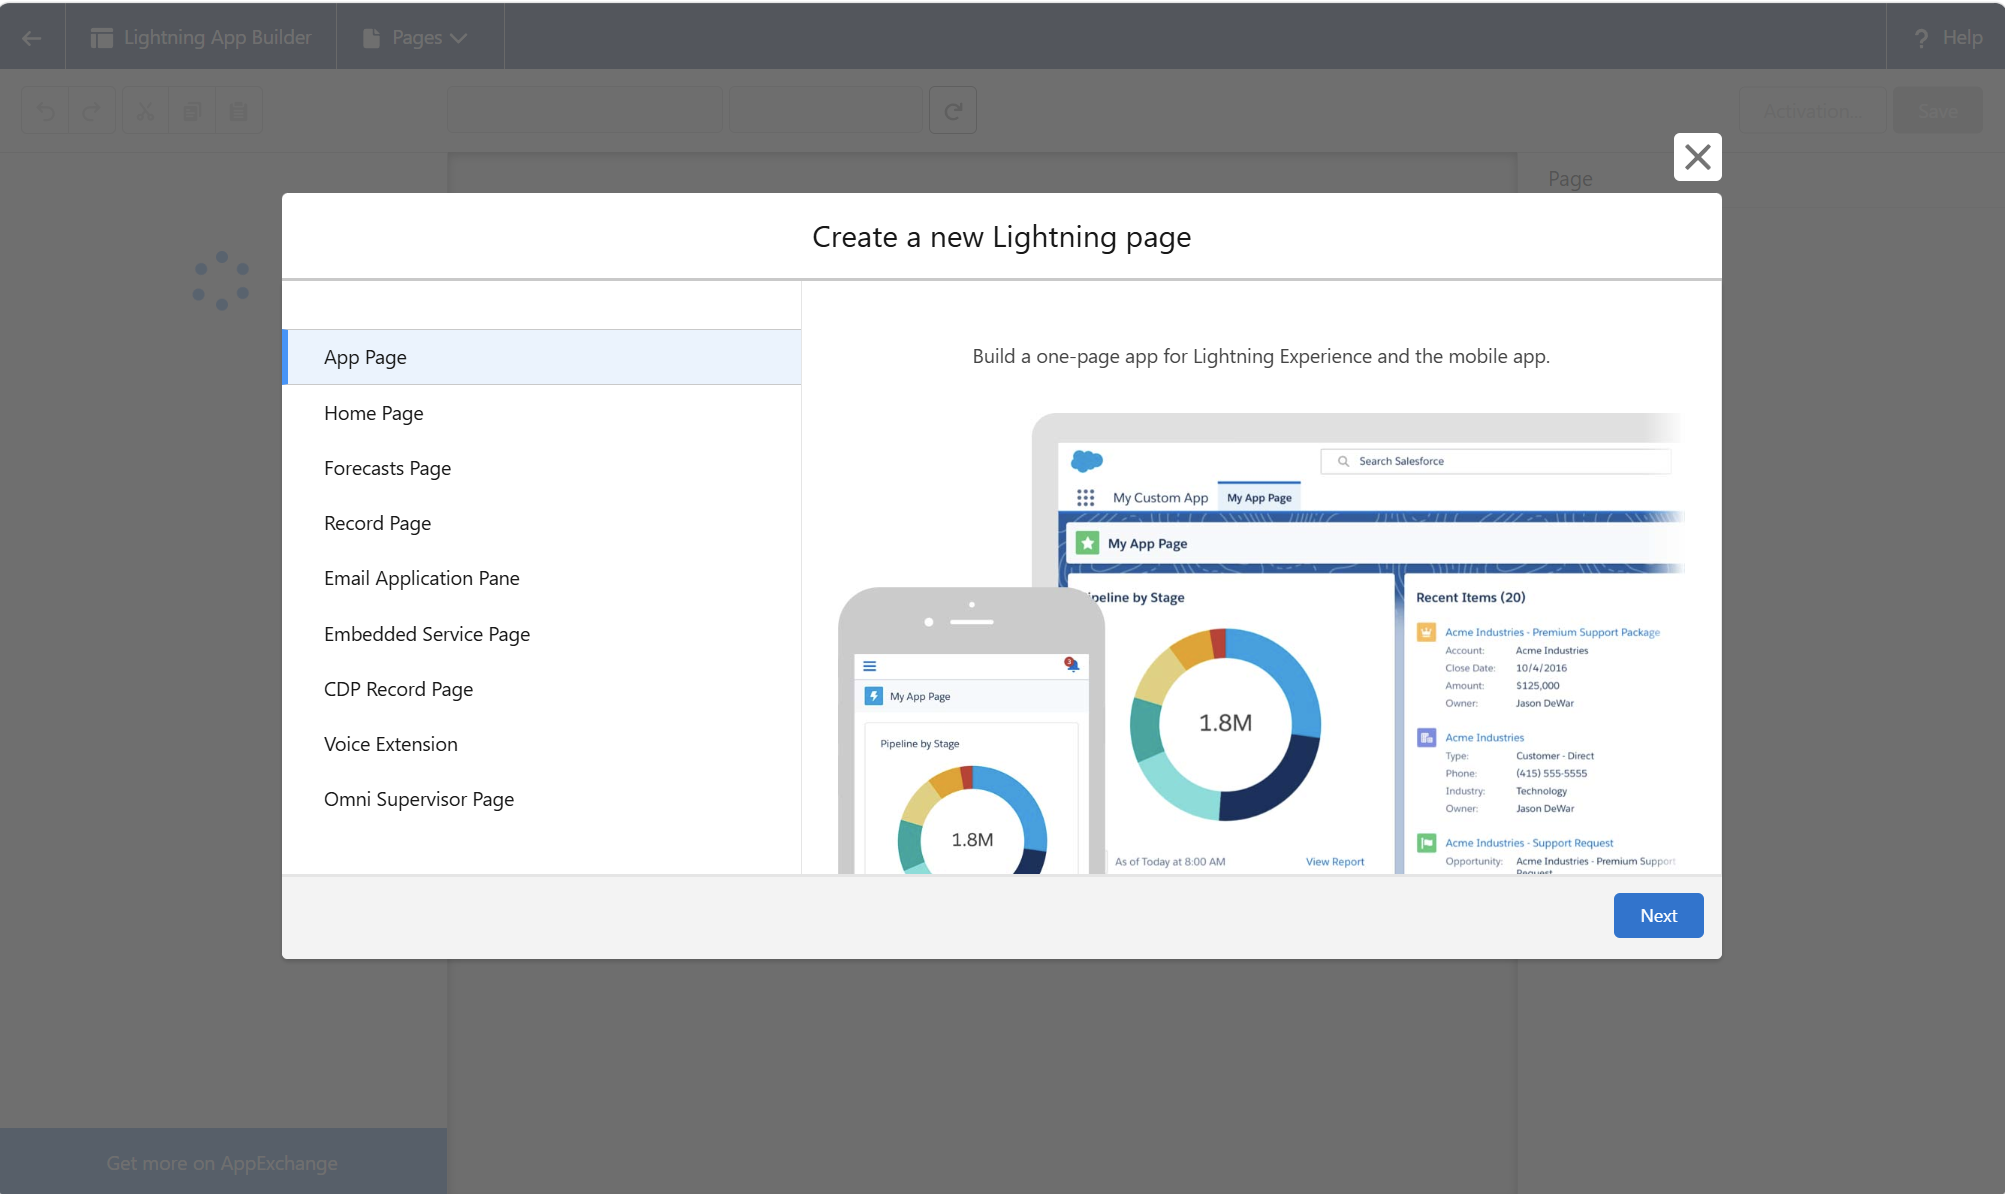
Click on App Page then Select Next.
Enter the name of the app that you would like. This will show up as the tab in Salesforce.
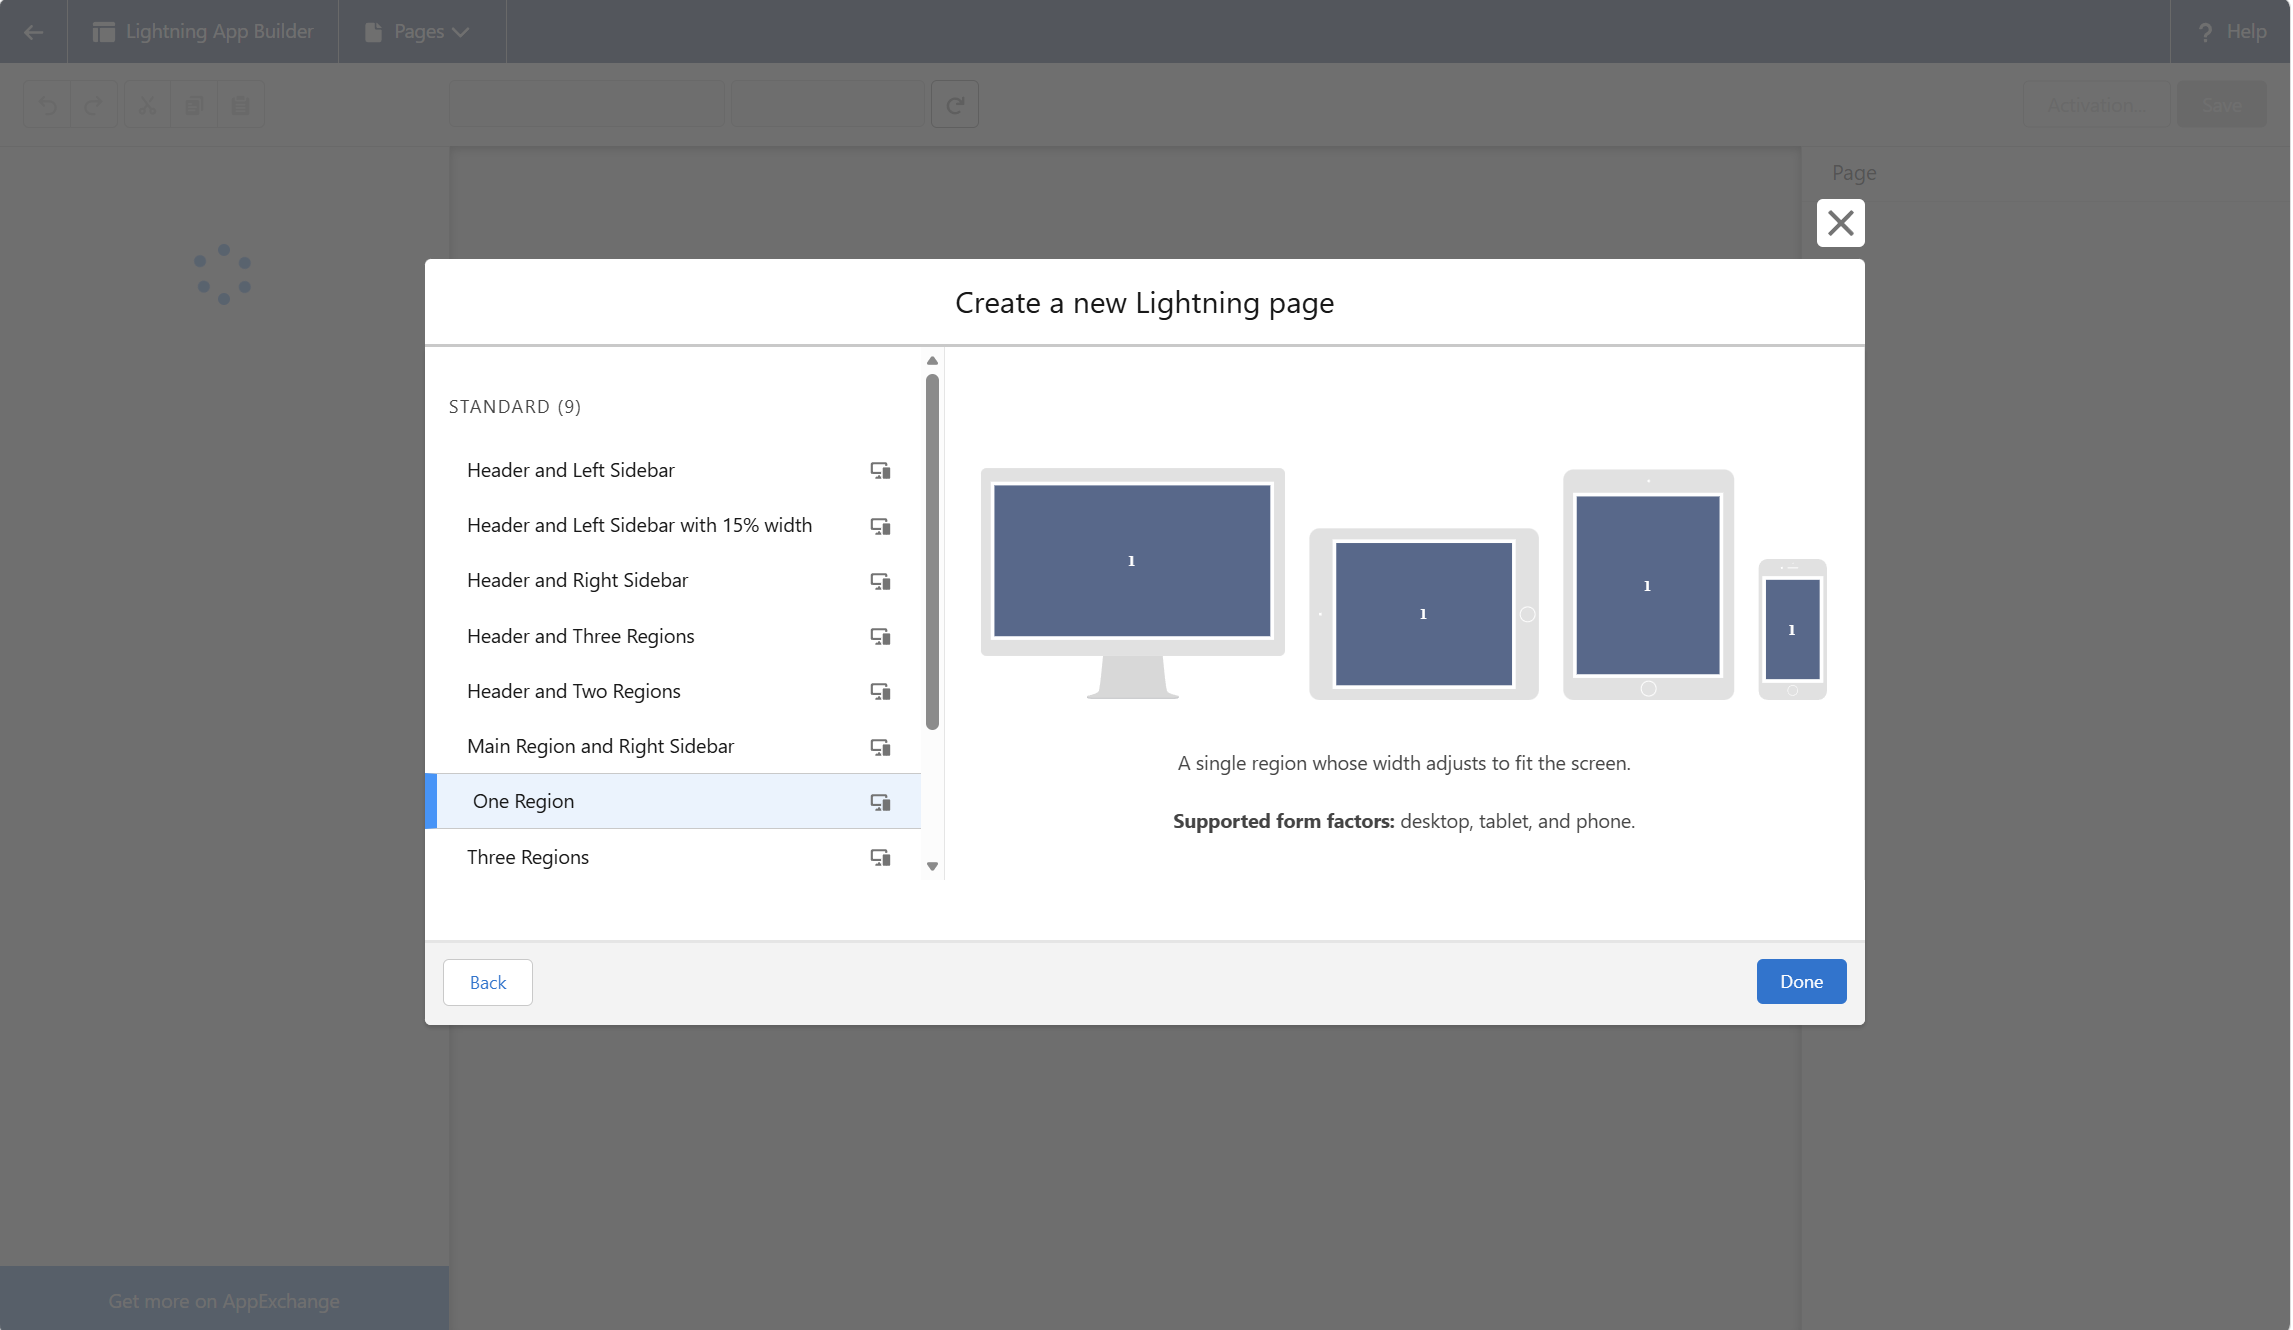
Select a template for the page from the available options provided. This may take some time to populate.
Note: "One Region will provide the largest canvas and is recommended."
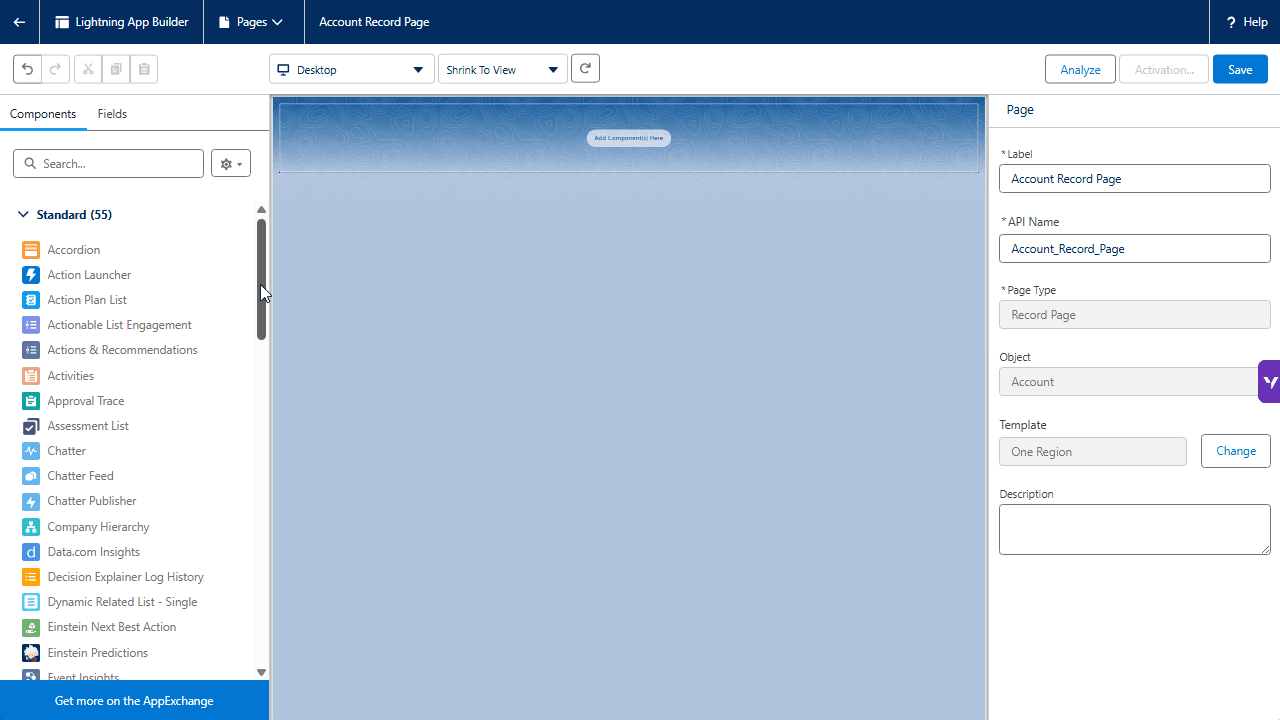
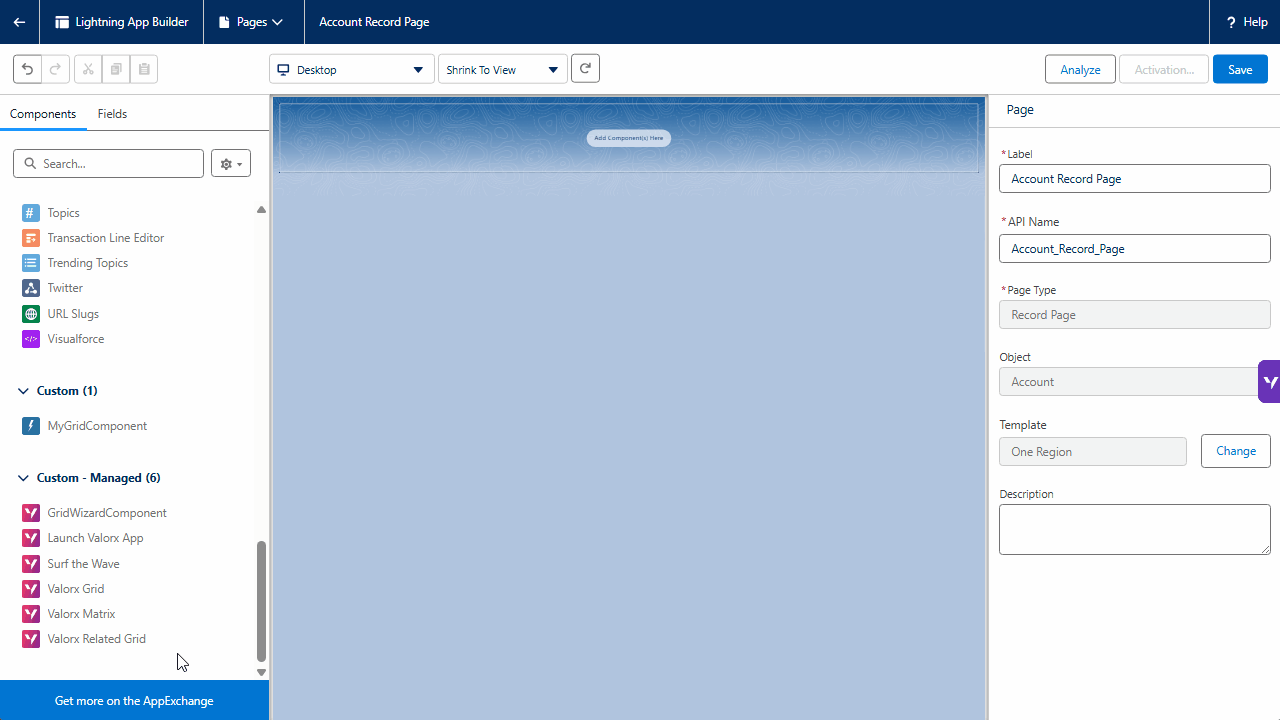
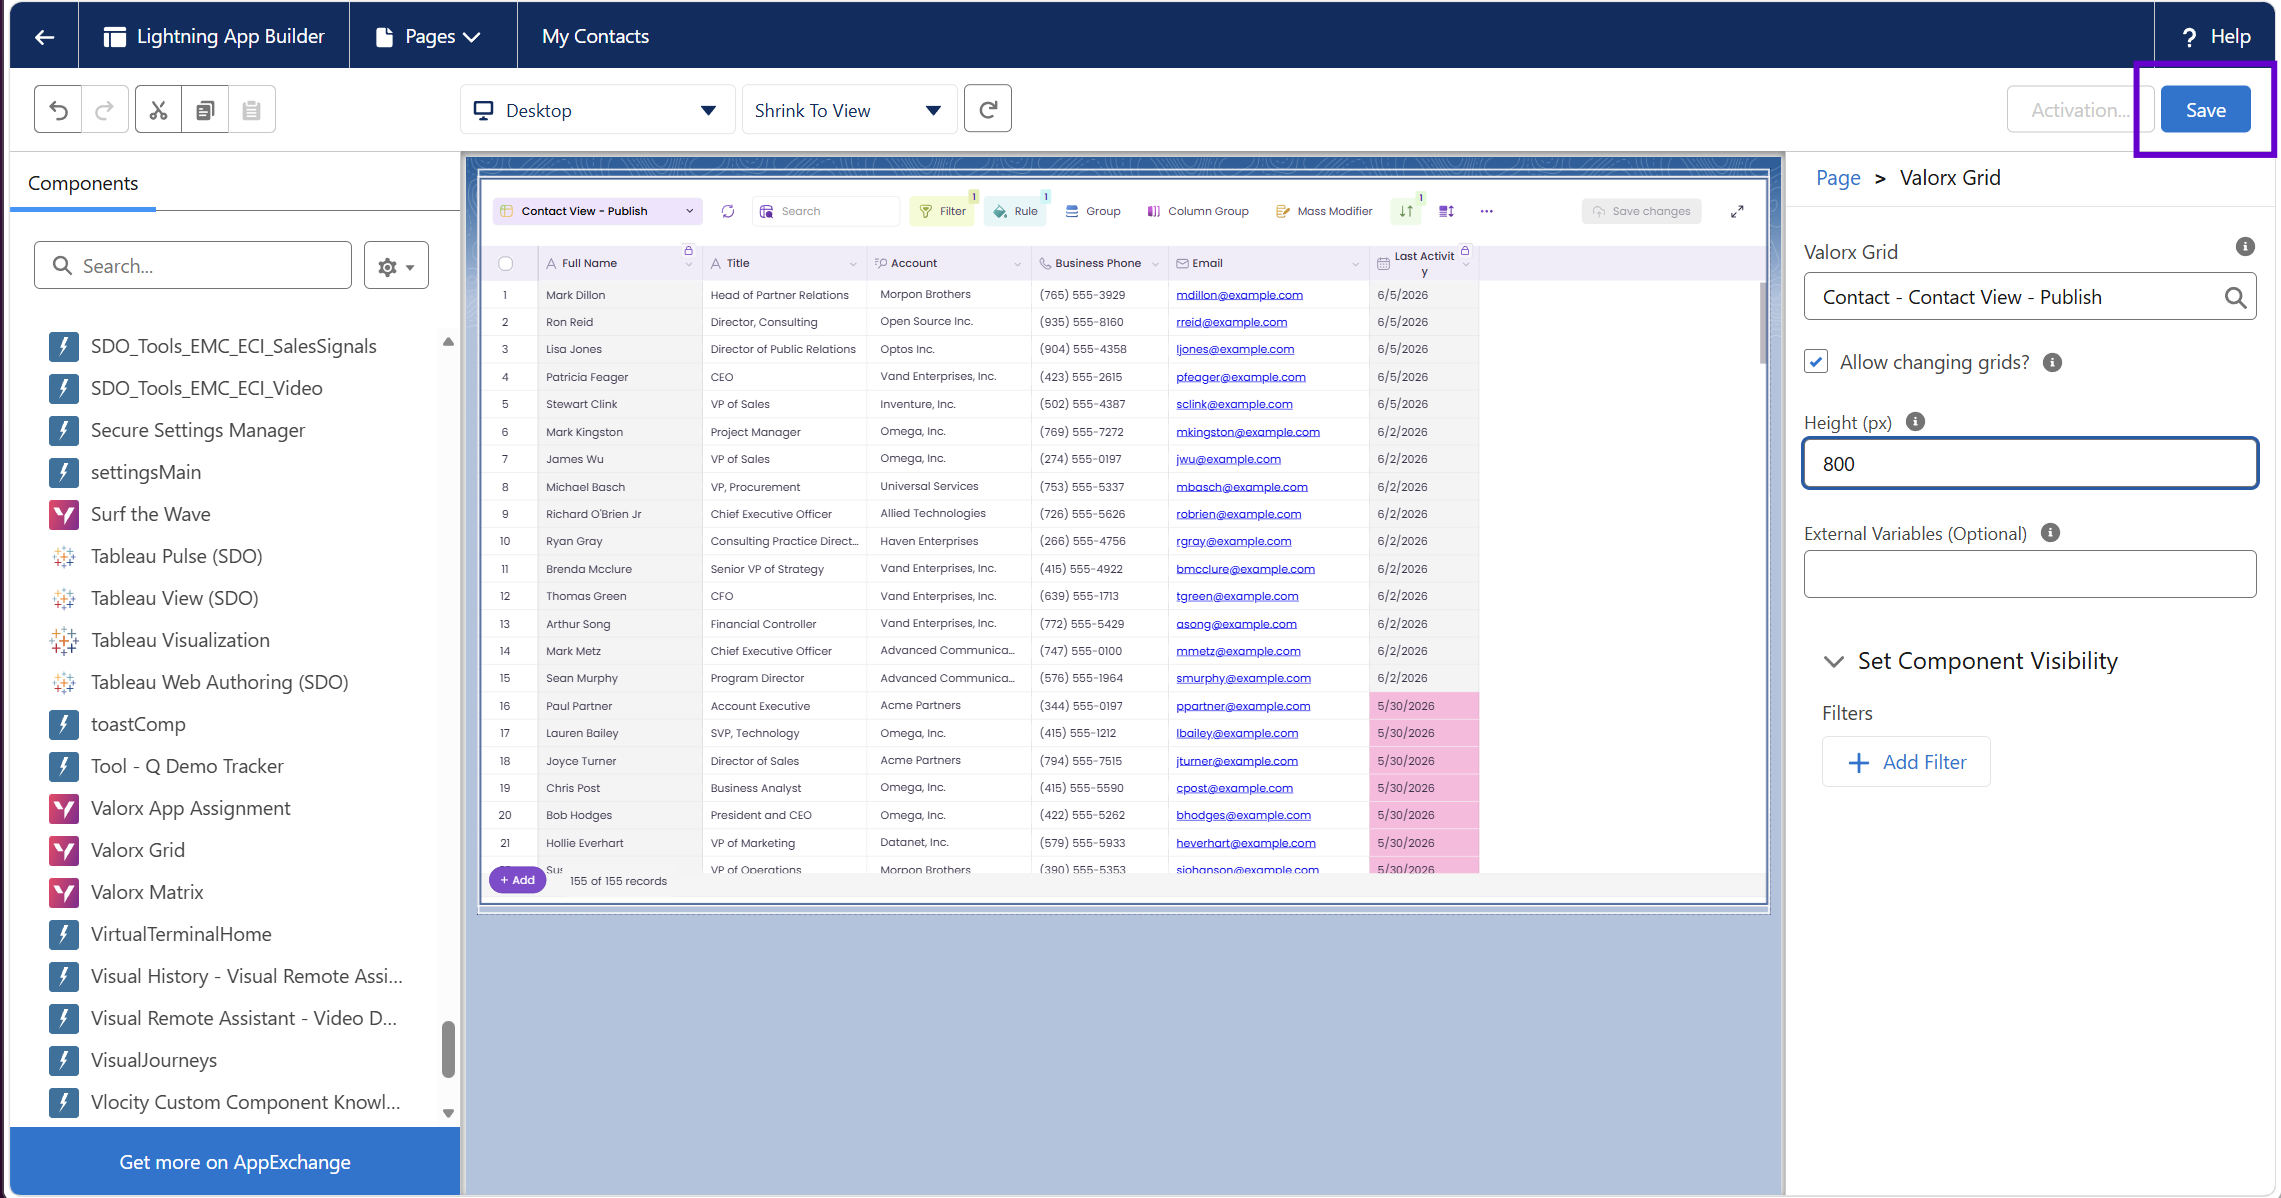
Scroll down the left panel (components section) until you reach the Custom – Managed section at the bottom. Then, click and drag the Valorx Grid into the middle section.
After adding the Valorx Grid, the configuration panel on the right becomes active
- Choose your desired grid configuration (this is the grid you want to add as an app) from the dropdown menu.
- Toggle the "Allow changing grids" option to enable or disable users' ability to switch between grids within the same object.
- Adjust the height settings for your grid configuration.
Click Save.
Once the save is complete, a pop-up will appear prompting you to activate the page. Click on "Activate" to proceed.
Ther are three activation assignment options: (1) Org Default — replaces the default page for all users; (2) App Default — replaces the default for users of a specific app; (3) App and Profile — assigns to specific apps and user profiles.
.gif)
Note: This step is for App Pages only. It is what makes the grid appear as a tab in the app navigation bar.
In Lightning Experience, you have the option to incorporate a page with a grid into any app. Select the app where you want this page to show up.
Click Activation → go to Lightning Experience tab → select the target app (e.g. Sales) → click Add Page to App → click Save.
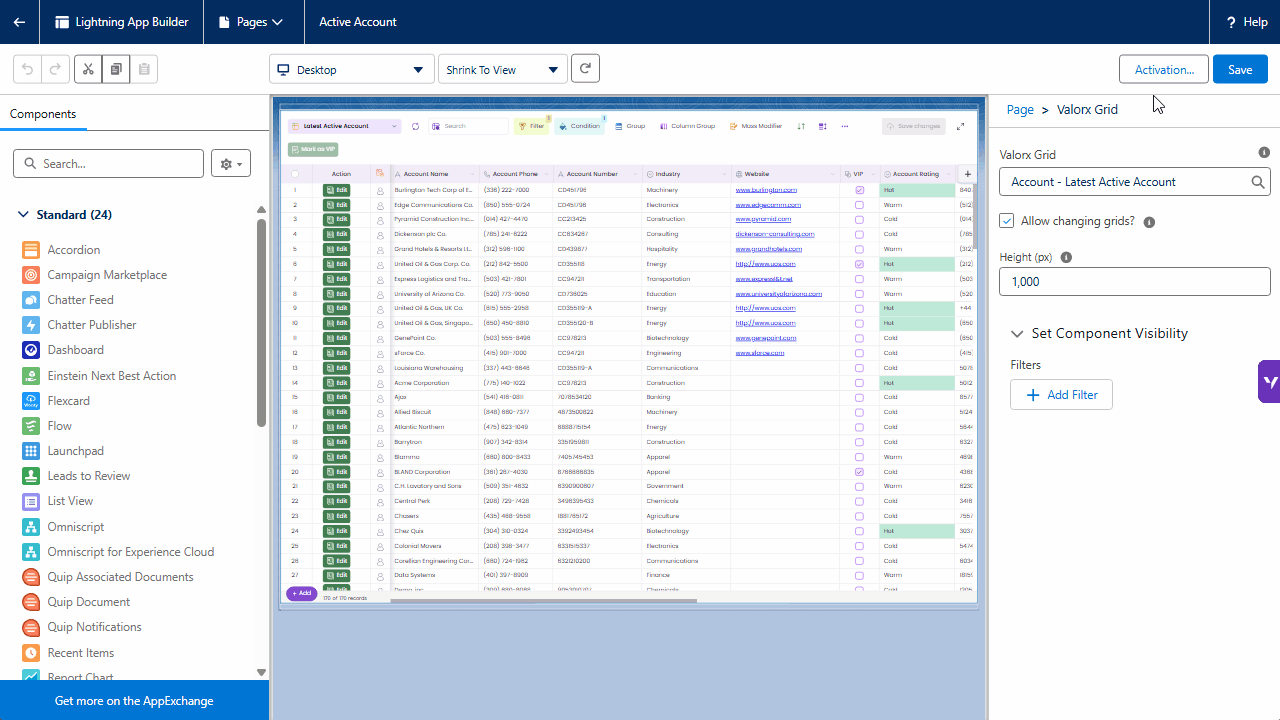
Navigate back to any Account record. You should now see the Valorx Grid embedded directly on the page, showing Contacts related to that Account.
Test it out:
✓ Click a cell to edit it inline
✓ Add a new Contact using the New Record button in the grid toolbar
✓ Use the search bar to filter contacts
✓ Click Save to push all changes back to Salesforce
Where else can you publish ?
The steps above cover Lightning App Pages — the most common publishing target. But Wave grids can be published to several other surfaces too.
Frequently asked questions
Can I publish a Matrix the same way ?
Yes. Matrices can also be published to Lightning pages using the same drag-and-drop workflow. Look for the “Valorx Matrix” component in the Lightning App Builder.
Can Standard Users interact with a published grid?
Yes. Standard Users can view and edit data in published grids based on the permissions the Designer configured. They don’t need to open Wave separately — the grid works directly on the page.
What if I update the grid configuration later?
Changes to the grid in the Wave Designer are reflected automatically on the published page. You don’t need to re-publish or re-edit the Lightning page.
Can I publish multiple grids on the same page?
Yes. You can add multiple Valorx Grid or Related Grid components to the same page. Use a Tabs component to organize them (e.g. “Contacts” tab, “Opportunities” tab, “Cases” tab).
How do I find the Grid ID if I need it?
Open the Wave Dashboard, hover over the grid, click Surf the Wave, and look at the URL — the Grid ID and Object Name are visible in the address bar. Format: ObjectName::GridId.
Ready to publish your first app?
If you already have a grid built, publishing takes under 15 minutes. If you’re starting from scratch, build a grid first (5 minutes) and then publish it (10 minutes). Your team will see live, editable data on their Salesforce pages today.
Choose the workflow you need:
Try Wave in browser Extension

Try Wave in Salesforce

Try Fusion In Excel

Enhancing Salesforce for industry leaders